Work History

North West Yorkshire Tile Doctor Work History Banner

Welcome to my Work History archive where you will find detailed examples of Tile, Grout and Stone Cleaning and renovation work carried out within North West Yorkshire.

Ceramic Kitchen Floor Tiles and Terracotta Window Sills Restored in Sherburn-in-Elmet

Ceramic Kitchen Floor Tiles and Terracotta Window Sills Restored in Sherburn-in-Elmet

At Tile Doctor, we have completed a wide variety of restoration jobs, from very large floors in hotels and restaurants to smaller floors in kitchens and bathrooms. We also often work on different surface types, including shower cubicles and stone or tiled window sills. I recently visited the small village of Sherburn-in-Elmet in Leeds to complete two small, but very different, jobs for a customer.

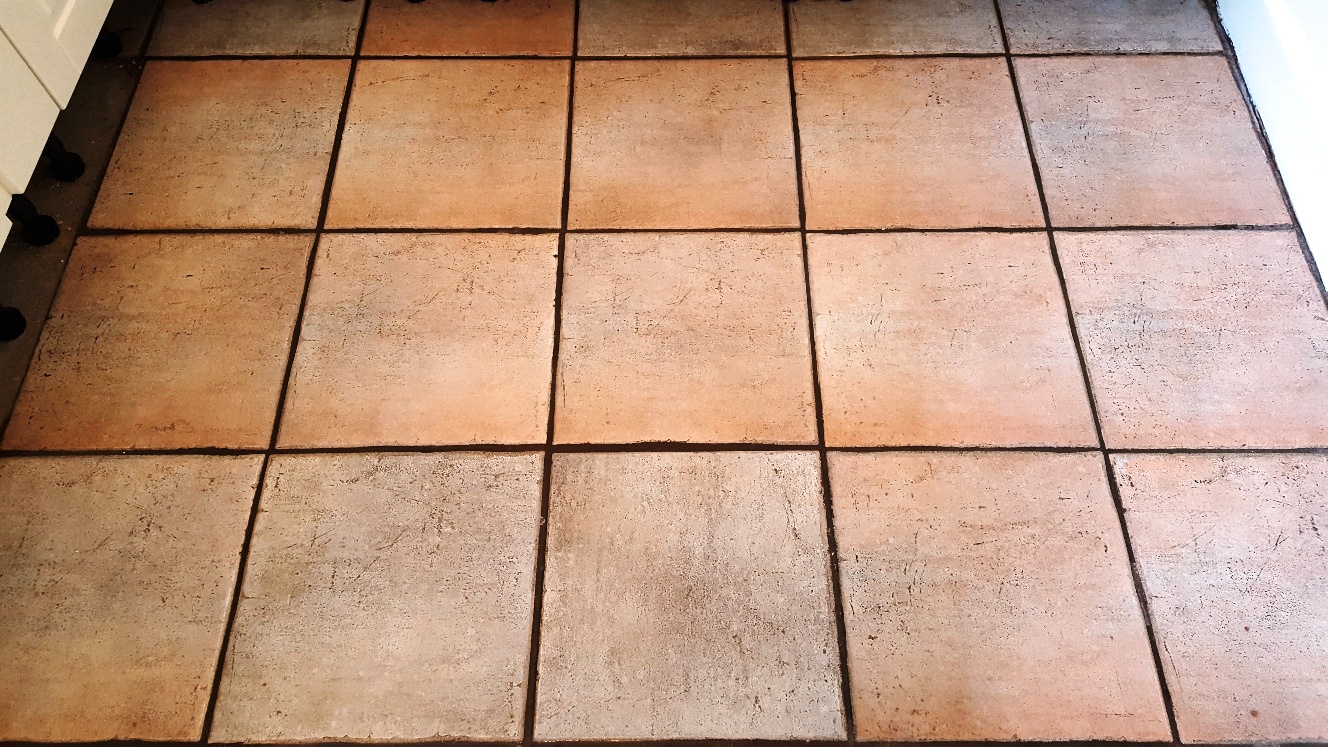
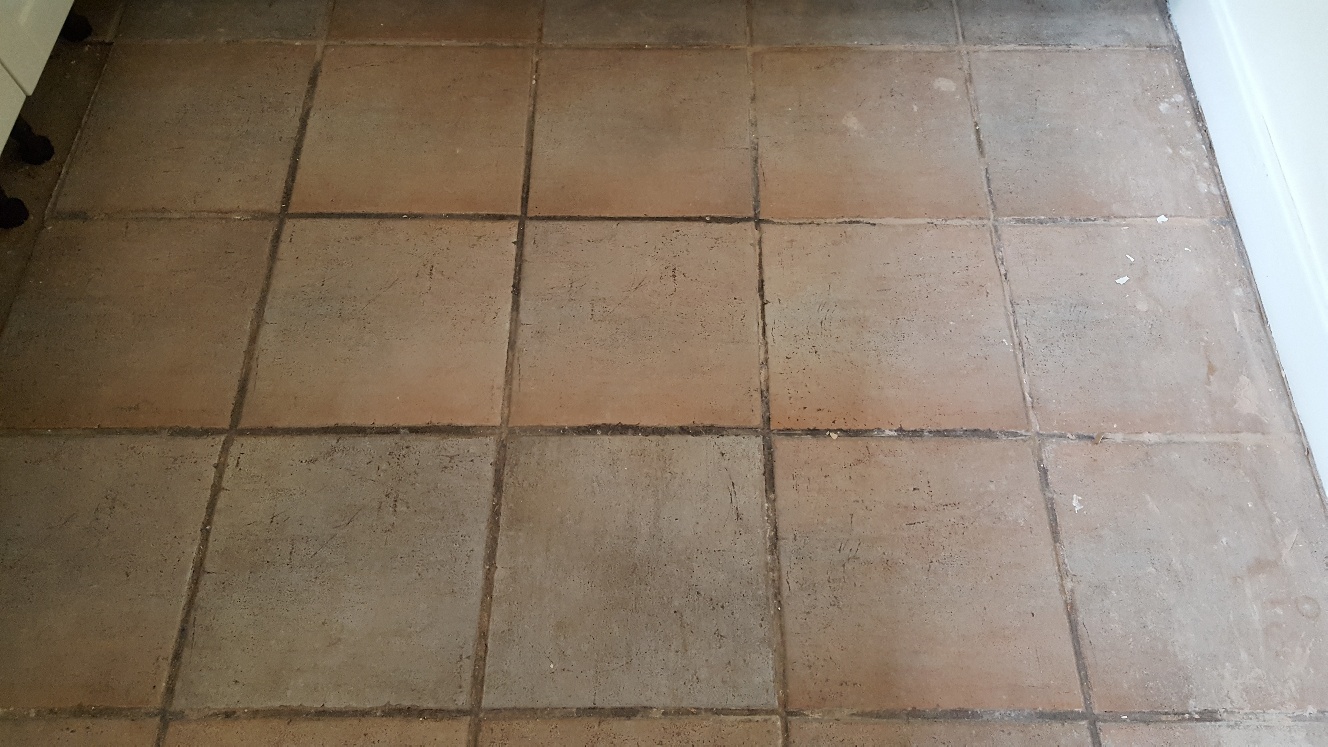
The first was the restoration of a Ceramic tiled kitchen floor that was really looking worse for wear. The grout lines had accumulated a lot of dirt over the years and the tiles themselves had been stained by what appeared to be plaster dust.

Ceramic Floor Tiles Before Cleaning in Sherburn in Elmet Kitchen
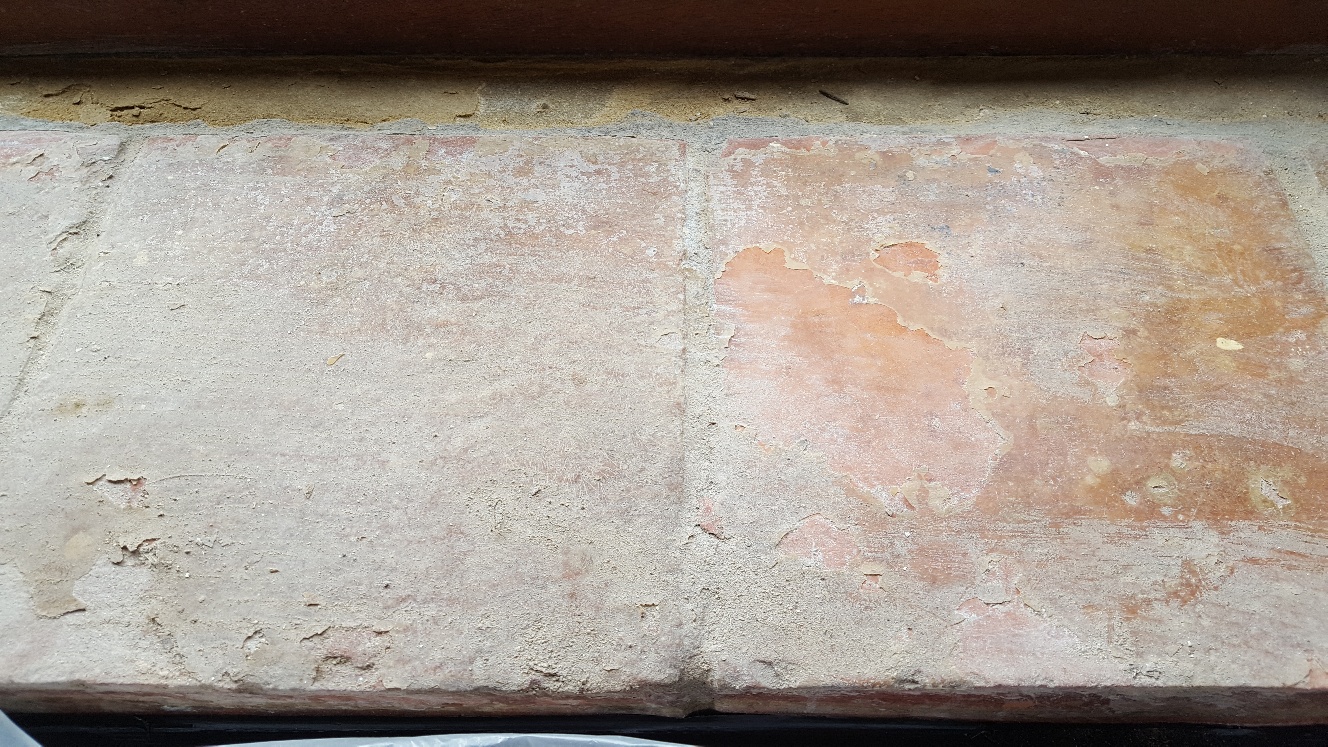
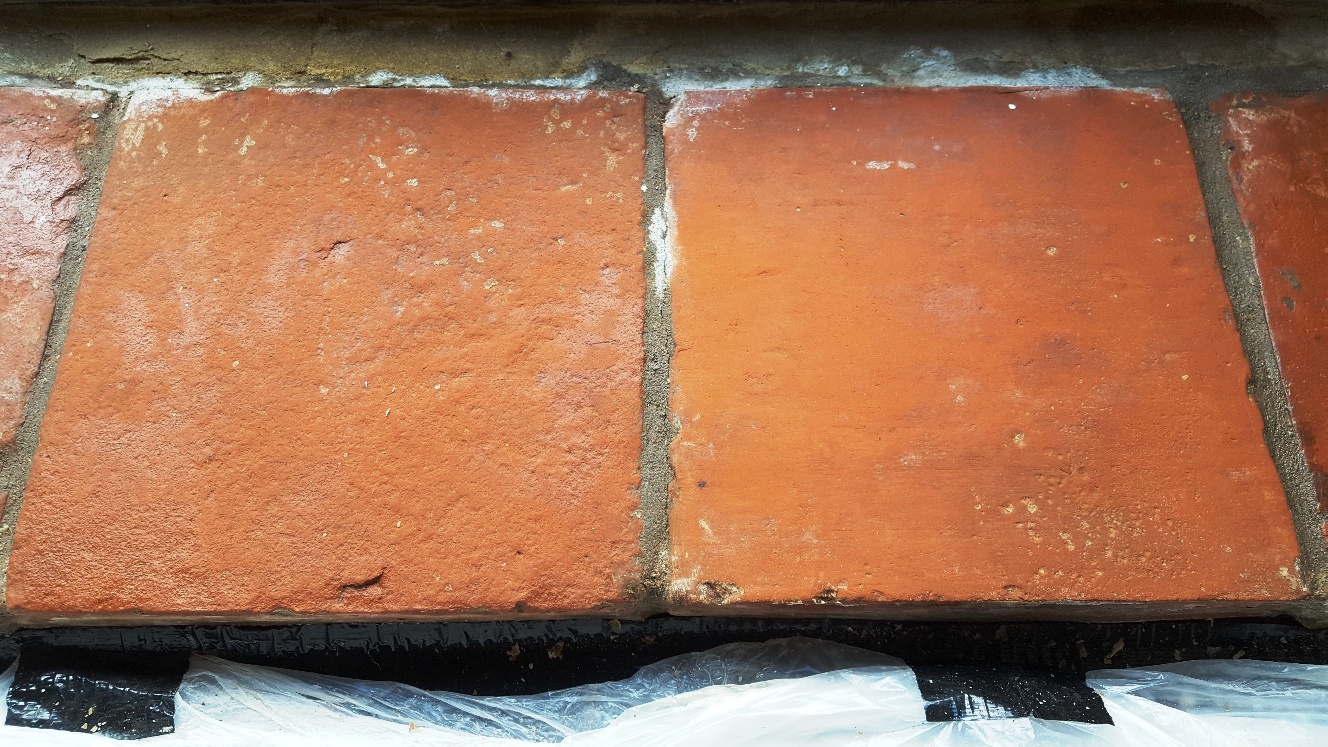
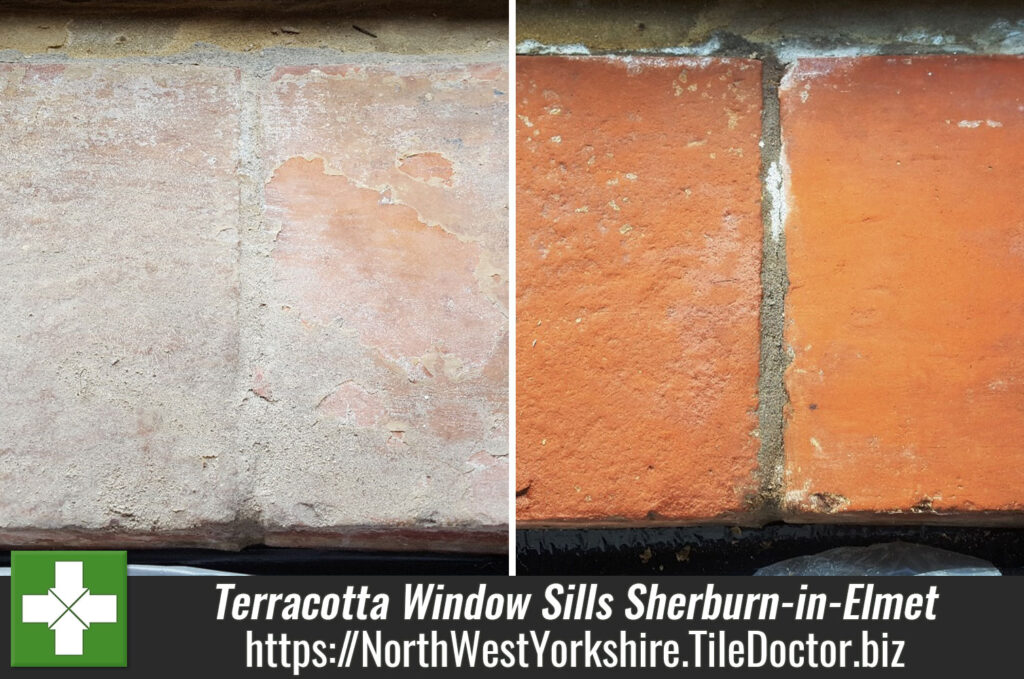
The second was the restoration of several window sills made from Catalan-style Terracotta. The stone had originally been covered in four to six coats of Yacht Varnish, which had left an unsightly white crusted covering. Naturally, the customer was keen to see the sills restored to their original, natural look.

Catalan Terracotta Window Sill Sherburn in Elmet Before Cleaning

Cleaning a Ceramic Tiled Kitchen Floor

After removing the kickboards from underneath the kitchen units, I used a handheld scrapper and a wire brush to manually remove most of the plaster dust. Next, I applied a solution of Tile Doctor Pro-Clean, which is a high alkaline tile and grout cleaner, across the floor.

By scrubbing the Pro-Clean into the tiles and grout I removed all the dirt and staining. As the tiles were fully glazed Ceramic, they did not need to be sealed.

Ceramic Floor Tiles After Cleaning in Sherburn in Elmet Kitchen

Cleaning and Sealing Terracotta Window Sills

The white crusted powder covering the Catalan Terracotta window sills was caused by Yacht Varnish, which would need to be removed before I could properly clean the stone below. I removed it using a combination of Tile Doctor Remove and Go, which is a heavy-duty stripper, and Tile Doctor NanoTech HBU, a powerful cleaner which uses nano-sized particles penetrates difficult-to-reach areas. Together they make a powerful stripper/cleaning solution.

This solution was left to work its magic for two hours, before I applied a handheld scrapper and wire brush to remove the white coating. Next, I rinsed the sills with water and then deep cleaned them again with Tile Doctor Pro-Clean.

The window sills were subsequently left to dry off completely overnight. I popped back to the property the next day to seal them with two coats of Tile Doctor Colour Grow, an impregnating sealer which intensified the natural shades in the stone and provided a natural-looking matte finish.

Catalan Terracotta Window Sill Sherburn in Elmet After Cleaning
Two quick jobs completed to a high standard and one very satisfied customer.

Professional Tile Cleaning and Sealing for a Ceramic Tiled Kitchen Floor Restoration and Terracotta Window Sill Restoration in Leeds

Ceramic Kitchen Floor Tiles and Terracotta Window Sills Restored in Sherburn-in-Elmet Read More »

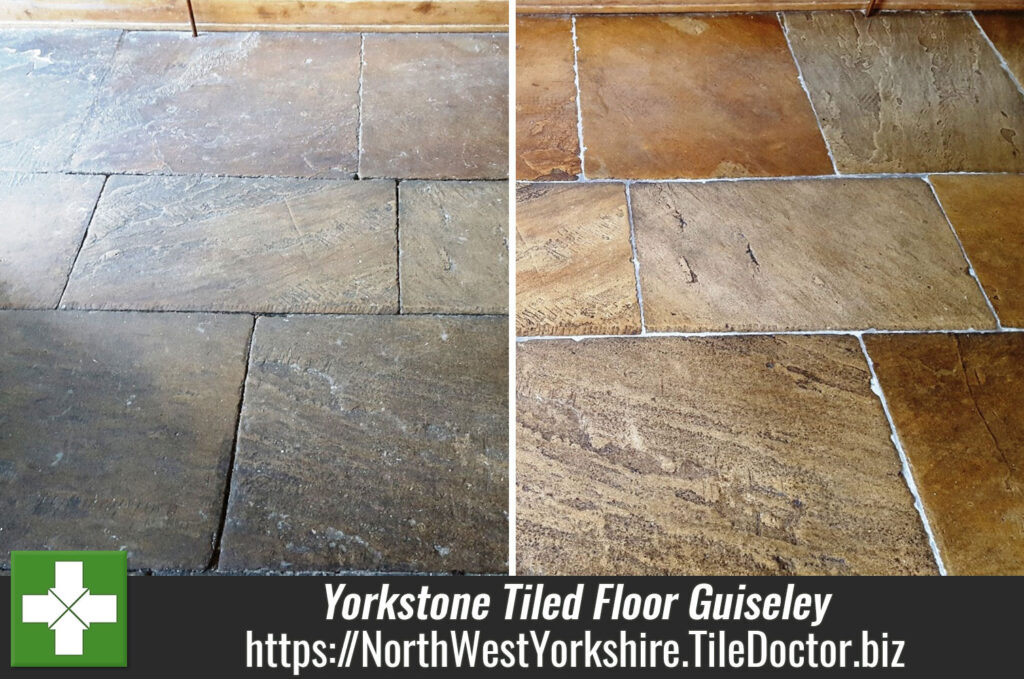
Botched Yorkstone Tiled Floor Instalation Resolved in Guiseley

Botched Yorkstone Tiled Floor Instalation Resolved in Guiseley

In an interesting turn of events, I was recently contacted again by a homeowner from Guiseley, near Leeds, with whom I had been in touch with two years prior. At that time, I had quoted for cleaning and maintenance work to be carried out on a Yorkshire Stone, or ‘Yorkstone’ tiled floor, but the customer had opted to go with a different company. Yorkstone is a variety of Sandstone that it unique to the quarries of Yorkshire.

When the customer called me again, she explained that the previous work – most likely carried out by inexperienced cowboy builders – had been disastrous. The stone evidently had not bene properly cleaned and very little sealer had been used to protect it against wear and tear. The result was a very dirty and dusty floor – and the only solution was to start the restoration process over again, this time with the help of a true professional!

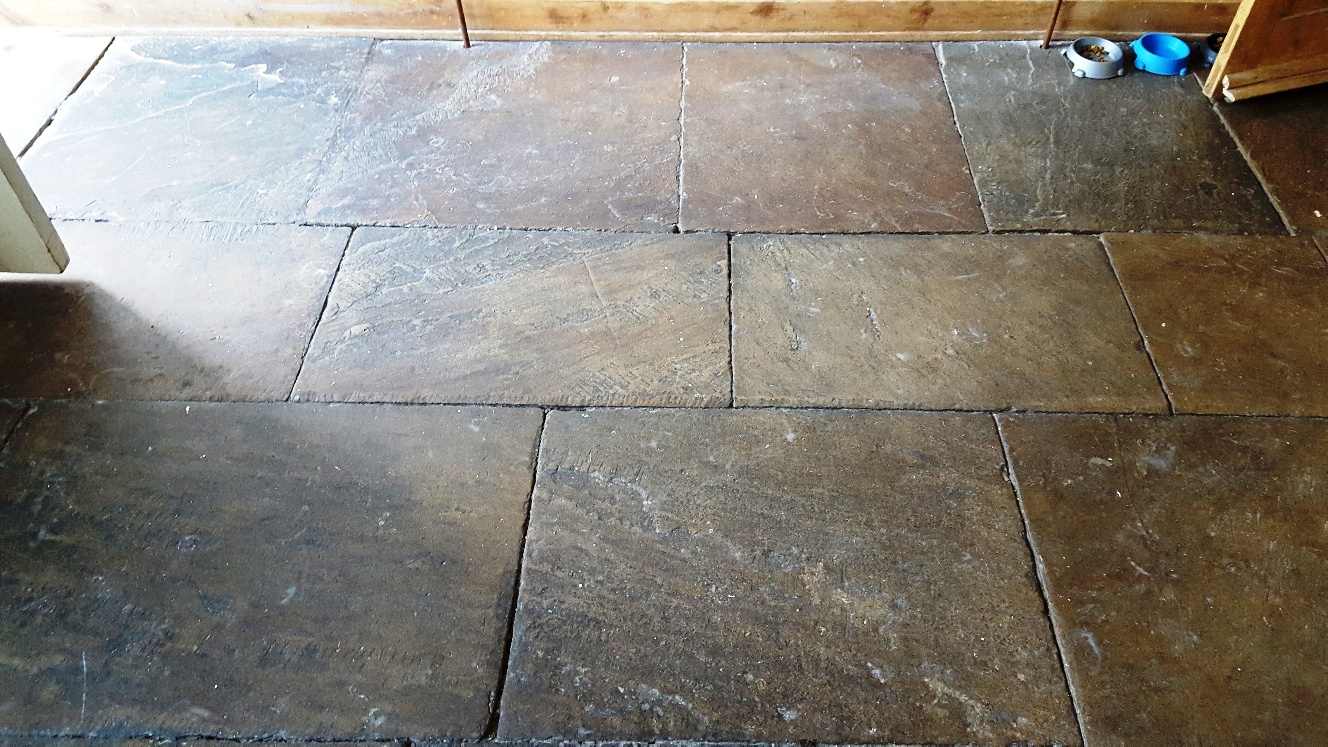
Here’s a photo of what the floor looked like before the restoration:

Yorkshire Stone Floor Guiseley Leeds Before Cleaning

Cleaning Dull and Dirty Yorkstone Tiles

Since the floor had not been cleaned properly to begin with, there were several unsightly paint stains on the stone in addition to general dirt and stains. To remove these, I applied Tile Doctor Pro Clean, which is a reliable alkaline cleaner, liberally across the floor and left it dwell for a short period. I then used a wire brush to scrub away the muck.

The customer had asked the builder to grout the tiles to reduce the likelihood of trapped dirt and make the floor feel complete. For whatever reason, builder either wouldn’t or couldn’t oblige, so I grouted the whole floor as well, much to the customer’s delight.

Sealing Yorkstone Tiles

Once the floor was fresh and clean, it was left to dry completely so it could subsequently be sealed.

My choice of sealer was Tile Doctor Seal and Go, a topical sealer which provides both a stain resistant surface seal and a durable and aesthetically-pleasing low-sheen finish to really enhance the character of the stone. Four coats of sealer were used in total to ensure maximum protection.

Here’s what the floor looked like after the restoration:

Yorkshire Stone Floor Guiseley Leeds After Cleaning

After cowboy builders had botched the job, the customer was exceptionally happy that the situation had finally been put right. The floor is now in top shape and will be protected against wear and tear for a long time to come.

Professional Restoration of a Dirty Yorkstone Tiled Floor in North Yorkshire

Botched Yorkstone Tiled Floor Instalation Resolved in Guiseley Read More »

Travertine Wet Room with Leakage Problem Restored in Harrogate

Travertine Wet Room with Leakage Problem Restored in Harrogate

Travertine is a distinct and highly aesthetic material which offers unique characteristics and colouring that not many other types of stone can offer. It looks great when used on tiled floors and in this case shower cubicles however like any natural stone it does need maintenance.

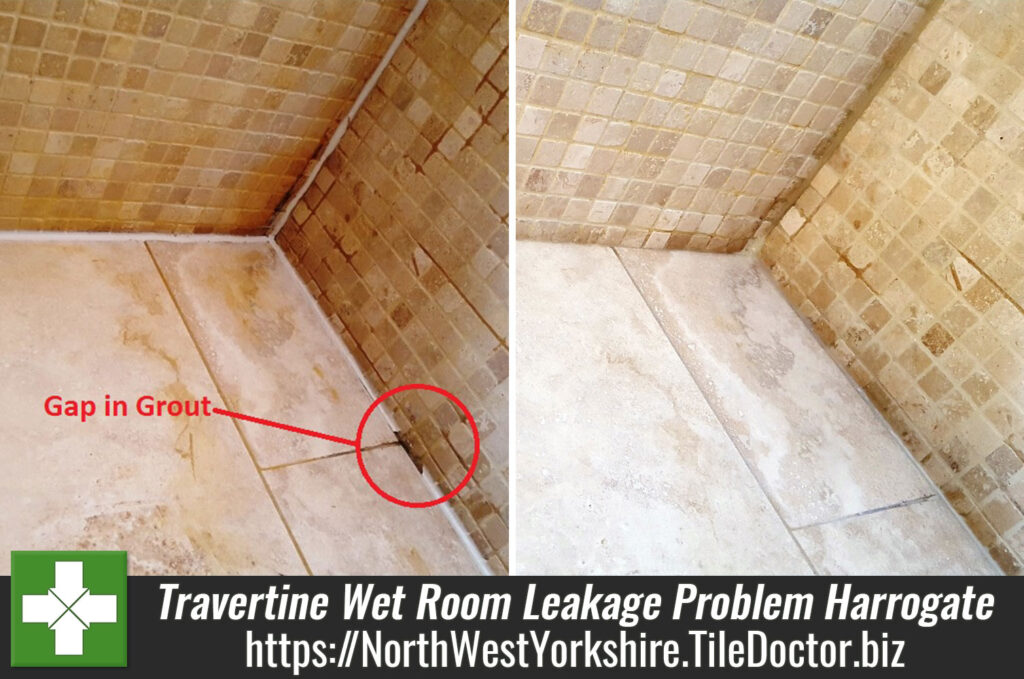
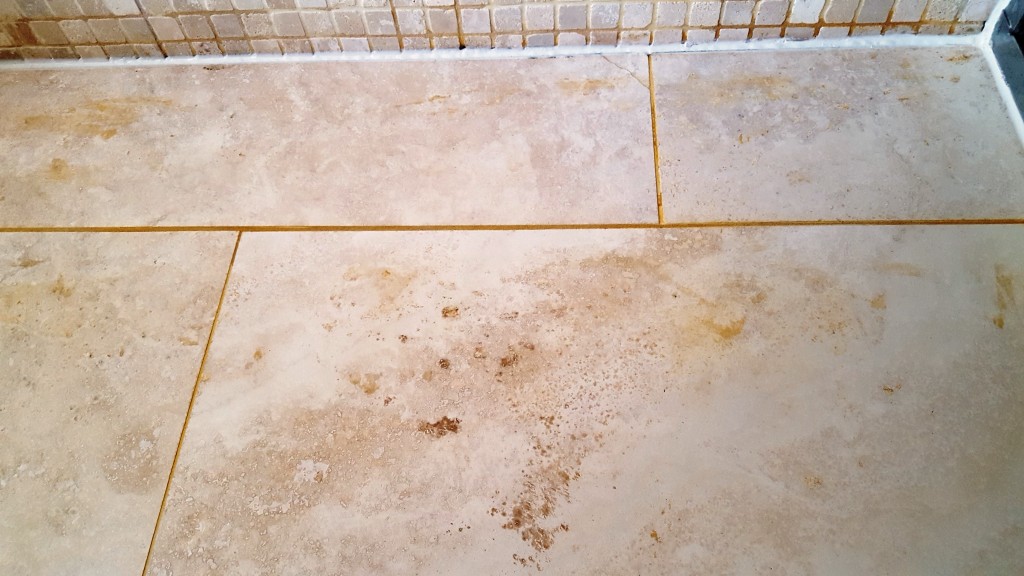
Travertine WetRoom Harrogate Before Cleaning
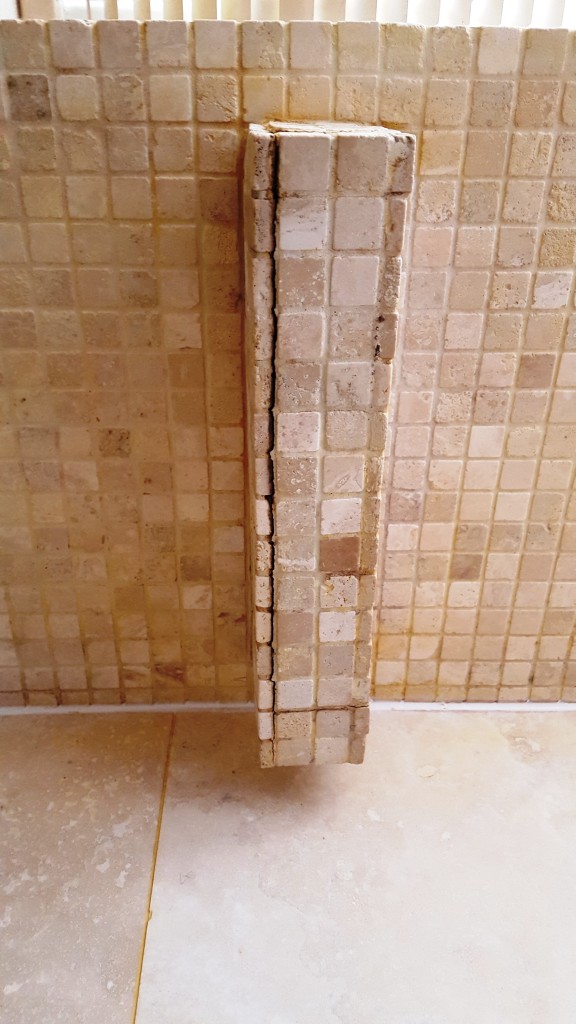
A good example of this point was this Travertine wet room in Harrogate, which comprised of large format Travertine tiles on the floor and Travertine mosaic tiles on the walls. It was in poor condition and to make things worse had been leaking for years. A local plumber had tried to resolve the leak, but to no avail. At this point, the property owner was desperately searching for a solution, and decided to contact me to see what could be done both to restore the appearance of the wet room and fix the leakage.

Travertine WetRoom Harrogate Before Cleaning

Cleaning a Travertine Tiled Wet Room

On first inspection of the wet room, l couldn’t see any obvious problems that might be causing the leak, however the white silicon did look a bit questionable and had already decided that would need replacing. To start I turned my attention to cleaning the whole shower cubicle, including the tile and grout.

I did this by applying Tile Doctor Pro-Clean, which is a high alkaline cleaner, to remove the mould, soap scum and dyes caused by daily exposure to acidic soap and shampoos. These issues can build up exceptionally quickly if care is not taken to regularly rinse down the shower after each use.

During this process, I noticed grout haze had been left on the surface of the tiles following installation and so treated the problem with Tile Doctor Acid Gel, which is a blend of hydrochloric and phosphoric acid in gel form. Being a gel, this product works particularly well on vertical surfaces because it is easier to control.

The next step was to resolve the leakage problem, starting by removing all the old and unattractive white silicon. When l removed the silicon, I could see that it was black with mould at the back. It was clear to me then that water was getting behind it and this was the cause of the leak. Also, this revealed a 2-3mm gap between the wall and the base of the shower. The gap was damp and mould had collected there, so this needed to be scraped out manually and the gap dried with a heat gun. Finally, l filled the gap with grout to seal it and left the wet room to dry overnight.

Travertine WetRoom Harrogate Before Cleaning

Sealing a Travertine Tiled Wet Room

The next day, I returned to the property and sealed the grout with Tile Doctor Ultra-Seal. This is a premium, natural-look, penetrating sealer formulated to provide maximum stain protection and allow moisture vapour transmission. To finish the restoration, I applied fresh, clear silicon around the base.

Travertine WetRoom Harrogate After Cleaning
In my opinion, white silicon should never have been used with stone, as clear silicon is far more suitable and more pleasing to the eye. Certainly, my customer agreed – and she was very pleased with the result and no more leak.

Travertine WetRoom Harrogate After Cleaning
 

Professional Restoration of a Travertine Tiled Wet Room in North Yorkshire

Travertine Wet Room with Leakage Problem Restored in Harrogate Read More »

Paint Spotted Victorian Tiled Hallway Deep Cleaned in Leeds

Paint Spotted Victorian Tiled Hallway Deep Cleaned in Leeds

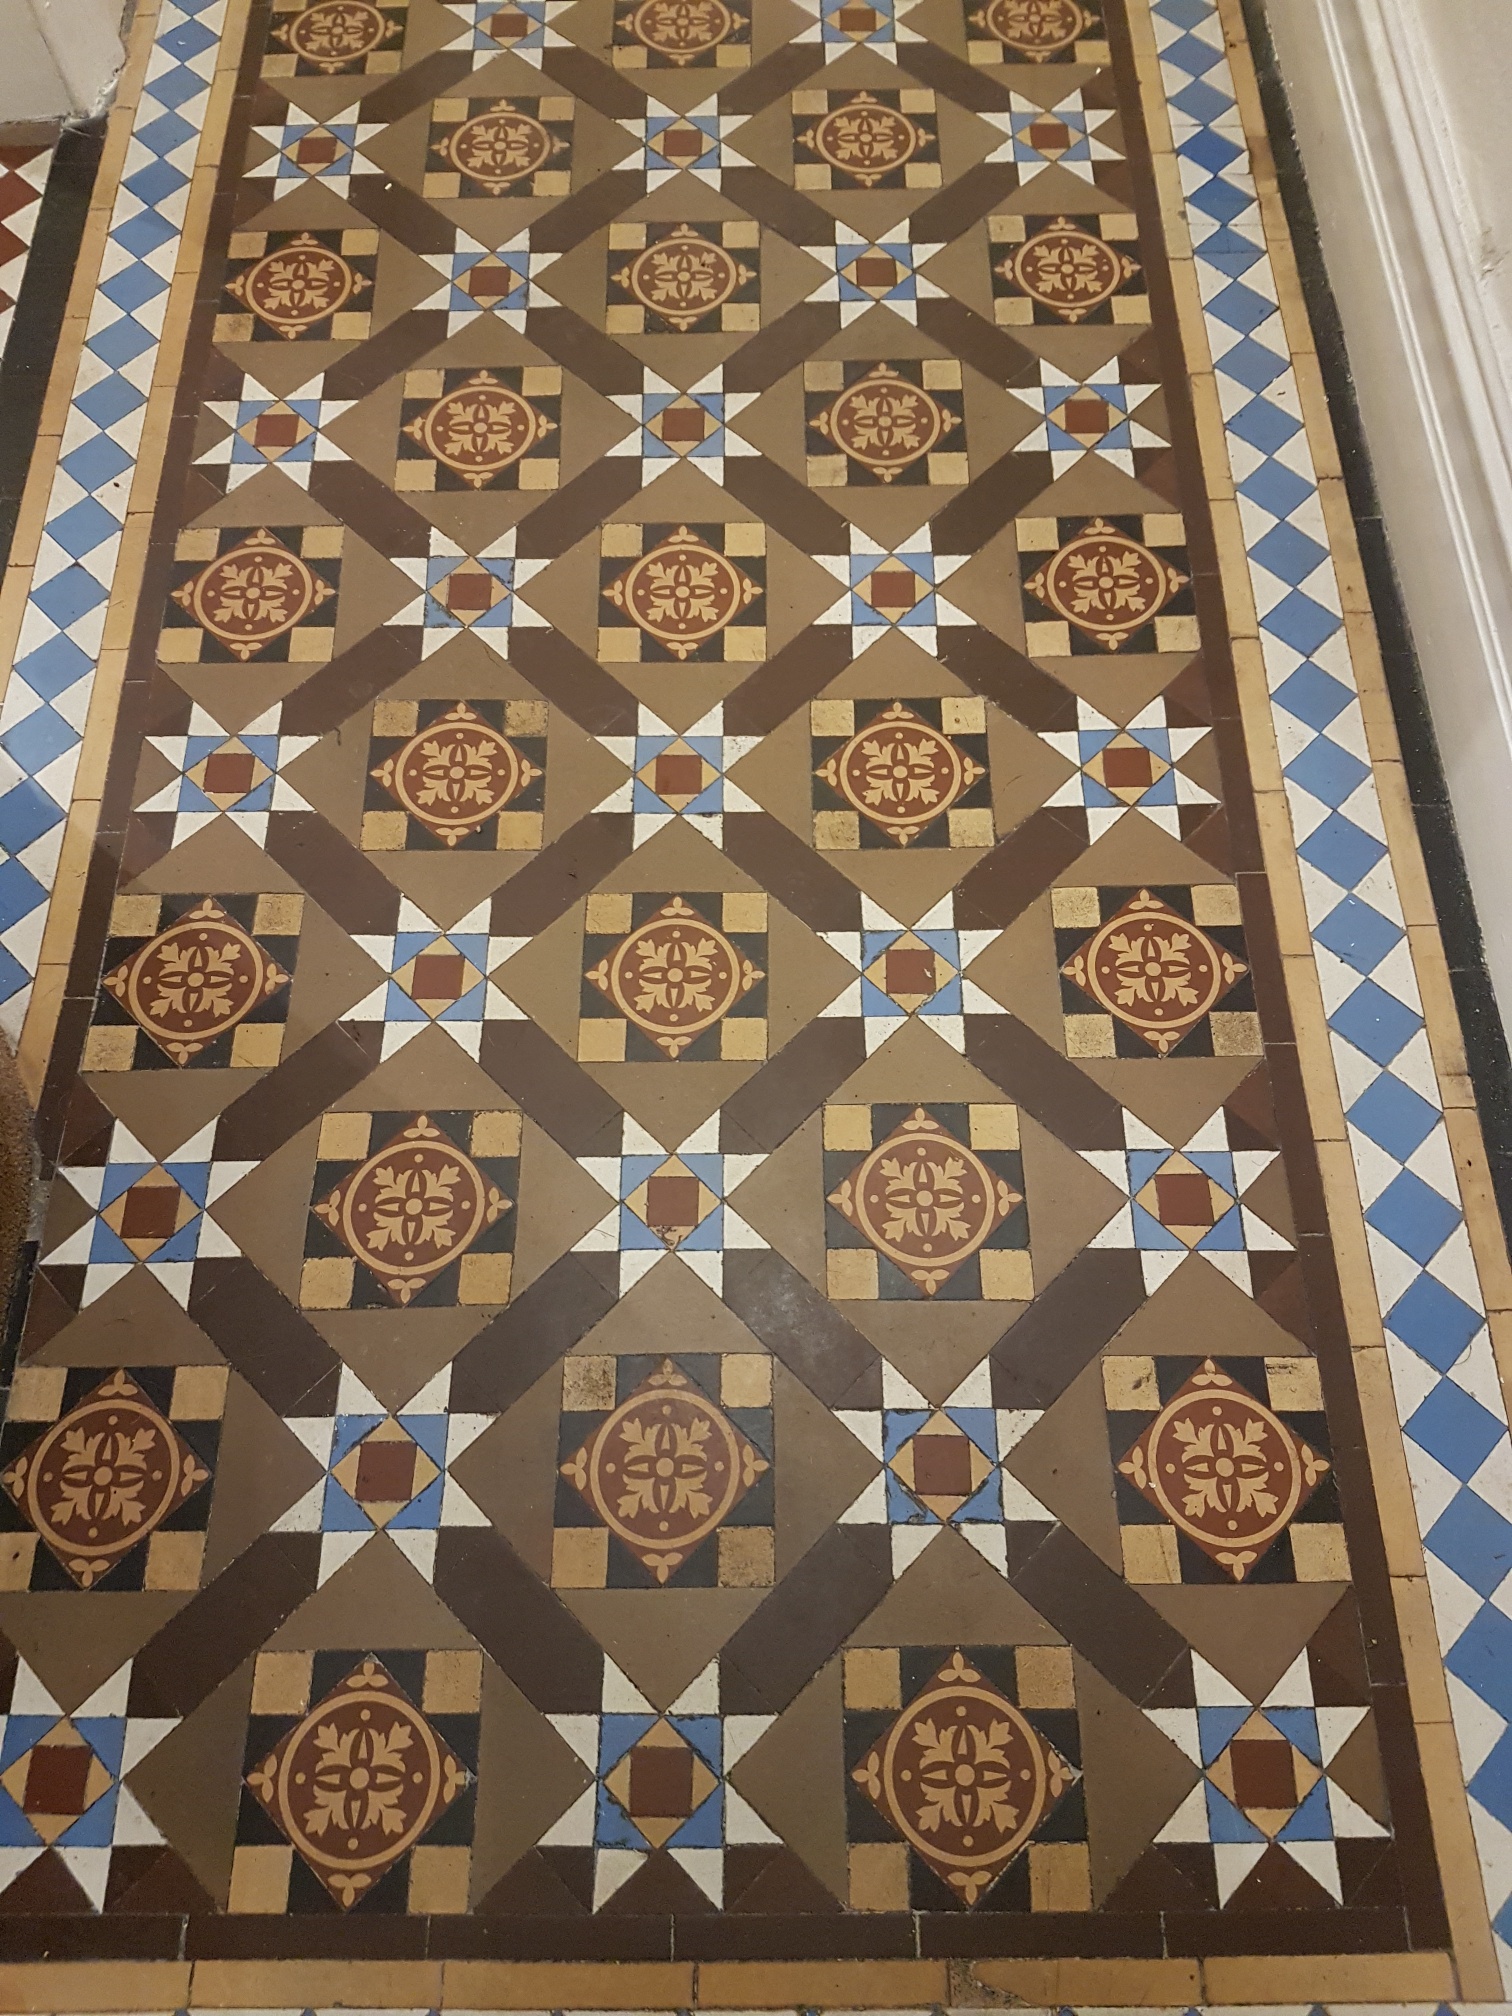
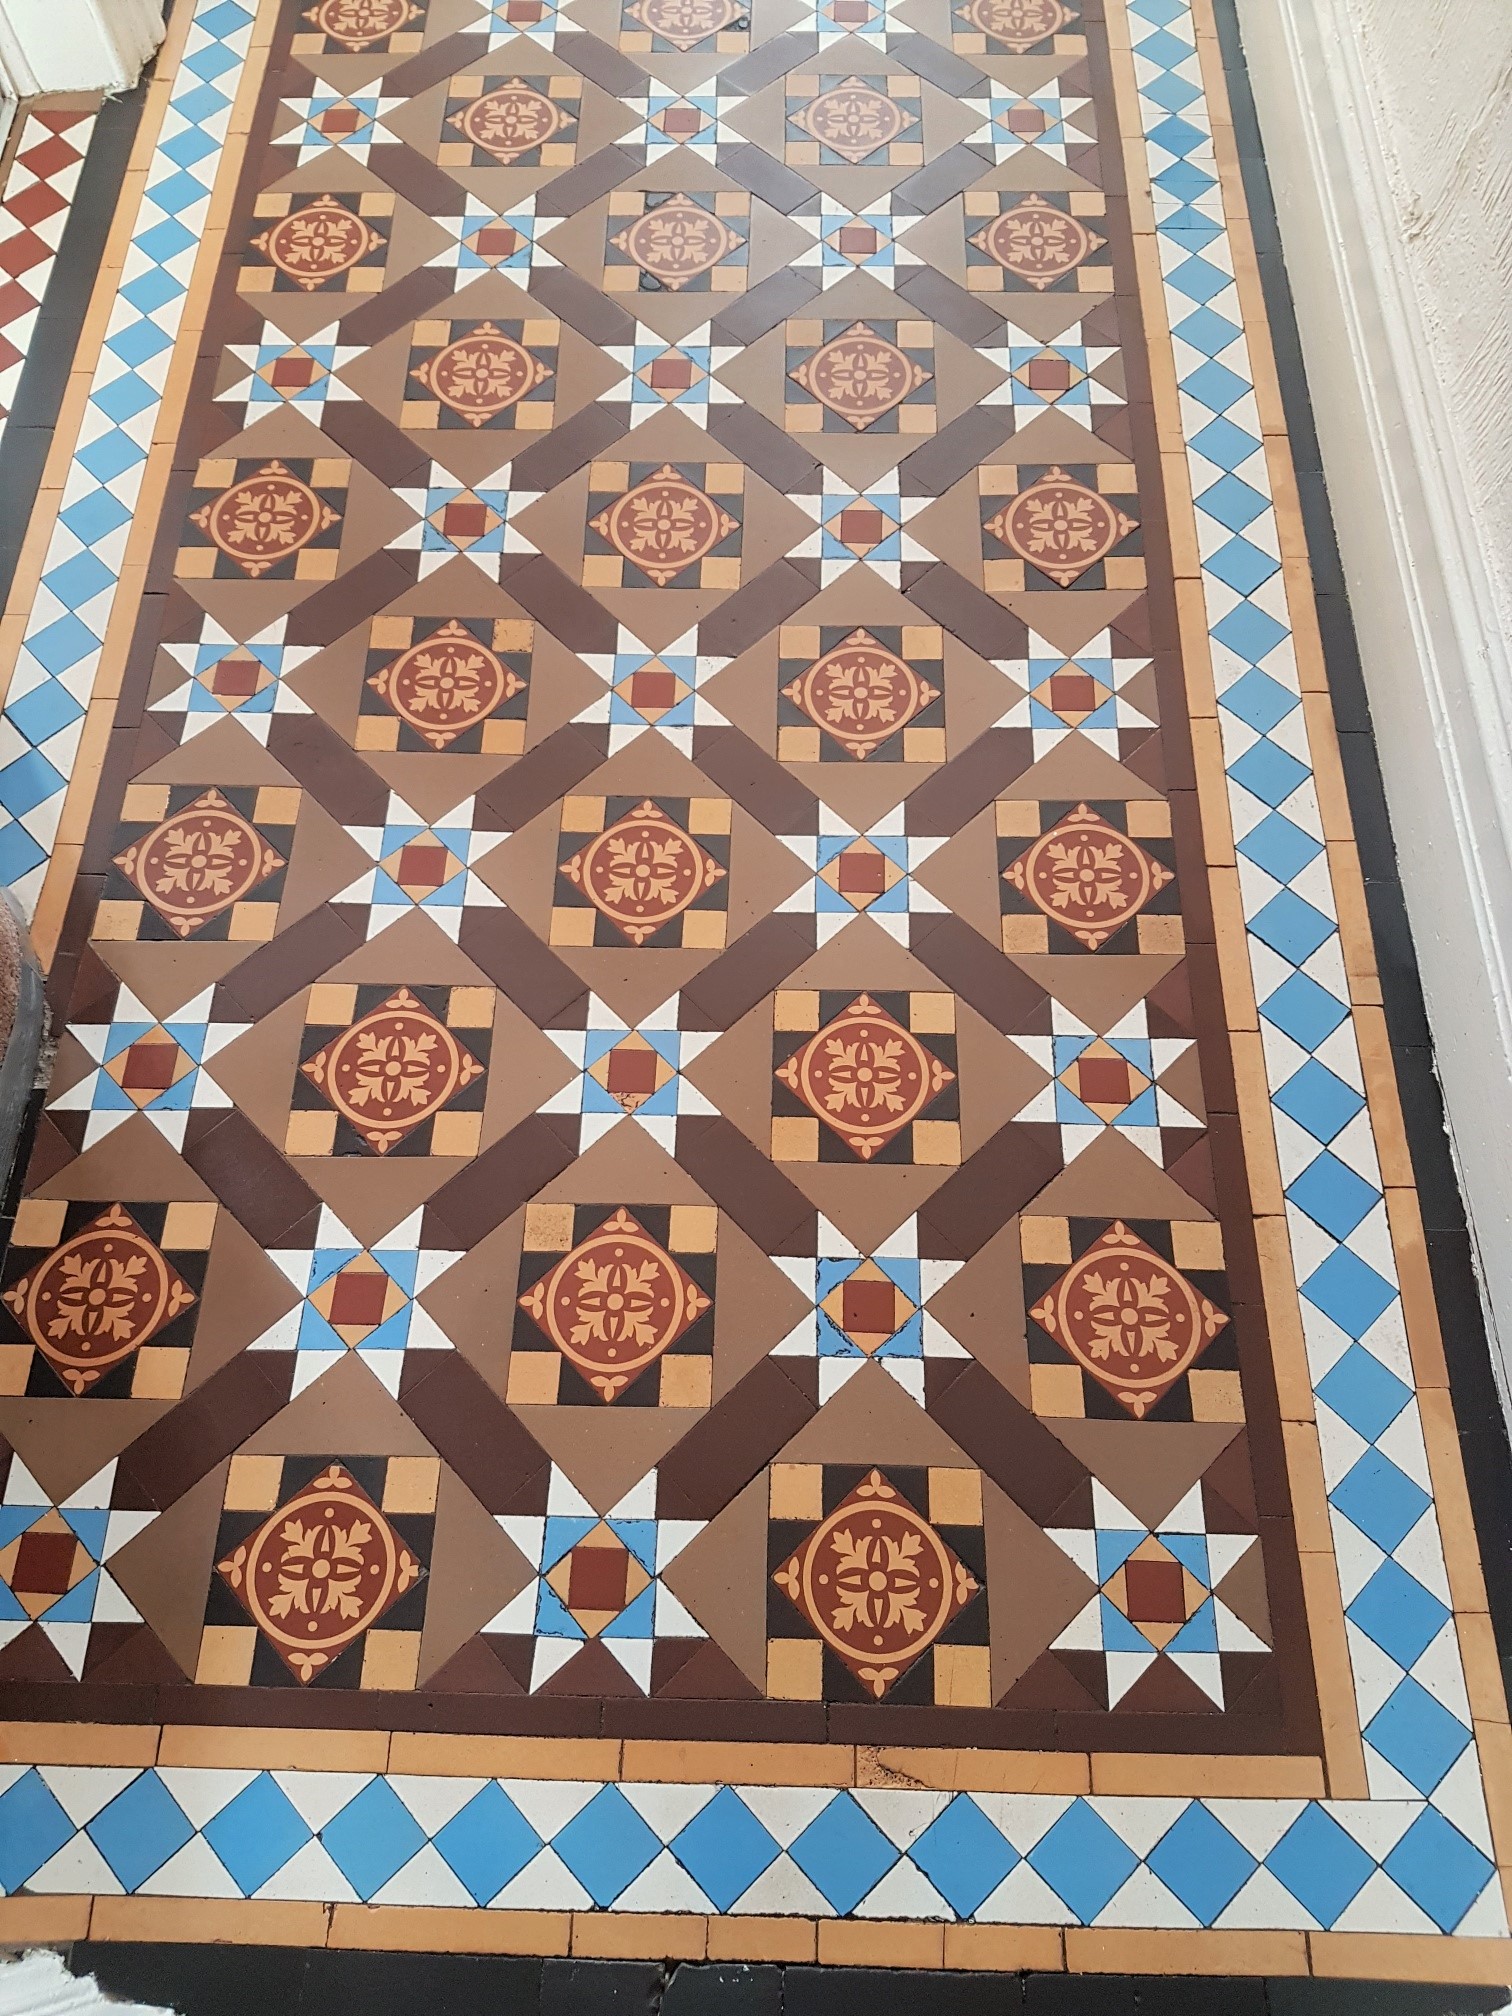
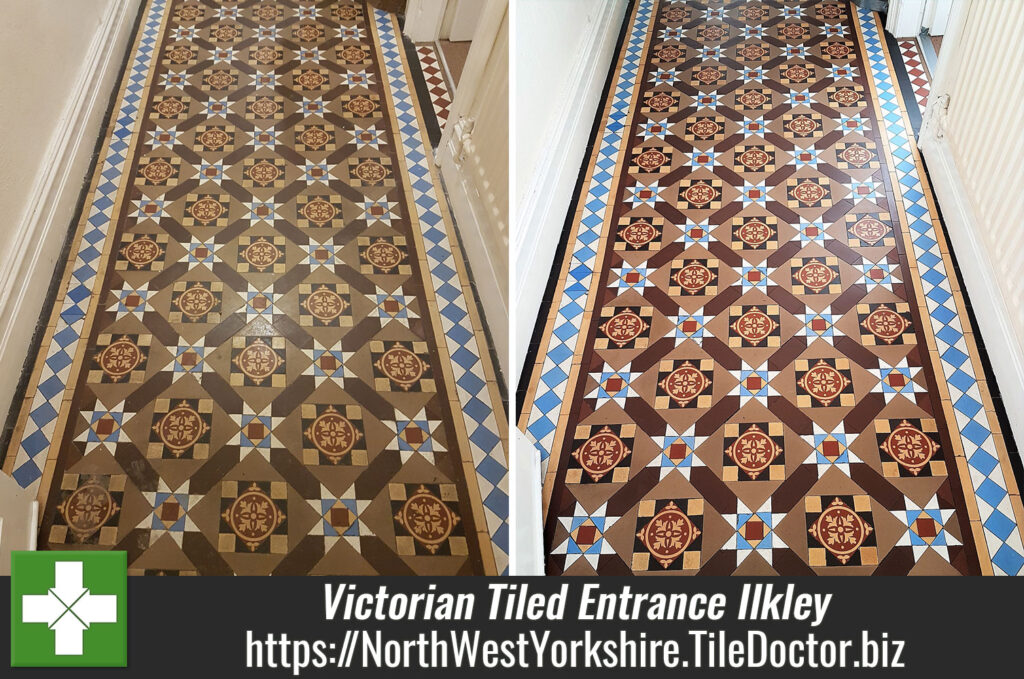
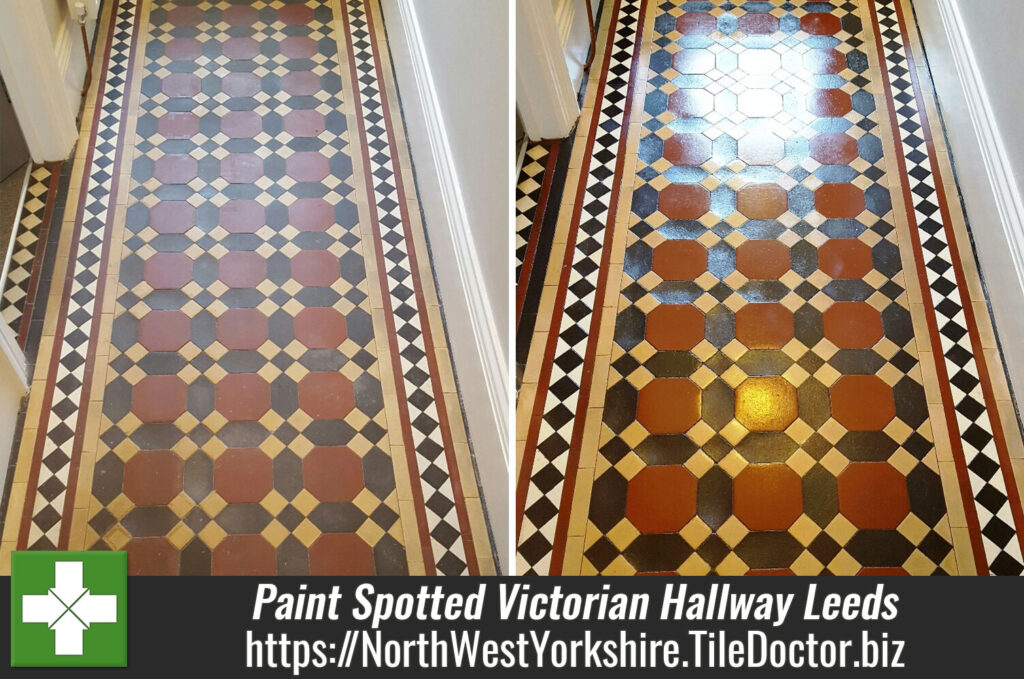
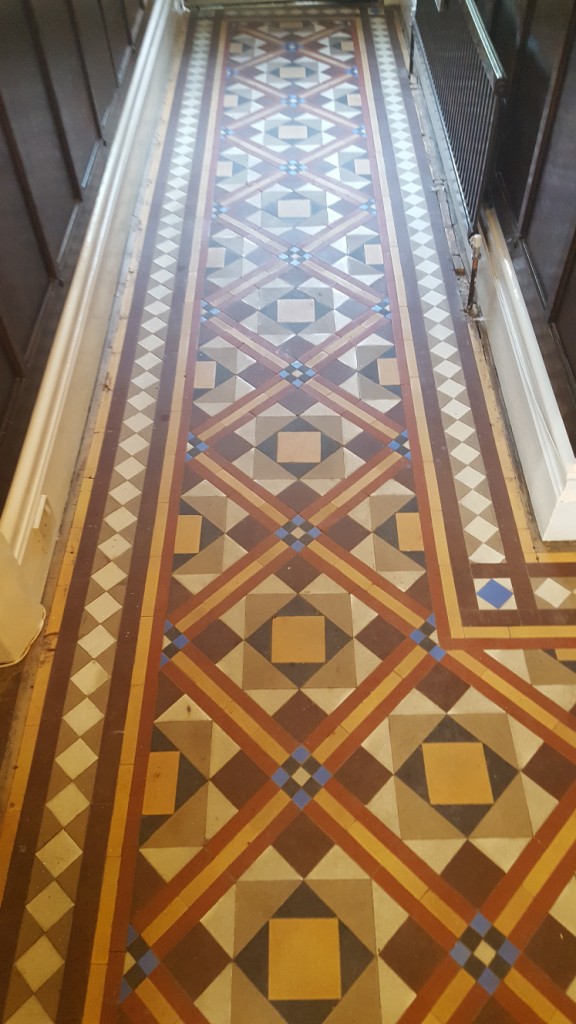
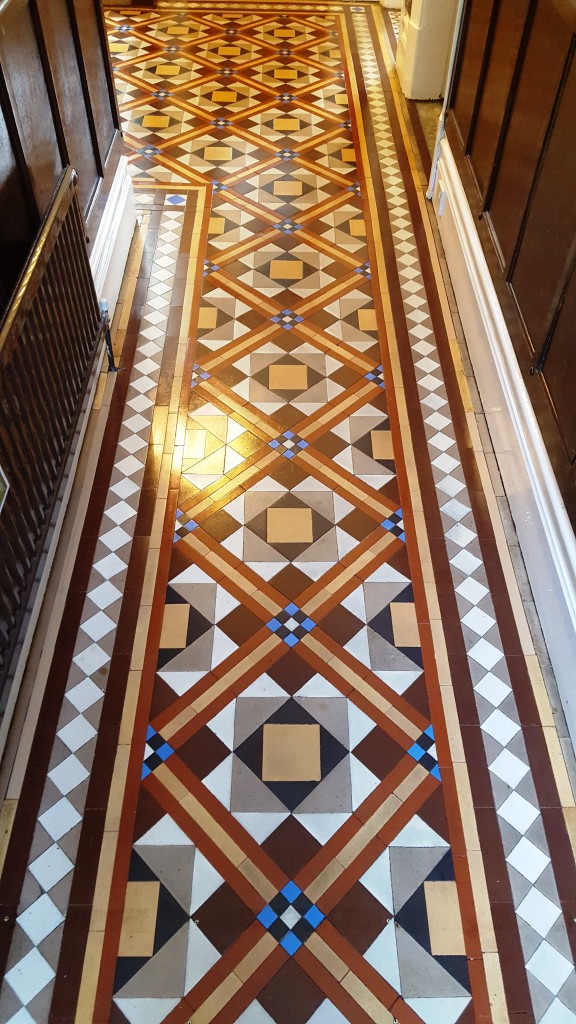
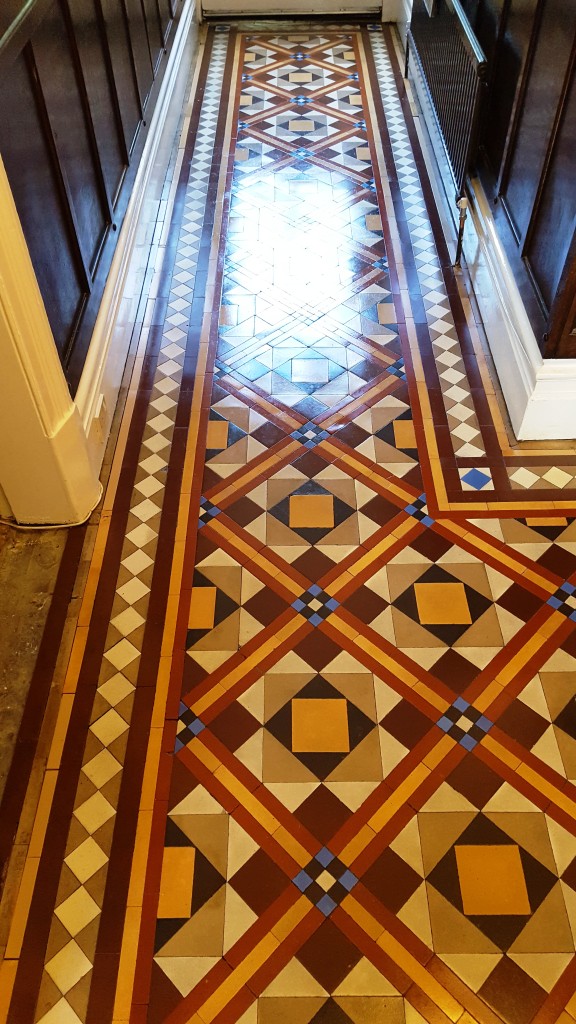
Details below of a Victorian Tiled Hallway Floor that I deep cleaned and sealed at a house in Leeds. It has previously been covered in carpet which had been removed before I got there.

The tiles were in good physical condition, just looking dull and there were traces of paint spots and glue residue from double sided tape that had held down the carpet. Worse of all there an imprint had bleed into the tiles from under lay that must have been damp. Dampness can be a problem for these old floors which were laid before the invention of damp proof membranes.

Victorian Tiled Hallway Floor Before Cleaning Leeds Victorian Tiled Hallway Floor Before Cleaning Leeds

Restoring a Victorian Tiled Hallway

Normally I use a series of Tile Doctor chemical products to deep clean Victorian tiles however I felt this would not deal with the imprint. Therefore on this occasion I started with the application of a coarse 200 grit diamond pad fitted to a weighted rotary machine and lubricated with a little water. The pads can struggle to reach into the edges and corners so to get those clean I used a 200 grit hand held block.

This removed the imprint, paint spots and glue residue and I was then able to lift the ingrained dirt out of the floor by applying a dilution of Tile Doctor Pro-Clean. The Pro-Clean was left to soak into the floor for a good ten minutes before working it in with a black scrubbing pad.

I extracted the soiled cleaning solution using a wet vacuum and then gave the floor a rinse with water, again using the wet vacuum to remove as much moisture as possible. The result of my cleaning efforts was excellent with 95% of the marks now removed and just a faint imprint left on a few tiles.

Sealing a Victorian Tiled Hallway

I left the floor to dry overnight and was able to return the next day, checked the moisture levels using a damp meter and then proceeded to seal the floor.

To seal I applied four coats of Tile Doctor Seal and Go which adds a lovely satin finish that really lifted the look of the Victorian floor tiles.

Victorian Tiled Hallway Floor After Cleaning Leeds Victorian Tiled Hallway Floor After Cleaning Leeds

Needless to say the customer was delighted with the finish and difference.

Professional Victorian Tiled Hallway Restoration in West Yorkshire

Paint Spotted Victorian Tiled Hallway Deep Cleaned in Leeds Read More »

Restoring Green Westmorland Slate and Blue Moleanos Limestone Tiles in Ripley

Restoring Green Westmorland Slate and Blue Moleanos Limestone Tiles in Ripley

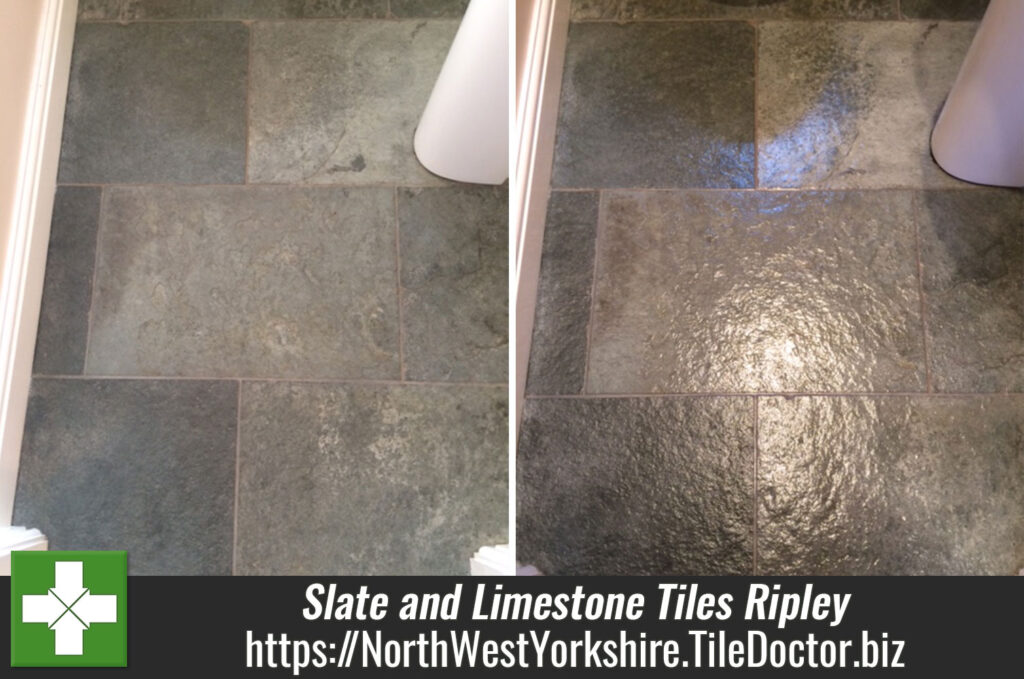
It’s not too common that you find two very different natural stone tiled floors in the same property. However, this is exactly what I discovered on a recent visit to a farmhouse property in Ripley, near Harrogate in North Yorkshire. The owner wanted to restore both their Westmorland Green Slate tiled entranceway and a Blue Moleanos Limestone tiled floor.

Westmorland Green Slate originates from the Lake District in Cumbria – where it has been quarried for many centuries – and is known to be a high quality and popular choice for flooring due to its subtle and pleasant green shades. By contrast, Moleanos Limestone originates from Portugal and is one of more commonly found types of Limestone used in buildings across the world.

But while the two floors were very different, the customer’s objective was the same for both – to restore the appearance of the tiles and return the shine to the stone. Here’s how I did it.

Cleaning and Sealing Westmorland Green Slate Tiles

The first floor I tackled was the Westmorland Green Slate, situated at the entrance to the property. Naturally, given that the tiles are situated in a high traffic area, they were very dirty and required a deep clean.

Westmorland Green Slate Floor Before Cleaning in Ripley
To do this, I applied a strong dilution of Tile Doctor Pro-Clean, which is our high alkaline, multi-purpose cleaner, stripper, and degreaser. The product was scrubbed into the tiles using a scrubbing pad fitted to a heavy-weight rotary machine to strip away any old sealer and remove the ingrained dirt. One I was satisfied with the condition of the floor it was rinsed with water and a wet vacuum used to remove the now soiled cleaning solution.

Once the floor had been left to dry completely, I was able to give the floor a fresh seal in the form of four coats of Tile Doctor Seal and Go. This sealer is specially formulated to provide both a stain resistant surface seal and a durable low-sheen finish.

Westmorland Green Slate Floor After Cleaning in Ripley

Cleaning and Sealing Blue Moleanos Limestone Tiles

Whilst waiting for the slate floor to dry I moved on to restore the Blue Moleanos Limestone tiles, which covered a floor area of 20 square metres, but were looking very sad, tired, and lifeless.

Blue Moleanos Limestone Floor Before Cleaning in Ripley
To clean polished Limestone tiles, we typically use a process known as burnishing, which involves the direct application of four different diamond encrusted burnishing pads to grind away old sealers, dirt and stains, before polishing the stone to restore lustre.

First, I used a Coarse 400 grit burnishing pad to strip the floor of the old sealer and remove all grease marks and stains. I had to go over the floor with the pad twice to get rid of some particularly stubborn grease spots.

Having done that, I moved on to focus on building back up the polished appearance of the Limestone by applying the Medium 800 grit, Fine 1500 grit, and Very Fine 3000 grit burnishing pads, with a light spray of water to act as a lubricant with each. This achieved a high-quality satin finish, which I ensured will be protected for the long-term by sealing the stone with Tile Doctor Colour Grow – an impregnating and colour enhancing sealant.

Blue Moleanos Limestone Floor After Polishing in Ripley
It took me three full days of work to clean, polish and seal both floors – and the hard work paid off, as the customer was absolutely delighted with their rejuvenated tiles!

Professional Tile Cleaning, Polishing and Sealing for Westmorland Green Slate Tiles and Blue Moleanos Limestone Tiles in Ripley, North Yorkshire

Restoring Green Westmorland Slate and Blue Moleanos Limestone Tiles in Ripley Read More »

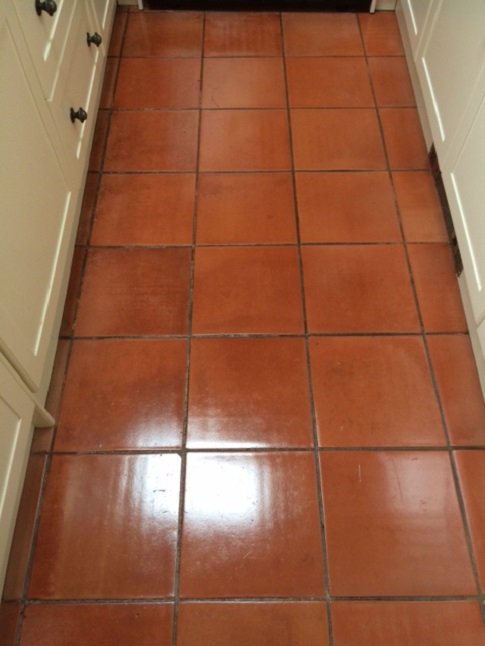
Terracotta Tiled Kitchen Before and After Cleaning Halifax

Dirty Catalan Terracotta Tiles Restored at a Halifax Farmhouse

Terracotta tiles are made all over the world and not surprisingly are very popular around the Mediterranean which is where these Catalan Terracotta Tiles were imported from.

Catalan Terracotta Before Cleaning Halifax Farmhouse Catalan Terracotta Before Cleaning Halifax Farmhouse

They had been installed in a large former farmhouse outside of Halifax in West Yorkshire about twenty years earlier and had never really been subject to an effective maintenance regime. They were now looking very tired and dirty indeed and well overdue a deep clean and reseal.

Cleaning Spanish Terracotta Tiles

I cleaned the floor using a 1:3 dilution of Tile Doctor Pro-Clean with water which is an effective alkaline Tile and Grout cleaner that will clean and strip old sealers from tiles when used in a strong dilution such as on this occasion. I left it to soak into the tile for about ten minutes before scrubbing it in with a black scrubbing pad fitted to a rotary floor machine. This process got most of the dirt off but the pad didn’t have good contact with all the tiles as many were convex in shape as Catalan tiles often are. This became apparent after rinsing the soiled cleaning solution off the floor with more water and extracting the soil with a wet vacuum.

To make sure all the missed areas were cleaned I applied more Pro-Clean and scrubbed them by hand with a scrubbing brush. I also took the opportunity to clean the grout as well which was a long job as the tiles were only 6 inches square so there was a lot of grout to do.
The little white tile inserts between the Terracotta tiles are called Tacos and they came up particularly well during cleaning.

Catalan Terracotta During Cleaning Halifax Farmhouse

Sealing Spanish Terracotta Tiles

Once the clean had been completed I left the tiles to dry off for two days before returning to seal them. It’s important that the tiles are bone dry before applying a sealer as any moisture can cause unexpected results.

Upon my return to the property I ran some quick damp tests, which revealed the tiles were ready to be sealed. I then applied four coats of Tile Doctor Seal and Go, our topical sealer which provides a satin finish and really improves the look of Terracotta floor.

Catalan Terracotta After Cleaning Halifax Farmhouse Catalan Terracotta After Cleaning Halifax Farmhouse

My customer was very happy with the finished result and I think you will agree the floor looks so much brighter and healthier.

Professional Terracotta Tile Maintenance in Yorkshire

Dirty Catalan Terracotta Tiles Restored at a Halifax Farmhouse Read More »

100 Year Old Victorian Tiled Hallway Restored back to Life in Knaresborough

100 Year Old Victorian Tiled Hallway Restored back to Life in Knaresborough

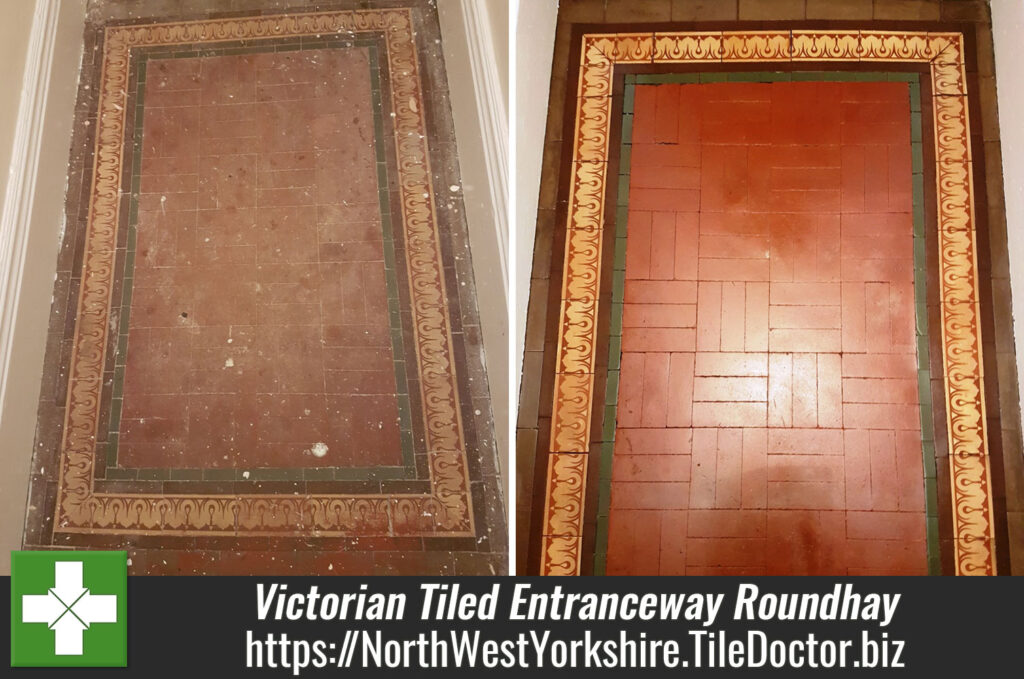
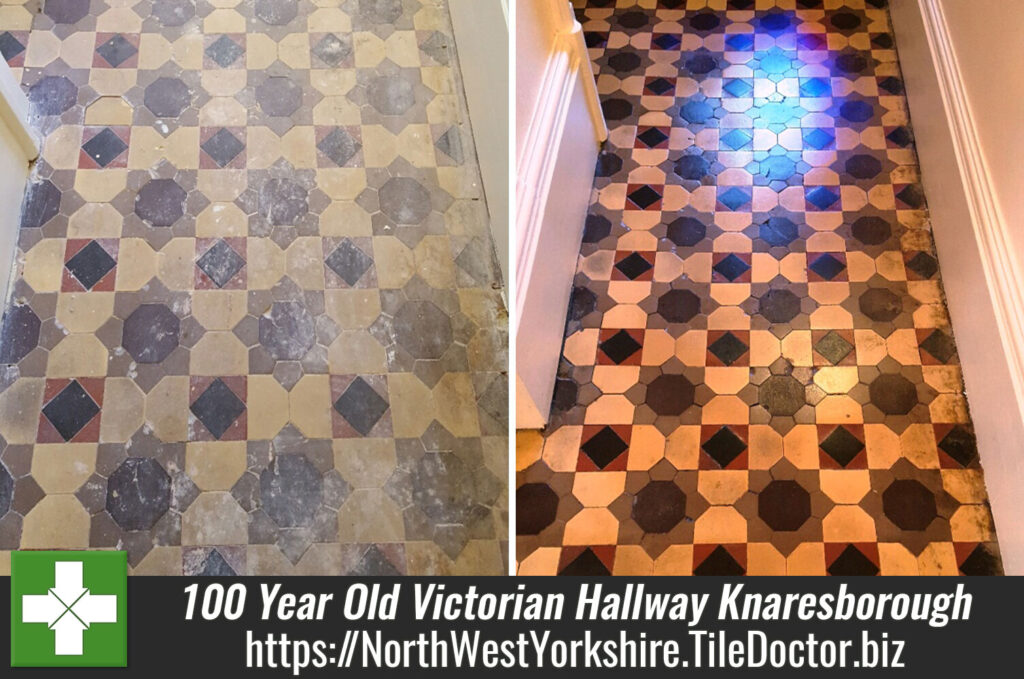
The photographs below are of a Victorian Tiled Hallway at a house in the historic market and spa town of Knaresborough. The tiles were actually over a hundred years old and as you can see in a terrible state. As well as looking dull and unloved they were traces of plaster, oil based paint and even chewing gum.

Old Victorian Tiled Floor Before Restoration in Knaresborough Old Victorian Tiled Floor Before Restoration in Knaresborough

Restoring a Victorian Tiled Hallway

The first job was to tackle the chewing gum with a sharp flat metal scraper taking to keep the blade level with the tile and not to scratch the tile. Once this was done the next task was to remove the paint by treating the affected areas with a product called Remove and Go which basically does what it says on the bottle. I find it works best by allowing it to soak into the affected area for about ten minutes before scrubbing it in and then rinsing it off with water.

The next step was to give the whole floor a good deep clean with a strong dilution of Tile Doctor Pro-clean, which deep cleans the tiles without damaging them. Again, you leave the product to soak into the tile before scrubbing it in and then rinsing it off and extracting the now soiled solution with a wet vacuum.

After that we gave the floor an acid rinse using Tile Doctor Acid Gel which removed the plaster and also adds a slight acid tint into the base of tile which helps to eliminate a problem we sometimes get with these old tiles called efflorescence which is where mineral salts rise up through the floor leaving white marks on the surface.

Sealing a Victorian Tiled Hallway

Once cleaned and fully dried a damp test was conducted to confirm the floor was dry before sealing. The customer has requested a satin finish, however we only apply this if there is no immediate damp issues or mineral salts present, if so we use a sealer called Tile Doctor Colour Grow which is fully breathable and soaks into the pores of the tile leaving a matt finish. On this occasion, everything was in normal state so we applied four coats of Tile Doctor Seal and Go which provided the satin finish the customer wanted.

Old Victorian Tiled Floor Atfer Restoration in Knaresborough Old Victorian Tiled Floor Atfer Restoration in Knaresborough

We pretty much through the book at this floor to restore it and I’m sure you will agree the effort was well worth it as the floor now looks brand new.

Last thing to do before leaving the customer was to provide them with some advice on how to clean the floor going forward. On this occasion, I explained that the floor will maintain its appearance as long as the sealer remains intact; now sealers will wear down over time however you can maximise their life by using a PH neutral cleaning product as anything stronger will cause premature erosion. To get them off on the right track I left them with a free 500ml bottle of Tile Doctor Neutral cleaner which is PH neutral and will not damage the sealer.

Professional Victorian Tiled Hallway Restoration in North Yorkshire

100 Year Old Victorian Tiled Hallway Restored back to Life in Knaresborough Read More »

Restoring the Colour and Appearance of a Victorian Tiled Hallway in Hebden

Restoring the Colour and Appearance of a Victorian Tiled Hallway in Hebden

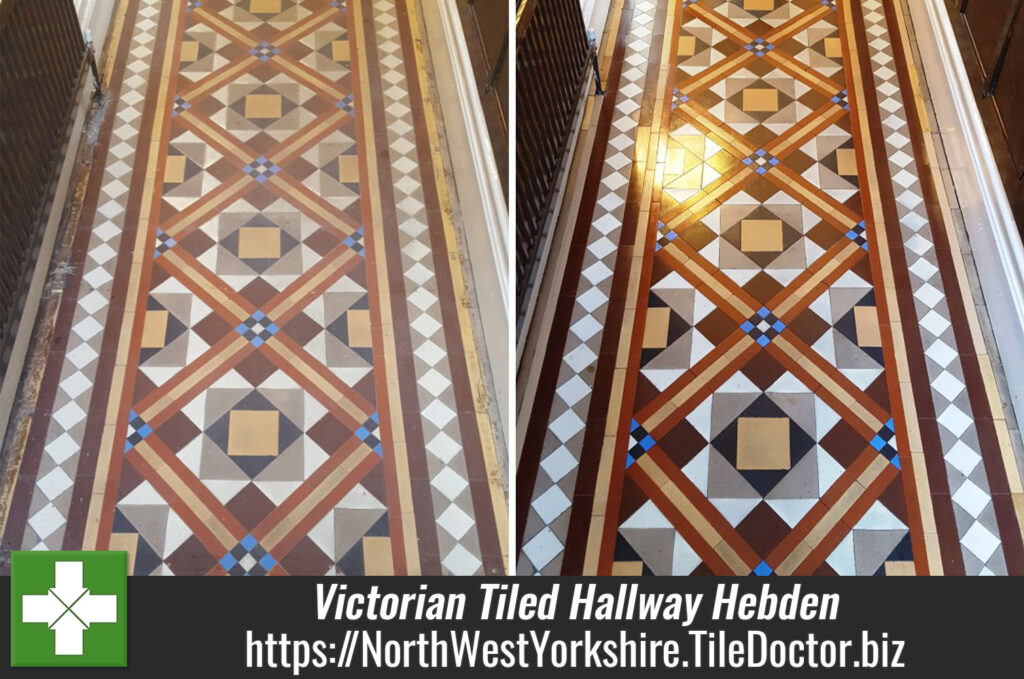
The colourful and diverse geometric patterns of a Victorian tiled floor can give a property a regal, elegant and timeless feel, making it a popular choice even in the 21st century. However, as time passes without regular care and maintenance, Victorian tiles can quickly lose their colour and appear deadened by the buildup of dirt and dust over several months (and sometimes years).

This property owner in Hebden a very small village in North Yorkshire of less than 300 people, had this common problem. Her Victorian tiled hallway had not been adequately maintained and was now more difficult to keep clean than ever. To add to the problem, most of the tiles along the edges were either broken, cracked, or filled with holes, probably I suspect from the installation of carpet grippers at some point in the past.

Victorian tiled hallway before cleaning Hebden
At this point, the property owner turned to Tile Doctor to see what could be done.

Victorian tiled hallway before cleaning Hebden

Repairing and Cleaning a Victorian Tiled Hallway

Before beginning a deep clean of the entire length of the hallway, it was first necessary to source and install replacement tiles for those that had been broken and damaged. I also relaid any that were loose.

When finished, I left the tiles to set and returned the next day to start the clean. My choice of cleaner in this situation was Tile Doctor Pro Clean, which was scrubbed into the floor with a special pad fitted to a rotary machine to break down ingrained dirt and stains. Pro Clean does this very effectively on all types of tile, including natural stone and of course Victorian tiles.

The floor was then rinsed with water and the soiled cleaning solution extracted from the floor using a vet vacuum. Stubborn areas were re-treated with more Pro Clean, and when I was satisfied with the condition of the tiles the floor was given a final but thorough rinse to remove any trace of cleaning product.

Sealing a Victorian Tiled Hallway

The floor was then left to dry completely overnight to ensure all excess moisture had disappeared, leaving it fresh to be sealed. I returned in the morning for a third day of work to seal the Victorian tiles with four coats of Tile Doctor Seal and Go, a topical sealer which provides a rich satin finish to really add depth to the colours in the tile while protecting it against dirt and stains.

Victorian tiled hallway after cleaning Hebden
The customer was delighted with the restoration and couldn’t quite believe the huge improvement in the appearance of the tiles, especially in regards to the enhancement in the different colours. Another satisfied customer!

Victorian tiled hallway after cleaning Hebden
 

Professional Victorian Tiled Hallway Restoration in North Yorkshire

Restoring the Colour and Appearance of a Victorian Tiled Hallway in Hebden Read More »

Burnishing and Sealing Works Wonders for Limestone Tiles in Harrogate

Burnishing and Sealing Works Wonders for Limestone Tiles in Harrogate

I was recently at a property in the North Yorkshire town of Harrogate, undertaking what I initially thought would be the cleaning and polishing of a Cream Limestone tiled kitchen. However, as I began the cleaning process I quickly discovered that under the dirty grout lines someone had taken a lot of effort to paint with a small brush directly onto the grout using varnish!

Cream limestone floor before cleaning Harrogate Cream limestone floor before cleaning Harrogate

Removing Varnish from Grout

In a normal situation, I would have covered the whole floor with Tile Doctor Remove & Go to solve the problem, however compared to, say, adhesive or paint staining, varnish is very difficult to remove. So instead I opted for the long, yet necessary process of cleaning the grout manually with several thin wire brushes. Over the course of two days I managed to remove approximately 90% of the stubborn varnish – and could finally move onto cleaning and polishing the Limestone as originally planned.

Burnishing and Sealing a Limestone Tiled Kitchen Floor

The polish had been lost from the Limestone kitchen tiles over time, so I set about restoring it using a type of polishing known as burnishing. This involves the application of diamond encrusted pads of varying grit to the floor to gradually buff the stone and achieve an aesthetic and durable shine. Burnishing is most commonly used on high-end stone such as Marble, Travertine and, of course, Limestone.

At Tile Doctor, our burnishing system comprises four burnishing pads, ranging from a Coarse grit to a Very Fine grit. After applying the first three pads (Coarse, Medium and Fine), I gave the tiles a further clean with Tile a Doctor Pro Clean, which is our alkaline cleaner, to remove any residue from the burnishing process. I then rinsed the floor with clean water and soaked up the residue with a wet vacuum, before leaving it to dry.

The floor was then polished to a satin finish using the fourth and final Extra Fine burnishing pad. I sealed it using a couple of coats of Tile Doctor Ultra-Seal, an impregnating sealer designed to provide maximum protection against dirt and stains.

Cream limestone floor after cleaning Harrogate Cream limestone floor after cleaning Harrogate

The combination of burnishing and sealing always makes a huge difference to Limestone tiles. Here, the finished result was almost like a new floor! The customer was both amazed and very pleased with the transformation.

Professional Maintenance of Polished Limestone Tiles in North Yorkshire

Burnishing and Sealing Works Wonders for Limestone Tiles in Harrogate Read More »

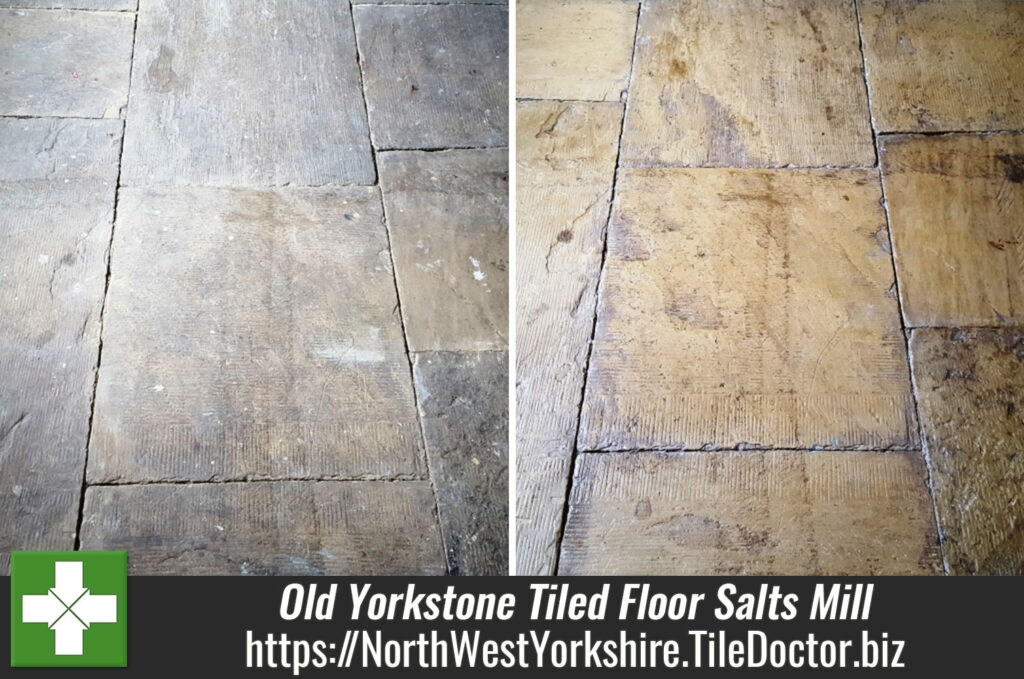
Old Yorkstone Tiled Floor Transformed at the Salts Mill

Old Yorkstone Tiled Floor Transformed at the Salts Mill

For this job, I had the pleasure of visiting the historic Salts Mill, a former textile mill turned art gallery, shopping centre, and restaurant complex near Bingley, West Yorkshire. It was built in 1853 by the famous manufacturer and philanthropist, Sir Titus Salt, and was at one point the largest industrial building in the world by total floor area.

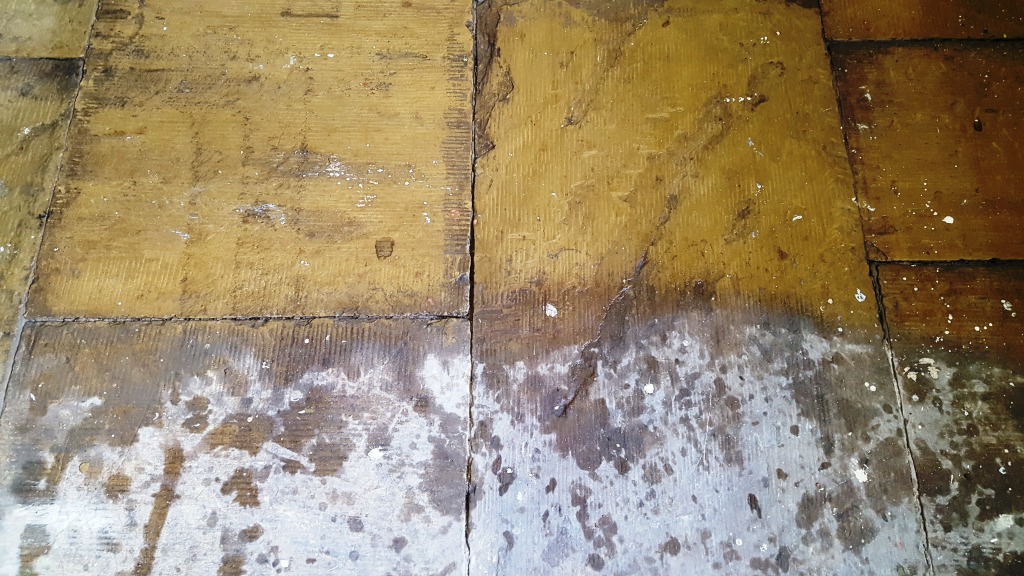
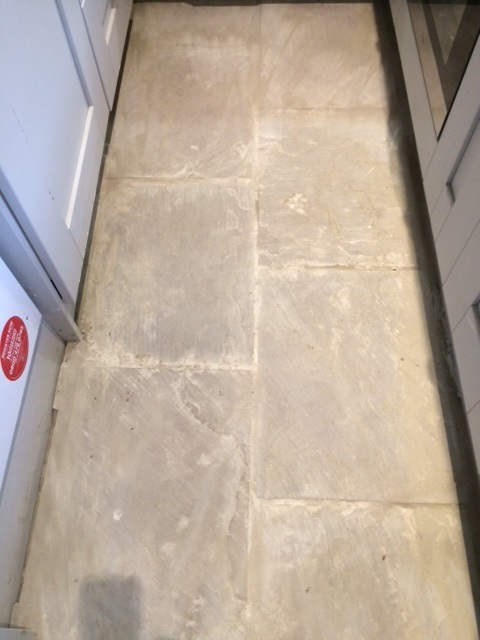
Salts Mill Yorkshire Stone Before Cleaning
As you can imagine, a lot of the rooms at Salts Mill are over a century and a half old. Most of them also contained stone flooring made from Yorkstone – a type of Sandstone unique to Yorkshire, and easily distinguishable due to its rich, natural yellow colouring. Unfortunately, one such floor in the Salts Mill was in quite a bad state. It has completely lost its vibrance – appearing more grey than yellow – and was evidentially in need of a very deep clean and fresh seal.

Salts Mill Yorkshire Stone Before Cleaning

Cleaning an Old Yorkstone Floor

I started the Yorkstone tile restoration by soaking the floor in a strong dilution of our reliable alkaline-based tile cleaner, Tile Doctor Pro Clean, and scrubbing it in using a rotary machine fitted with a scrubbing pad. This quickly removed the initial layers of muck and, in the process, revealed oil-based paint and glue stains all over the floor.

Salts Mill Yorkshire Stone During Cleaning
To break down the oil and paint I applied Tile Doctor Remove & Go, which is our heavy duty stripper, remover and degreaser. This quickly ate through the paint and glue, and I followed by giving the floor another thorough clean with Pro Clean. Finally, I rinsed the floor with clean water before leaving it to dry for a full two days due to the amount of chemical cleaning product and water applied.

Sealing an Old Yorkstone Floor

Upon my return to the Salts Mill two days later, I ran some quick damp tests to check for any excess moisture which could’ve prevented me from sealing the floor. Thankfully, the floor was dry and ready to be sealed, but it is always recommended, especially with older floors, to be aware of damp issues as these can be very troublesome.

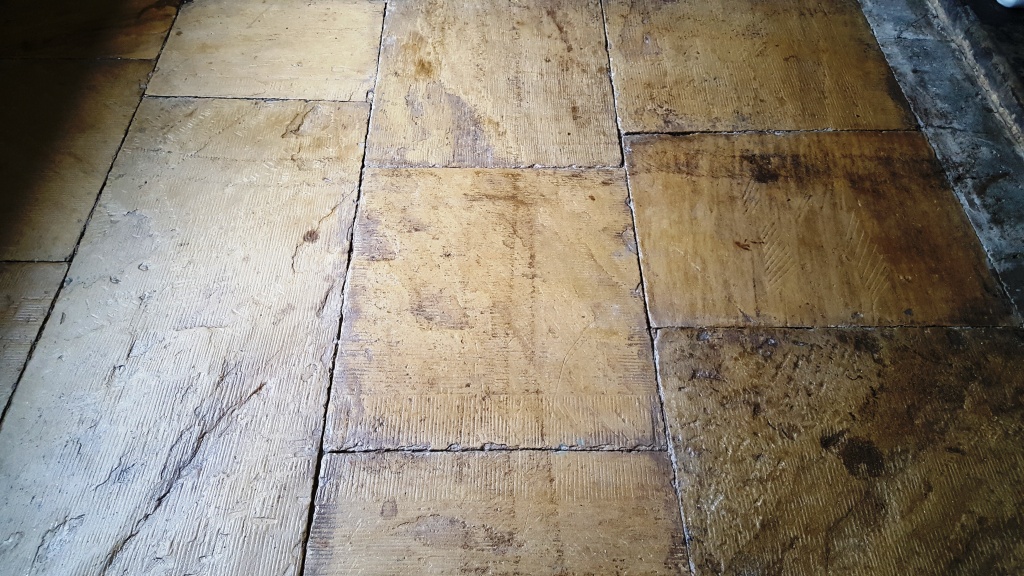
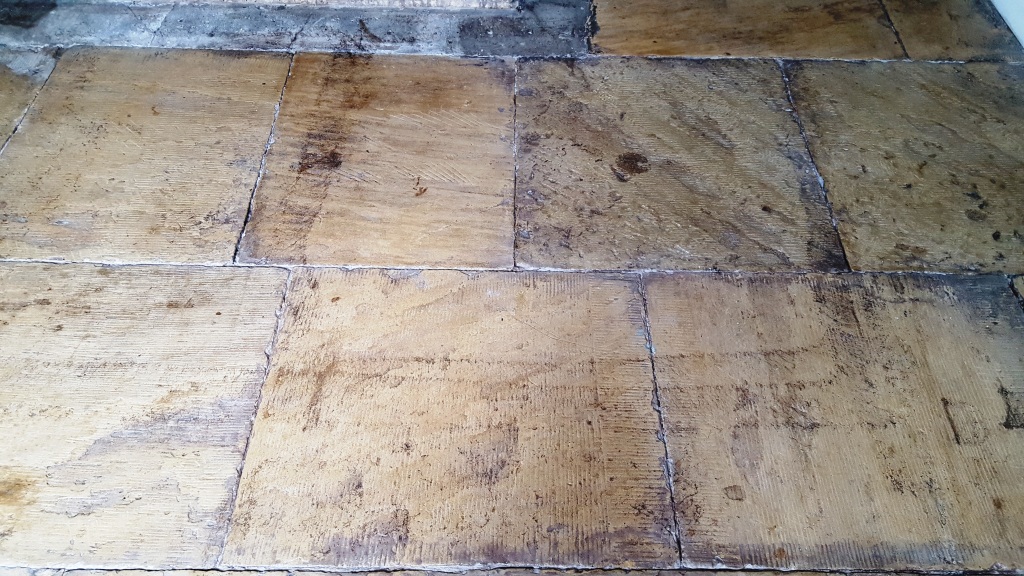
Salts Mill Yorkshire Stone After Cleaning
My choice of sealer was Tile Doctor Seal and Go, a topical sealer which provides a robust, stain resistant seal and a durable low sheen finish all in one product. Multiple coats of Seal and Go were applied, bringing the life and character back to these classic tiles.

Salts Mill Yorkshire Stone After Cleaning
 

Professional Restoration of an Old and Dirty Yorkstone in Yorkshire

Old Yorkstone Tiled Floor Transformed at the Salts Mill Read More »

Spanish Terracotta Tiles Refreshed in Halifax

Spanish Terracotta Tiles Refreshed in Halifax

Terracotta is an interesting type of stone manufactured using a variety of techniques dependant on the country of origin which leads to a number of differences such as Spanish Terracotta being less porous than its Mexican counterpart: the former is semi-hand made and finished in a factory kiln, while the latter is completely handmade. Spanish Terracotta is therefore a lot less than porous and ultimately, of a higher quality.

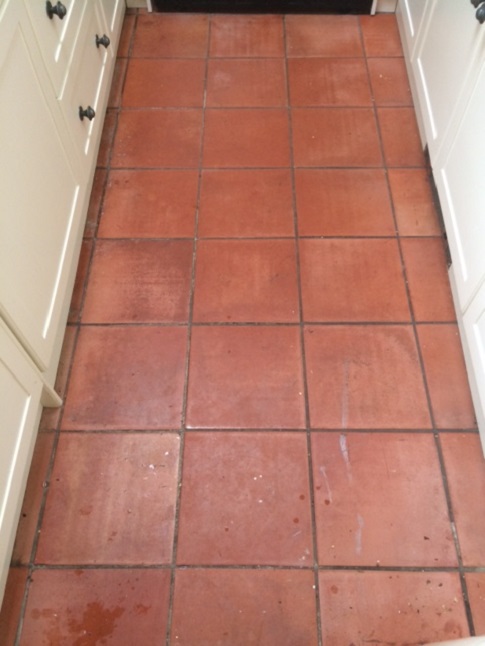
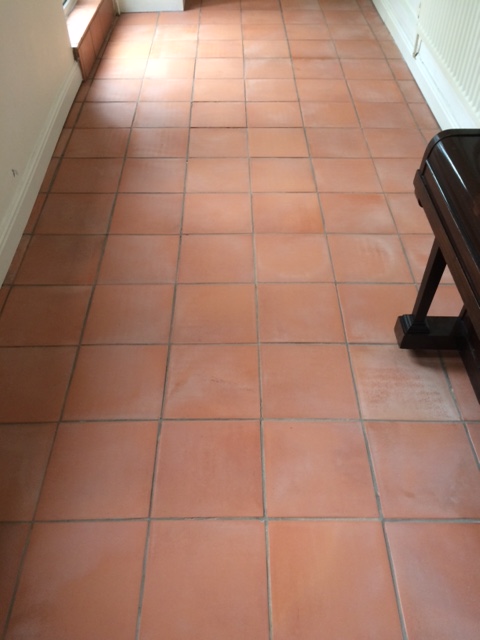
Spanish Terracotta Hallway Before Cleaning Halifax
But despite the Spanish Terracotta being less porous, and therefore being less prone to ingrained dirt, it still, like any other stone, needs regular maintenance to keep it looking smart. In the tiling trade, we quite often refer to this as a good old fashioned ‘Clean and Seal’ and this is exactly what was requested by this property owner in Halifax, for their Spanish Terracotta tiled floors in the kitchen and adjacent hallway.

Cleaning Spanish Terracotta Tiles

I cleaned both sets of Terracotta tiles using the same process, which involved the application of our reliable alkaline cleaner known as Tile a Doctor Pro Clean, diluted with five parts of warm water. Once the solution had been left to dwell for a short period, it was scrubbed into the tiles to remove all dust, dirt, and general muck. This created a slurry of cleaning residue, which I promptly soaked up using a wet vac. A wet vac machine is an essential tool when it comes to cleaning porous tiles since, unlike a traditional mop and bucket, it sucks the excess trapped dirt out of the clay and thus provides a superior clean.

Following this, I applied a small amount of our heavy duty remover, known as Tile Doctor Remove & Go, to deal with some of the more stubborn stains and paint splashes, before rinsing with clean water and wet vaxing in a similar fashion to before.

Spanish Terracotta Kitchen After Cleaning Halifax

Sealing Spanish Terracotta Tiles

Once the clean had been completed I left the tiles to dry completely. This can take 12 to 24 hours depending on numerous factors including whether a Damp proof Membrane and underfloor heating has been installed which can really help reduce drying times. Letting the tiles dry completely before sealing is paramount as moisture can cloud the sealer and affect its performance.

Upon my return to the property I ran some quick damp tests, which revealed the tiles were ready to be sealed. I then applied several coats of Tile Doctor Seal and Go, our topical sealer which provides a satin finish and accentuates colour. A new coat of this product is recommended every six months on Terracotta to ensure the continuous protection of the tiles’ soft clay particles.

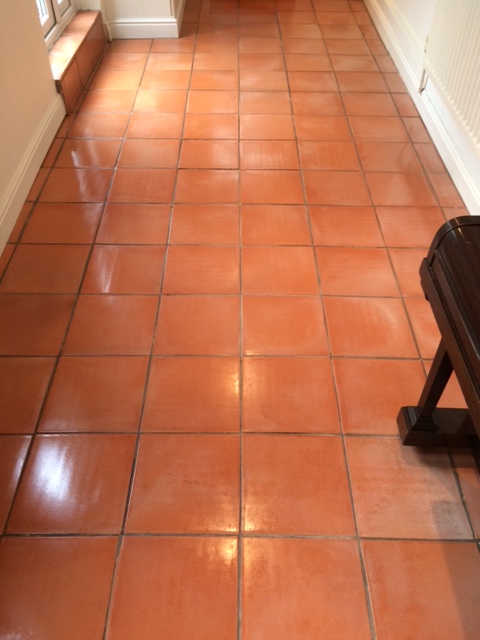
Spanish Terracotta Hallway After Cleaning and Sealing Halifax
My customer was extremely pleased with her refreshed Terracotta tiles. It goes to show what a big difference a bit of regular maintenance can make. I advised the customer that an everyday cleaner called Tile Doctor pH Neutral cleaner can also be used regularly to keep the tiles looking great without damaging the sealer.

Spanish Terracotta Kitchen After Cleaning and Sealing Halifax
 

Professional Terracotta Tile Maintenance in Yorkshire

Spanish Terracotta Tiles Refreshed in Halifax Read More »

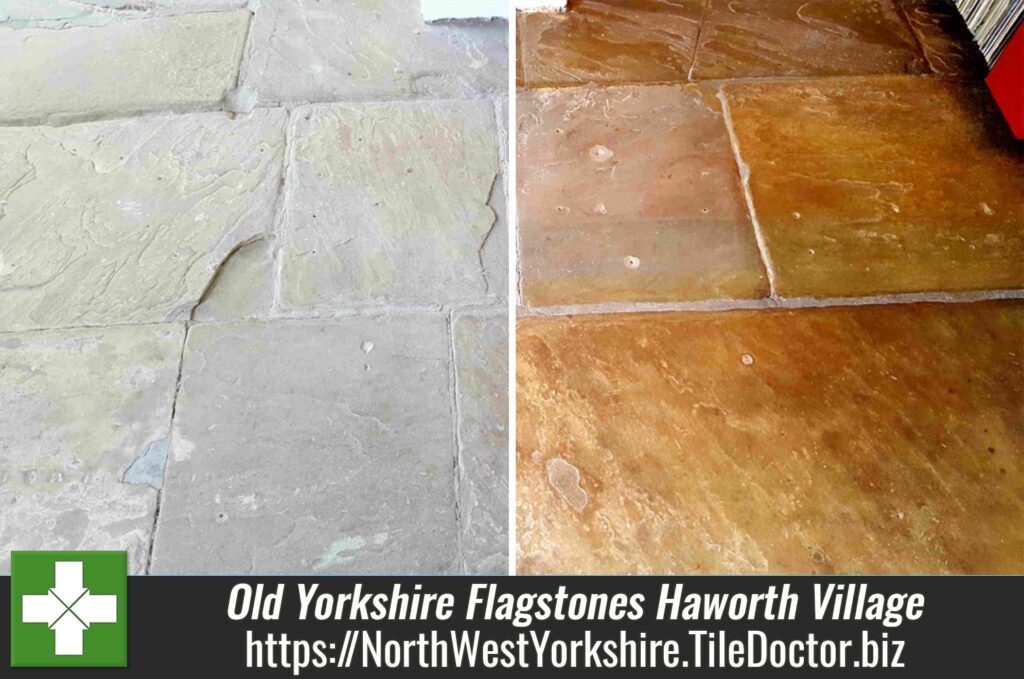
Old Yorkshire Flagstones Revitalised in Haworth Village

Old Yorkshire Flagstones Revitalised in Haworth Village

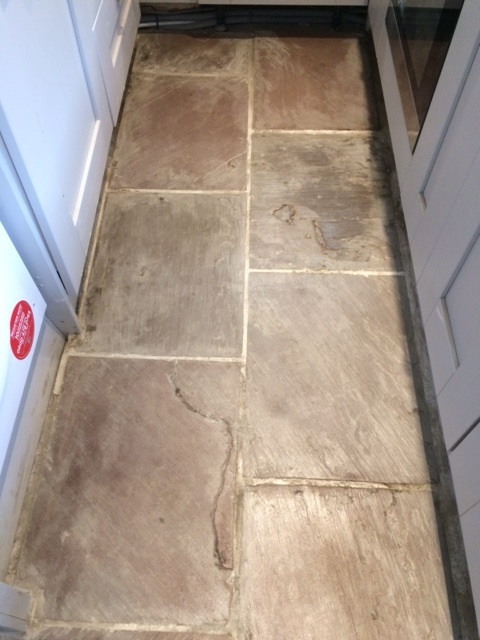
This Yorkshire flagstone floor was about 20m2 in size and was well overdue a deep clean, additionally a lot of the pointing was loose or missing which would need to be resolved. The location of this job was at a house in Haworth village which is situated at the edge of the Pennine moors in West Yorkshire, the area is known as Bronte country after the famous Bronte sisters who lived here in the local parsonage in the 19th century.

Old Yorkshire Flagstones Before Cleaning Haworth

Cleaning Yorkshire Stone

To deep clean the floor the sandstone flagstones were covered in a 1:3 dilution of Tile Doctor Pro-Clean which was left to dwell and soak into the stone for 15 minutes before being scrubbed clean using a rotary machine fitted with a black pad. The now dirty cleaning solution was then removed using a wet vacuum and then the whole floor washed down with water and stubborn areas re-treated until I was satisfied.

The next step was to rake out the loose pointing and re-point with a matching grey flexible wide joint grout. This is the advantage of using a Tile Doctor to work on your tiled floors as were not just a cleaning company.

Sealing Yorkshire Stone

The floor was left to dry overnight and I returned the next day to seal the floor first checking it for dampness using a Damp Meter. The flagstones were dry so I then proceeded to seal the floor using four coats of Tile Doctor Seal and Go which adds a nice subtle sheen to natural stone, it also a water based sealer so there’s no smell.

Old Yorkshire Flagstones After Cleaning Haworth
You can see from the photo that as well as protecting the floor the sealer adds to the appearance of the tiles and brings out the natural colours that were not visible earlier.

Deep Cleaning Yorkshire Flagstone in Yorkshire

Old Yorkshire Flagstones Revitalised in Haworth Village Read More »

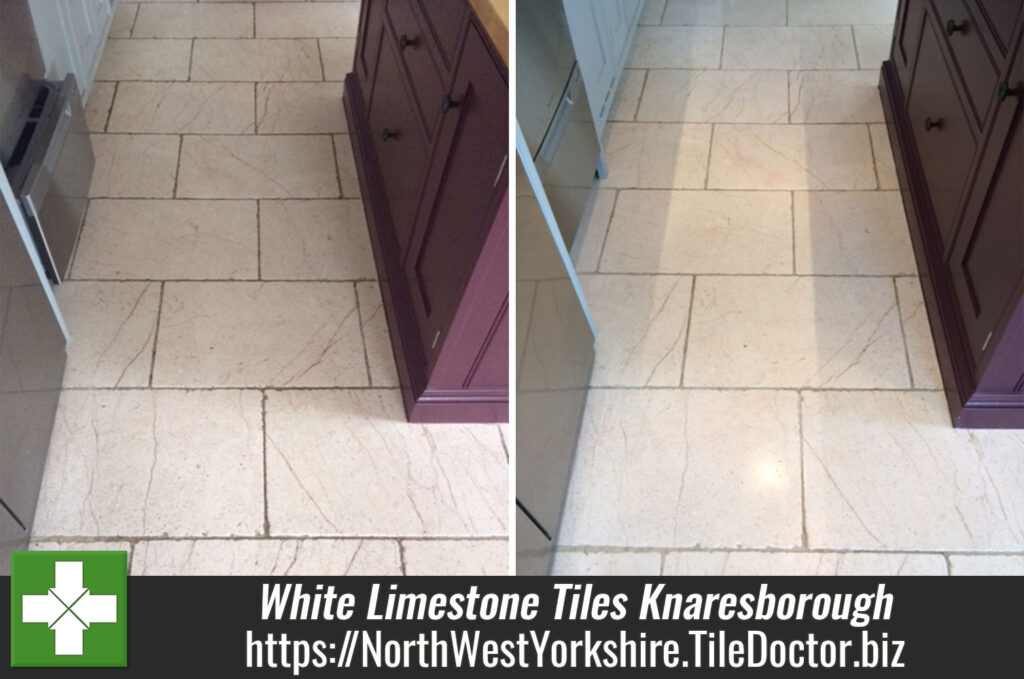
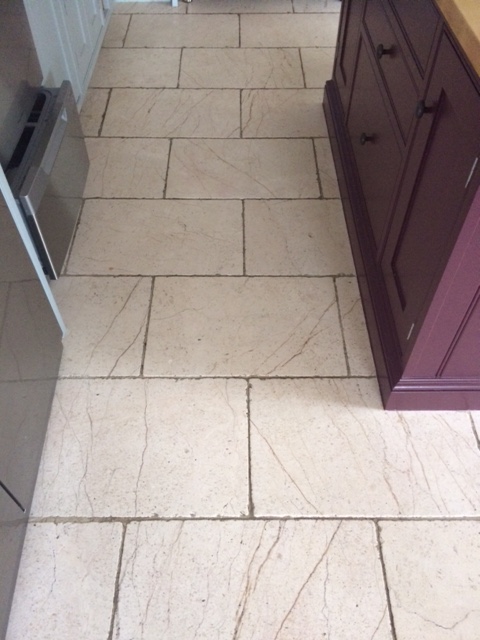
Dirty White Limestone Tiles Restored Through Burnishing in Knaresborough

Dirty White Limestone Tiles Restored Through Burnishing in Knaresborough

Knaresborough is a historic town in North Yorkshire, popular amongst holiday goers for its numerous attractions. I travelled to the area not to visit the attractions, however, but to visit a customer, whose fantastic white Limestone tiled floor was in need of a deep clean.

White Limestone Floor Before Cleaning in Knaresborough
Limestone is a porous material, meaning that without a sealer dirt can become easily trapped in the pores of the stone, as well as the grout. With this Limestone being naturally white, the dirt was particularly visible, making the tiles look very unsightly. Once deep cleaned the floor would also require a fresh seal to provide long-term protection against muck and stains.

White Limestone Floor Before Cleaning in Knaresborough

Burnishing a Dirty White Limestone Floor

To treat high end, polished stone floors such as Limestone and Marble, we recommend using the process of burnishing. Simply put, burnishing involves the application of diamond encrusted pads of varying grits, which serve to break down dirt and then polish the stone.

Typically, we use a set of four pads in gradual succession; here, I used the first three pads on the first day. Starting with the Coarse grit pad, along with a little water as lubrication, I polished the Limestone, before repeating the process with Medium and Fine pads to refine the polish.

On the same day, I also cleaned the grout using a solution of one part Tile Doctor Pro-Clean (a high alkaline cleaner) and three parts water. On Limestone floors you should take care to avoid even mildly acidic cleaning products as sensitive stones like Limestone and Travertine can be damaged over time. After successfully cleaning the dirt grout lines, I rinsed the floor before using a wet-vac machine to soak up the residue. The floor was then left to fully dry overnight.

Sealing a White Limestone Floor

The next day, I returned to the property to complete the restoration. Before sealing the tiles, I applied the fourth and final of the burnishing pads to achieve a Very Fine polish.

White Limestone Floor After Cleaning in Knaresborough
To seal the tiles, I used Tile Doctor Ultra Seal, the customer didn’t want to darken the stone in the way that a colour enhancing sealer might. Additionally, the customer required a more natural finish, which this product provides.

Then, I polished the excess sealer off with a white buffing pad and left it to dry for an hour, before polishing a final time with the Very Fine grit burnishing pad. With this method, the floor was perfectly dry and the customer could walk on the tiles as soon as I left.

White Limestone Floor After Cleaning in Knaresborough
Before leaving my very satisfied customer to enjoy their newly restored Limestone floor, I made sure to impart some aftercare advice. I recommend Tile Doctor Stone Soap for the Limestone (and other polished stone) as its helps to retain the sheen whilst also acting as a general cleaning agent.

Polishing White Limestone Floor Tiles in North Yorkshire

Dirty White Limestone Tiles Restored Through Burnishing in Knaresborough Read More »

Indian Fossil Stone Floor in Terrible Condition Restored in Skipton

Indian Fossil Stone Floor in Terrible Condition Restored in Skipton

This Indian Fossil Sandstone tiled floor in Skipton was in a terrible state. Indian Sandstone, sometimes known as Indian Sandstone Flags, are an alternative to Yorkshire Sandstone (or ‘Yorkstone’), which is known for being particular hard wearing and high quality.

Indian Fossil Stone floor Before Cleaning in Skipton
Nonetheless, the problems with the floor were not due to the quality of the stone, per say. Rather, the floor’s poor condition was caused by a lack of sealer, allowing the floor – and by extension the entire house – to become very dusty. In addition, the grout lines had been pointed with cement and sand instead of normal grout, which simply made the floor look messy and poorly cared for.

Indian Fossil Stone floor Before Cleaning in Skipton
I was called down to the property to set the situation right by providing a deep clean and fresh seal.

Cleaning an Indian Fossil Sandstone Floor

I started the job by dealing with the unsightly cement splashes around the grout lines, breaking them down manually using a good old fashioned hammer and chisel.

Nonetheless, my main concern around the grout lines was the grout haze caused by the excess cement. To neutralise the haze I carefully treated the grout lines with a phosphoric acid cleaner known as Tile Doctor Grout Clean Up, this product removes mineral deposits such as excess cement leaving the surface looking a lot tidier. The floor was then rinsed with water to remove the acid cleaner.

To round off the cleaning process, I mixed a solution of one part Tile Doctor Pro Clean to four parts clean water, before applying it to the tiles and scrubbing it in with a black pad fitted to a rotary machine. This helped to remove the ingrained dirt caused by a lack of sealer and clean the area ready to receive a fresh seal.

Sealing an Indian Fossil Sandstone Floor

I left the property to allow the floor to dry over night. Upon my return the next day, I checked for excess moisture and, once satisfied the floor was dry, I proceeded to seal the floor with four coats of Tile Doctor Seal & Go.

Indian Fossil Stone floor After Cleaning in Skipton
Seal & Go is a water-based topical sealer designed to build up stain resistant protection on the surface of the floor and to allow moisture vapour transmission. It is typically used to seal internal, unsealed porous surfaces, including Sandstone, Quarry and Victorian tiled floors.

Indian Fossil Stone floor After Cleaning in Skipton
Given the awful original condition of this floor, the results achieved over the space of two days were very good. Certainly my customer was very pleased with the transformation. The addition of a robust surface seal will go a long way to ensure the floor doesn’t fall back into such a bad state again.

Restoring the Appearance of an Indian Fossil Sandstone Flagstone Floor in North Yorkshire

Indian Fossil Stone Floor in Terrible Condition Restored in Skipton Read More »

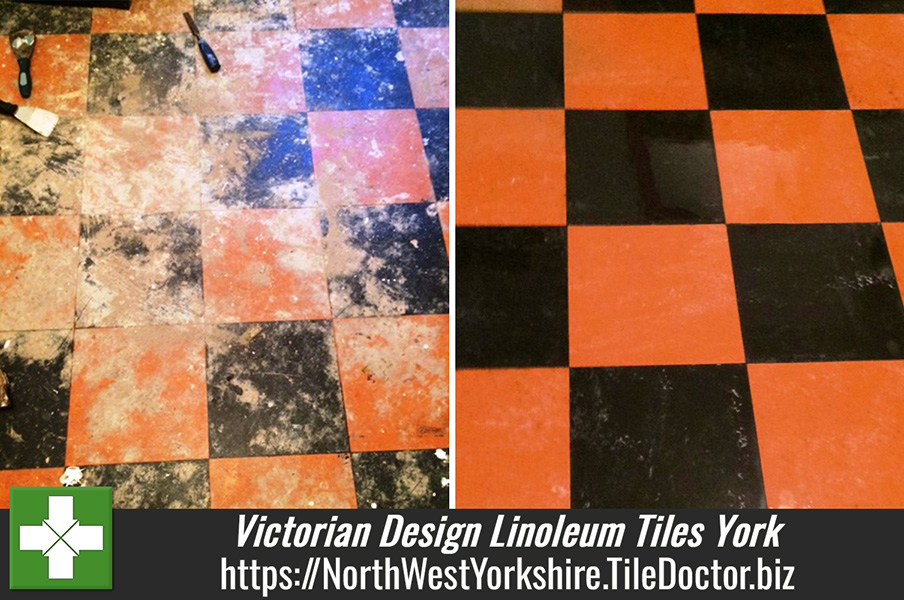
Linoleum Tiled Floor Before and After Restoration in York

Victorian Design Linoleum Tiles Restored in York

Here’s an interesting job I recently completed at a house near the centre of York, the biggest town in North Yorkshire and famous for its Viking history. My client had initially emailed me some pictures of her tiles which, upon first inspection, looked like Black and Red Victorian tiles. This was also the opinion of my client and her friend, who is a builder.

Linoleum Tiled Floor Before Restoration in York
The floor had previously been covered by carpet, which was fixed down by adhesive. As such, the newly unveiled floor was in a bit of a state, with adhesive markings ruining the appearance of the tiles. I agreed a date with my client to give the tiles a closer inspection.

Restoring Linoleum Vinyl flooring

Upon my arrival at the house, I discovered that the floor was in fact made up of linoleum, rather than Victorian tiles. This was a surprise to me as Tile Doctor don’t usually get asked to work on Vinyl flooring. Nonetheless, I agreed to restore the floor to the best of my abilities.

To clean the floor, I started with a blunt chisel (so not to puncture or tear the Lino) and proceeded to scrape off all the glue and plaster from the floor. Had the tiles been unpolished natural stone I would’ve used a product such as Tile Doctor Remove & Go to break down the adhesive markings.

The next step was to restore the appearance of the floor using a combination of Tile Doctor Pro-Clean mixed with Grout Clean-up. The latter product contains phosphoric acid to break down any remaining cement, while the former is a versatile, high alkaline cleaner.

Linoleum Tiled Floor During Restoration in York
Finally, the floor was given a thorough rinse with clean water to remove any trace of chemical and then sealed with a Linoleum sealer.

Despite not coming across this type of floor often, I am very pleased with the results I was able to achieve. Needless to say, my client was also very happy with what is essentially a fantastic new feature for her house.

Linoleum Tiled Floor After Restoration in York
 

Restoring Linoleum Vinyl Flooring in Yorkshire

Victorian Design Linoleum Tiles Restored in York Read More »

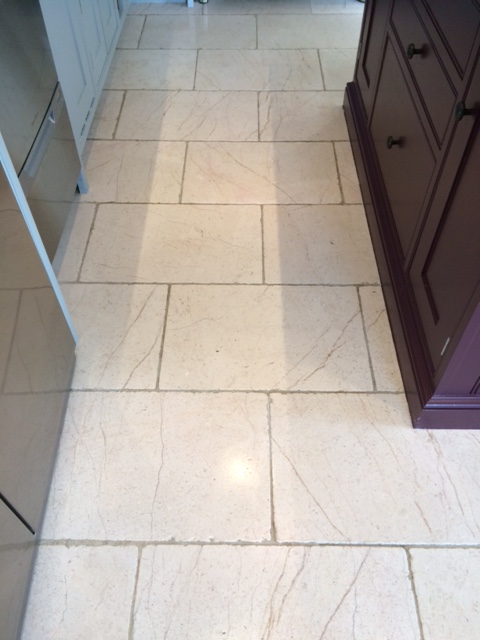
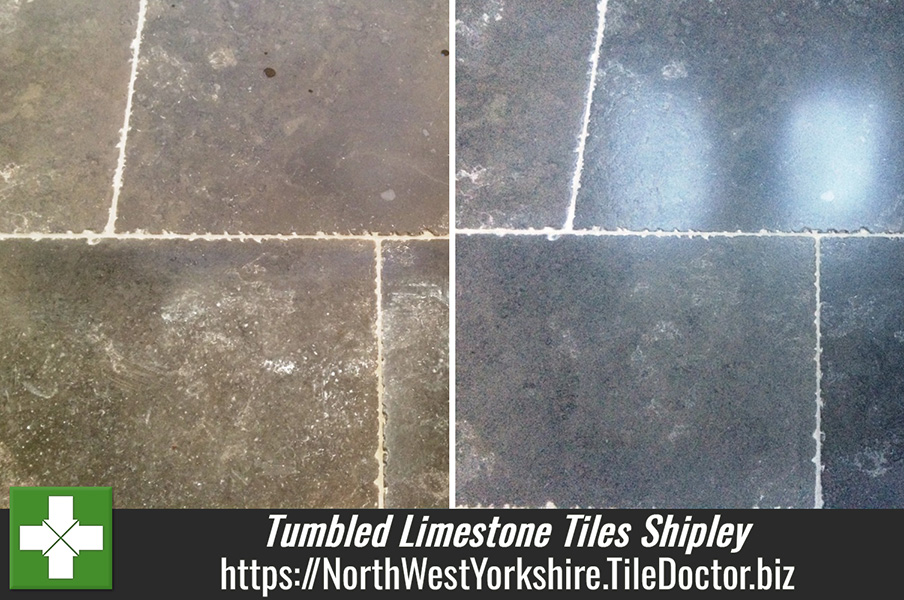
Ca Pietra Hazlebury Tumbled Limestone in shipley After Polishing

Grout Haze on Expensive Tumbled Limestone Tiles in Shipley

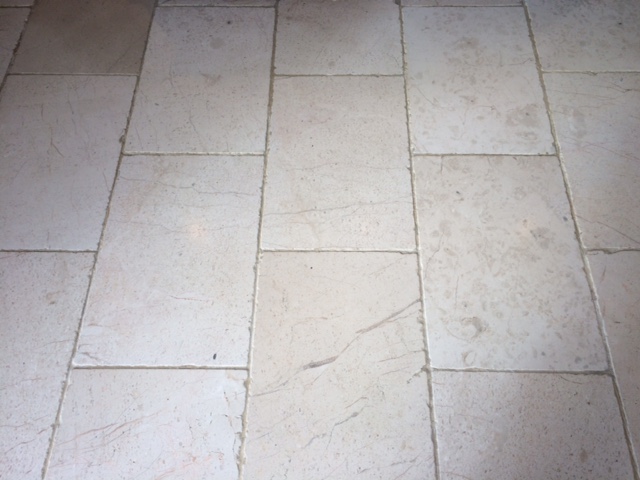
Details below of a recently laid Ca Pietra Hazlebury Tumbled Limestone tiled floor that retails at £180m2 and should have been stunning however the fitter had ruined it and left it covered in grout haze. The owner of the house in Shipley was unable to get the problem resolved and asked us to take a look.

Ca Pietra Hazlebury Tumbled Limestone in shipley covered in Grout Haze

Removing Grout Haze from Tumbled Limestone Tiles

To restore the appearance of the stone it was necessary to wash the surface in an acid based product called Tile Doctor Grout Clean-Up which is diluted with water and left to dwell on the surface for 1 to 2 minutes before being scrubbed in. Limestone is especially sensitive to acids so you really do have to work fast and wash it off as soon as it’s done its job followed by a thorough rinse with fresh water.

Once the floor was free of the grout it was given a thorough clean with a strong dilution of Tile Doctor Pro-Clean which is a strong alkaline cleaner and sealer remover. This was worked into the floor using a scrubbing pad fitted to a rotary machine and the resultant soiled solution removed with a wet vacuum. After this the floor was given another thorough rinse and then left for two days so it could dry out.

Polishing and Sealing Tumbled Limestone Tiles

With the grout haze removed we were able to bring back the polish on the Limestone using a very fine 3000 grit burnishing pad attached to a rotary machine.

Ca Pietra Hazlebury Tumbled Limestone in shipley After Polishing
The tiles were then sealed using coats of Tile Doctor Ultra Seal which is a penetrating sealer that soaks into the pores of the stone filling them so dirt can’t penetrate below the surface but without changing the appearance of the stone. It’s highly recommended for Polished Limestone and will provide on-going stain protection.

Ca Pietra Hazlebury Tumbled Limestone in shipley After Polishing
The resulting transformation was remarkable and as you can image the customer was highly delighted.

Tumbled Limestone Floor Problems Resolved in North West Yorkshire

Grout Haze on Expensive Tumbled Limestone Tiles in Shipley Read More »

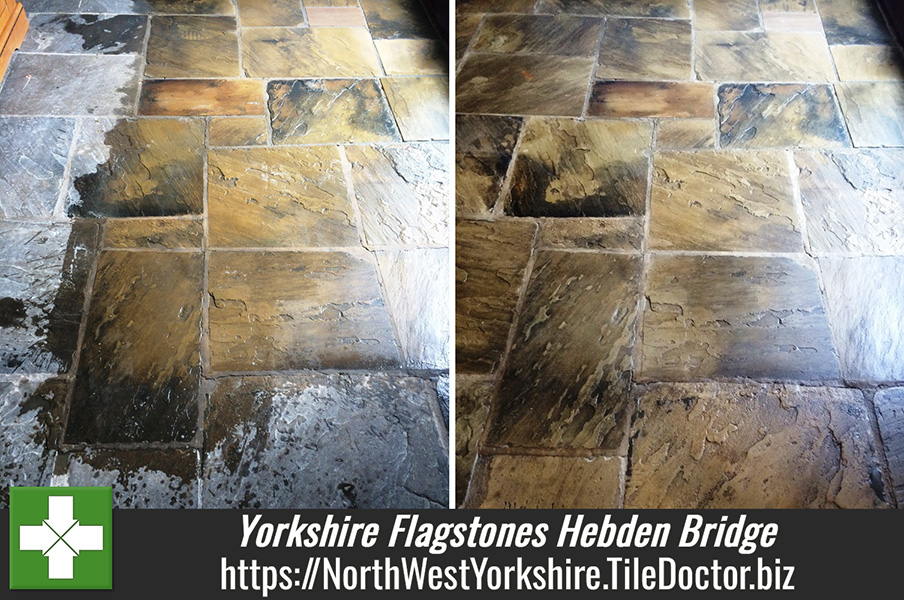
Yorkshire Stone Hebden Bridge After Cleaning

Yorkshire Flagstones Cleaned and Sealed in Hebden Bridge

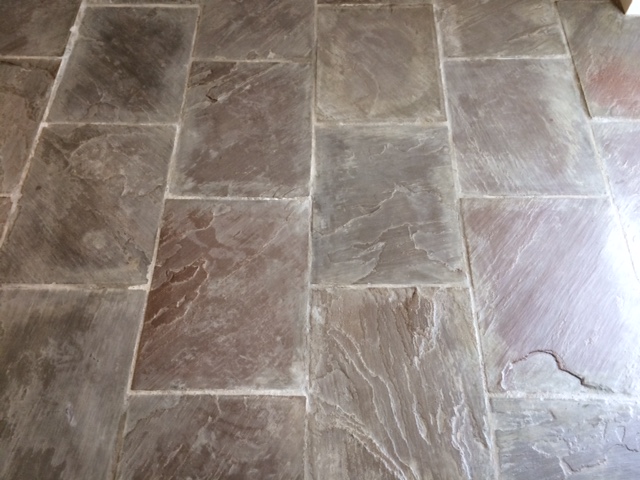
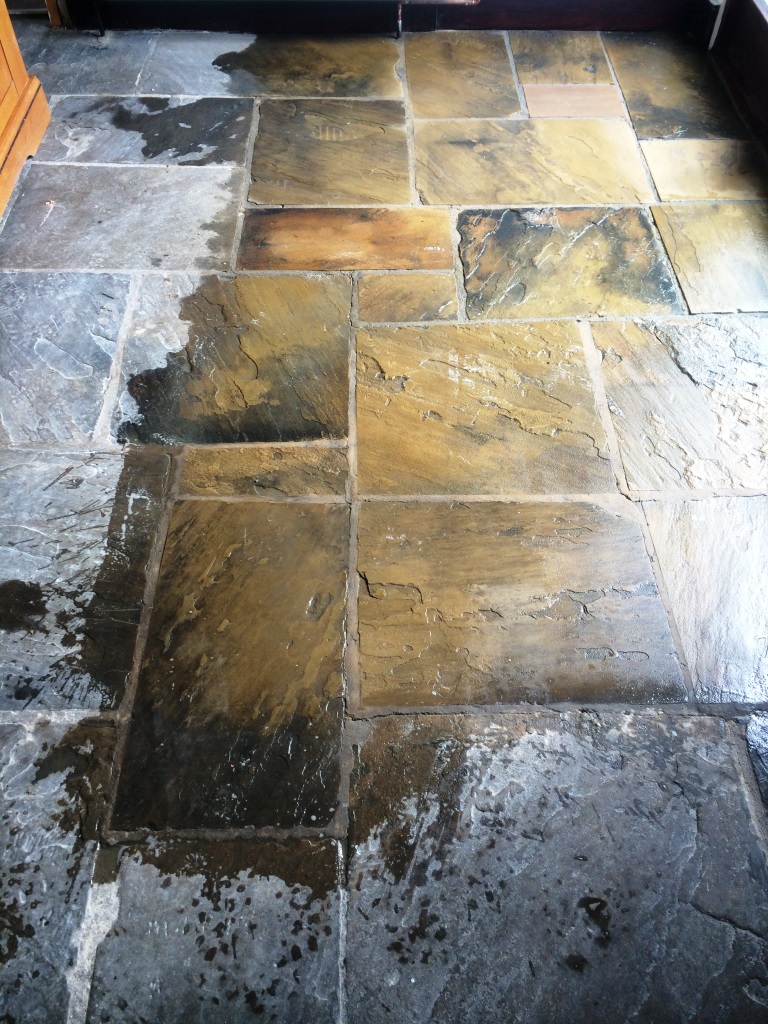
The photographs below are of an 18m2 Yorkshire Stone floor in the kitchen of a barn conversion in the village of Hebden Bridge. The flagstones which appeared to be various shades of dark grey had lost any colour and vitality they once had, in fact they only seemed to come alive when wet and once dry the natural features and colours of the Yorkshire stone faded away. This was caused by the sealer being worn away allowing dirt to become ingrained in the stone making it difficult to properly clean.

Yorkshire Stone Hebden Bridge During Cleaning

Cleaning Yorkshire Stone

To restore the natural appearance the floor was soaked in a 1:2 dilution of Tile Doctor Pro-Clean and then scrubbed clean using a rotary machine fitted with a black pad. Pro-Clean is an industrial strength alkaline cleaning product that is safe to use on Tile, Stone and Grout; for best results you should let the Pro-Clean dwell on the floor for around ten to fifteen minutes before working it in. The soiled cleaning solution was removed using a wet vacuum and then the whole floor washed down with water and stubborn areas re-treated until I was satisfied that the flagstone and grout was as clean as I could get it.

Sealing Yorkshire Stone

The floor was left to dry overnight and I returned the nexst day to seal the floor first checking it for dampness using a Damp Meter. The flagstones were dry so I then proceeded to seal the floor using four coats of Tile Doctor Seal and Go which adds a nice subtle sheen to natural stone, it also a water based sealer so there’s no smell.

Yorkshire Stone Hebden Bridge After Cleaning
The look of the Yorkshire flagstones was restored and the owner of the house left the following comment on the Tile Doctor feedback system.

Very professional service. Very happy with the results, Ms. E. Parkin

Cleaning Yorkshire Flagstone Tiled Kitchen Floor in Hebden Bridge

Yorkshire Flagstones Cleaned and Sealed in Hebden Bridge Read More »
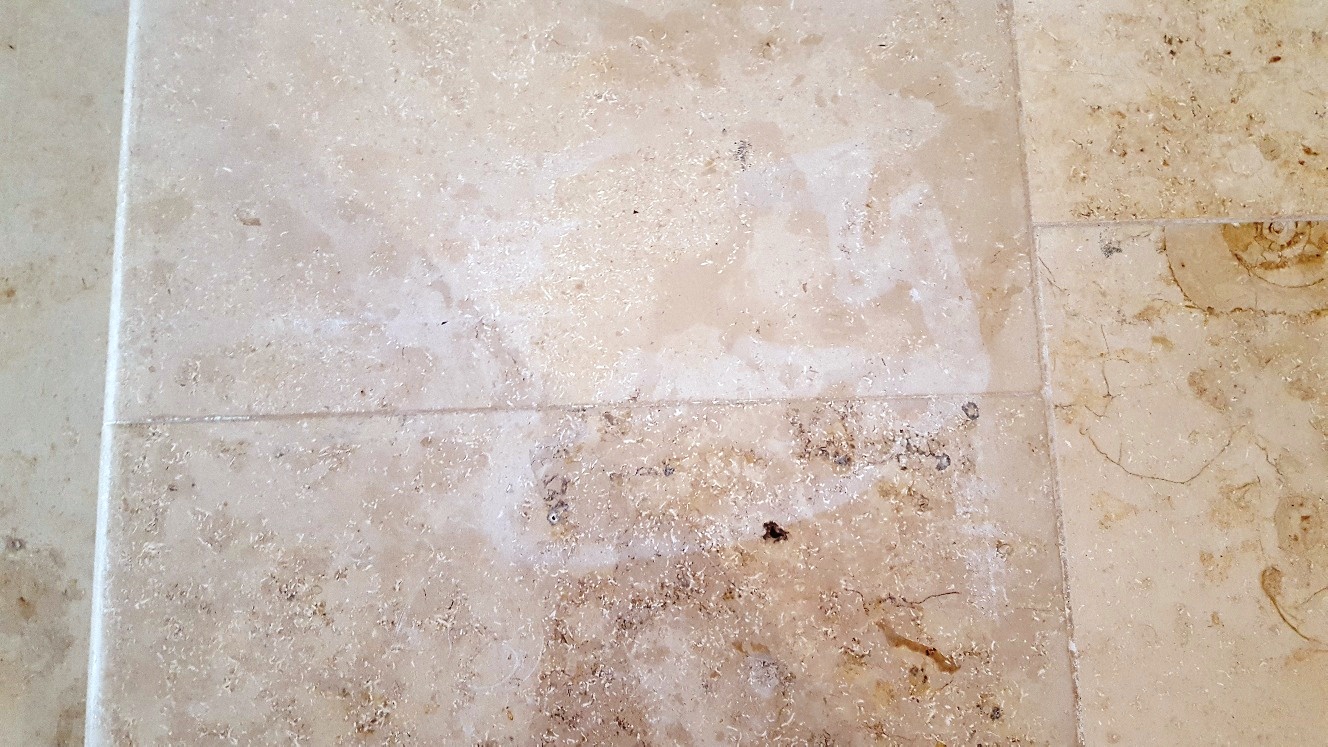
York Minster Limestone After Cleaning Harrogate

Limestone Flagstone Floor Cleaned and Polished in Austwick

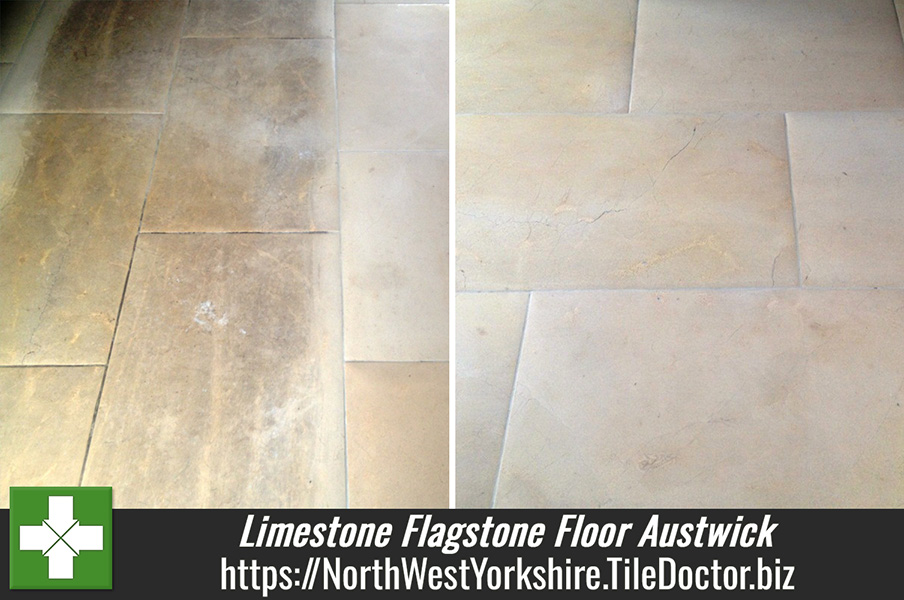
These rather dirty but beautiful classic Minster Limestone flagstones had been installed in the Kitchen of a house in the village of Austwick. They were now overdue for a deep clean and polish and so we were asked to do to the work.

York Minster Limestone Before Cleaning Harrogate York Minster Limestone Stairs Before Cleaning Harrogate

Stripping and Polishing Limestone Floor Tiles

To restore the surface of polished stone we use a set of diamond encrusted pads however before starting we gave the floor tiles a general clean with a dilution of Tile Doctor Pro-Clean mainly to clean-up the grout and secondly to remove any loose surface grit. This was rinsed away and removed with a wet vacuum before starting the burnishing process using a rotary scrubbing machine fitted with a coarse diamond encrusted burnishing pad and a little water. The coarse pad strips off dirt and old sealers from the tile and the resulting slurry is then removed using a wet vacuum.

The burnishing pads come in a set of four so once we were done with the coarse pad we moved on to the Medium and then Fine pads again with a little water until the floor was polished. To bring up the polish on the Limestone tiles the last “Very Fine” pad was fitted to the rotary machine and run over the floor to buff it to a nice shine.

York Minster Limestone During Cleaning Harrogate York Minster Limestone During Cleaning Harrogate

Sealing Limestone Floor Tiles

Once the floor was dry we set about sealing it using two coats of Tile Doctor Ultra Seal which is a penetrating sealer that soaks into the pores of the stone filling them so dirt can’t penetrate below the surface. As well as offering excellent protection Ultra Seal doesn’t enhance the stone the stone in anyway giving it a natural look. Once sealing was complete and dry the Limestone tiles were given a final buff with a soft white pad.

York Minster Limestone After Cleaning Harrogate York Minster Limestone After Cleaning Harrogate

I think you will agree that the Limestone tiles now look much better and now that’s it’s been sealed cleaning the floor should be so much easier.

Minster Limestone Flags Cleaned, Polished and Sealed in Yorkshire

Limestone Flagstone Floor Cleaned and Polished in Austwick Read More »

Victorian Tiles Skipton After Cleaning

100 Year Old Victorian Tiled Floor Restored in Skipton

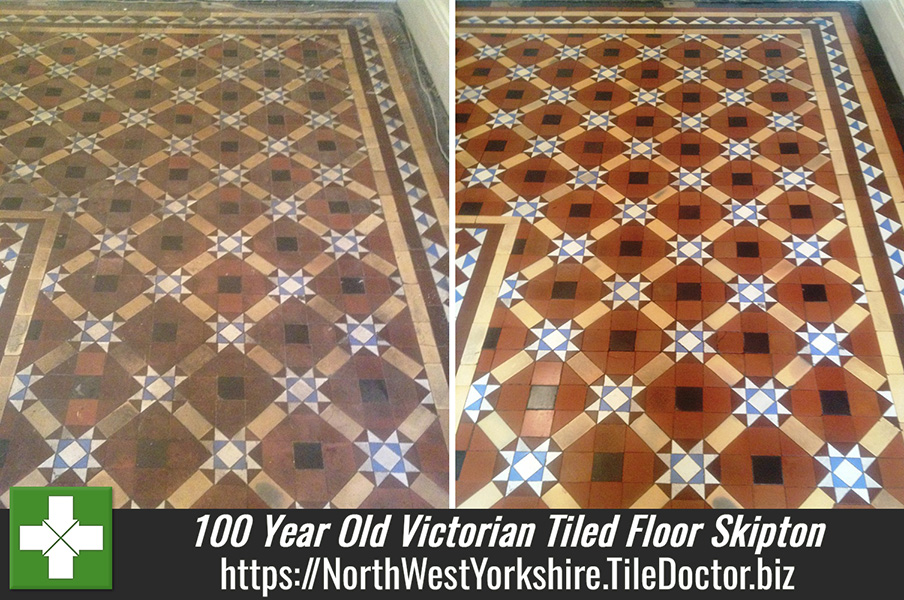
This one hundred year old floor needed some serious cleaning; these Orange and Black Victorian tiles installed in the hallway of a period house in Skipton, North Yorkshire had paint, glue and around twenty years of ingrained dirt on them due to previously being covered in carpet.

Victorian Tiles Skipton Before Cleaning Victorian Tiles Skipton Before Cleaning

Restoring Victorian Floor Tiles

To restore the tile surface we used a process we call the Blanket method which involves covering the floor in a mixture of Tile Doctor Remove & Go and Nano Tech Ultra Clean. The whole floor was covered very liberally with the chemical mixture and then sheeted over with polythene and sealed all the way round with water proof tape. There must be a perfect seal so no chemicals can dry out by oxidation and is left over night to soak into the tile.

The next day the polythene was removed in sections and the chemicals were first cleaned off with rags and then rinsed of many times with warm water. The whole floor was then scrubbed with a rotary machine fitted with a black pad and Tile Doctor Pro-Clean mixed 1 to 4 parts warm water to remove all the residue of the chemicals and any dirt. Pro-Clean is an industrial strength cleaning product that is safe to use on Tile, Stone and Grout.

Sealing the Victorian Tiled Floor

The next day I returned and checked the floor for dampness using a Damp Meter which indicated the floor was dry and ready for sealing. Three coats of sealant was used and for Victorian Floor tiles I recommend Tile Doctor Seal and Go which provides a low sheen finish whilst offering great stain protection.

Victorian Tiles Skipton After Cleaning Victorian Tiles Skipton After Cleaning

The 100 year old floor now looks almost as new and I think you will agree it has been transformed.

Cleaning a Victorian Tiled Floor in Skipton

100 Year Old Victorian Tiled Floor Restored in Skipton Read More »

Quarry Tiles In Great Ouseburn After Cleaning

Quarry Tiled Floor Cleaned and Sealed in Great Ouseburn

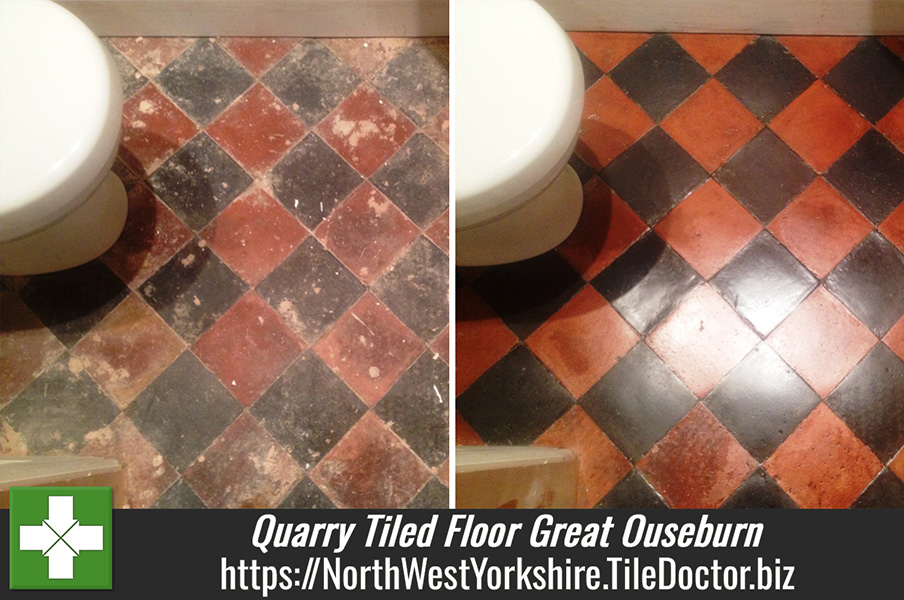
This Quarry tiled floor was in the hallway of a residence in Great Ouseburn near York, the tiles were in a dreadful state with plaster, carpet glue and what appeared to be one hundred years of dirt. Were often being asked to restore old tiled floors that have been hidden under carpet since the 1970 when taste’s changes and this one seemed no different.

Quarry Tiles In Great Ouseburn Before Cleaning Quarry Tiles In Great Ouseburn Before Cleaning

Cleaning Hallway Quarry Tiles

To tackle the glue the floor was covered with a dilution of Tile Doctor Remove and Go which was left to dwell on the floor for an hour to soften before being scrapped off with a paint scrapper. I should mention Remove and Go is a powerful coatings remover which is safe to use on tile and stone. Once happy with that all traces of the glue had been removed the floor was washed down with clean water and the solution was removed using a wet vacuum.

The plaster was then attacked with Tile Doctor Grout Clean-Up which is an Acid based product that we normally use for removing grout smears from tiles however it works just as well with plaster and can also remove mineral deposits and rust stains. You have to be quick with an acid on tile though as prolonged exposure can damage the tile, once done the tiles were washed down again.

The next step was to scrub the whole floor using a rotary machine fitted with a black scrubbing pad and a strong one to one dilution of Tile Doctor Pro-Clean to ensure we have removed all the dirt and grime for the tile, again once done the floor was rinsed with clean water to neutralise the tile before sealing. The wet vacuum was used again to remove the soiled cleaning solution and reduce the drying time of the floor.

Sealing Hallway Quarry Tiles

We returned the next day to seal the floor which we did using four coats of Tile Doctor Seal and Go which will provide protection going forward and also leaves a beautiful satin finish on the surface of the tile. The customers were very surprised and happy with the results, it’s a great bonus when you exceed a customer’s expectations.

Quarry Tiles In Great Ouseburn After Cleaning Quarry Tiles In Great Ouseburn After Cleaning


Old Quarry Tiles Restored in Great Ouseburn near York

Quarry Tiled Floor Cleaned and Sealed in Great Ouseburn Read More »
=================================

North West Yorkshire Tile Doctor

================================= Read More »
Scroll to Top