Pro-Clean

Terracotta Tiled Floor Renovation Ripon

Varnish Coated Terracotta Tiled Flooring Renovated in 1780’s Property Ripon

The photographs below are of a tired Terracotta floor in a 1780’s property in the cathedral city of Ripon. The floor ran throughout the living room, into the hallway and by the side entrance was a stone tiled area, both of which needed a deep clean and seal.

Terracotta Tiled Floor Before Renovation Ripon Terracotta Tiled Floor Before Renovation Ripon

I had a good idea of what the floor would need but to clean and seal it but with Terracotta you can never be sure what coatings may have been applied previously, in fact Wax is often used and this can be a struggle to remove. To ensure there were no surprises I arranged an appointment to visit the property and survey the floor. This would also enable me to work out a detailed price for deep cleaning the terracotta tiles and grout and then sealing it.

Terracotta Tiled Floor Before Renovation Ripon

After running some tests, it seemed to be the floor had in face been coated with Varnish and some type of surface sealer. This had since worn down in the most trafficked areas and dirt was not making its way into the pores of the Terracotta leaving it looking dull. This is quite common with terracotta; being made from clay it is very porous and does need a lot of sealer to prevent that from happening.

Happy with my quote I was given the go ahead to renovate the floor but with the stipulation that the work had to be completed in two days due to the owners’ commitments. It was a reasonably large floor so it would be a push but it could be done so a date was agreed for the work to start.

Cleaning a Terracotta Tiled Hallway Floor

To clean the floor and remove what remained of the previous protective coatings the floor was sprayed with a strong dilution of Tile Doctor Remove & Go. This was then left to soak in for ten to fifteen minutes to give it time to break down the coatings and ingrained dirt. The solution was then worked into using a Black Pad fitted to a rotary machine. Once done the floor was rinsed with water and the soils extracted with a wet vacuum.

The floor was inspected, and any problem areas retreated using the same process until I was happy with the floor. Once done the grout lines were scrubbed using Tile Doctor Pro-Clean worked in by hand with a stiff brush.

Once the floor was clean it was rinsed again and the dried thoroughly with the wet vacuum. Two floor dryer fans were then left in place to help the floor to dry out ready for the next day.

Sealing a Terracotta Tiled Hallway Floor

The next morning moisture reading were taken from the tiles to ensure they had dried off sufficiently overnight and were now ready for sealing. This confirmed the floor fans had done the job and with the results within tolerance we had a green light to apply the sealer.

On this occasion and due to the age of the property Tile Doctor X-Tra Seal was used to seal the Terracotta. With old properties you can’t be certain a damp-proof membrane is present under the floor so it’s best to use a fully breathable product that can cope with potential dampness. X-Tra Seal allows for moisture transmission and is also a hard-wearing impregnator that’s rated for external use so ideal for hallways. Being an impregnator it soaks into the pores of the tile protecting it from within and ensuring any dirt remains on the surface where it can be easily cleaned away.

Terracotta Tiled Floor After Renovation Ripon

Once done the floor looked much cleaner and brighter and the new sealer should ensure it remains that way for many years to come. My customer was highly delighted and left the following feedback:

“Great service from Chris over the last 2 days thoroughly cleaning & resealing very old quarry tile floors & a stone porch floor at my house. He worked incredibly hard & the results look fantastic. Really pleased & would certainly recommend. Thanks a lot, Chris!”

For aftercare cleaning I recommended Tile Doctor Neutral Tile Cleaner which is a mild yet effective cleaning product that won’t affect the sealer.

Terracotta Tiled Floor After Renovation Ripon Terracotta Tiled Floor After Renovation Ripon


Professional Restoration of a Terracotta Tiled Hallway in Northwest Yorkshire

Varnish Coated Terracotta Tiled Flooring Renovated in 1780’s Property Ripon Read More »

Limestone Floor Restoration Burley in Wharfedale

Limestone Tiled Kitchen Floor Repair and Restoration in Burley in Wharfedale

The photos below are of a Limestone tiled kitchen floor with an inset of coloured stone at a 200-year-old cottage in Burley in Wharfedale near Ilkley. The stone floor was overdue a deep clean and seal and some of the inset flagstones were damaged and uneven. Looking for a solution, the owner had tried other companies before us so by the time I got to look at the floor some repairs had already been attempted although not that successful.

Limestone Floor Before Restoration Burley in Wharfedale Limestone Floor Before Restoration Burley in Wharfedale

I popped over to survey the floor and recommended re-seating and repairing the cracked and uneven flagstones and then burnishing the floor with diamond burnishing pads to deep clean the stone and restore its appearance, then finally applying a fresh sealer to protect it going forward.

Happy with the quote I was asked to go ahead with the work and a date was scheduled.

Cleaning/Repairing a Limestone Tiled Kitchen

The first job was to repair the stone by carefully pulling out the uneven and damaged sections and then cleaning up the foundation. The existing stone was then cleaned up and fixed back in place, the cracks were then filled with epoxy mastic, colour matched to blend in with the original stone. It’s a lengthy process that requires a lot of attention to detail, but the alternative would have been to source matching replacement flagstones which given the age of the floor would have been tricky.

Limestone Floor During Repair Burley in Wharfedale Limestone Floor During Repair Burley in Wharfedale

Once the repairs had set, work started on the burnishing by applying the first of a set of four diamond encrusted burnishing pads. The first pad is a coarse 400-grit which was worked into the floor using a medium dilution of Tile Doctor Pro-Clean for extra cleaning power and lubrication. This combination increases the effectiveness of the pad and together removed ingrained dirt and remaining old sealer. The pad is applied using a rotary machine which had extra weight added to further increase traction with the stone.

Next up the grout was treated to a good scrub with more Pro-Clean which was worked into the grout by hand to ensure the best result. The tiles were a reasonably large format so it didn’t take too long to go round the whole floor cleaning the grout with this method.

The floor was then rinsed with water and the slurry extracted with a wet vacuum before repeating the process with finer 800 and 1500-grit pads that build up a nice subtle polish on the limestone and are applied using only with water. After rinsing the floor and extracting the soiling the last pad which is a super fine 3500-grit was applied dried to the tiles using only a little water sprayed onto the tile. This the final step in the cleaning and polishing process and added a lovely subtle sheen to the floor. These pads bring up the appearance of the stone as well as helping the repairs to blend in.

Sealing a Limestone Tiled Kitchen

Once the floor was dry as confirmed by a moisture meter the stone was sealed with a single coat of Tile Doctor Ultra-Seal. This is a premium almost invisible impregnating sealer which soaks into the stone, occupying the pores and thereby preventing dirt from becoming ingrained there. This ensures dirt remains on the surface where it can be easily cleaned away.

Limestone Floor After Repair Restoration Burley in Wharfedale

The result was a fully restored clean limestone floor with a subtle shine. My client was very pleased with the improvement and left the following testimonial:

“Very professional and pleasant. Willing to do what was needed to ensure the best job possible “

For the aftercare of polished and sealed stone floors I recommend Tile Doctor Stone Soap which is sealer friendly and contains a patina enhancer that will help the floor keep its polished appearance.


Professional Restoration of a Limestone Tiled Kitchen in Northwest Yorkshire

Limestone Tiled Kitchen Floor Repair and Restoration in Burley in Wharfedale Read More »

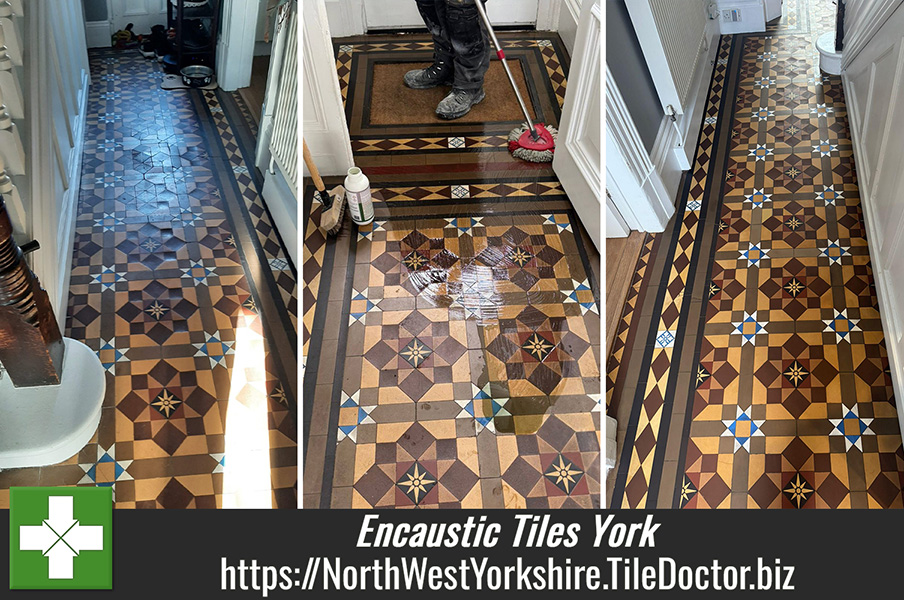
160 Year Old Encaustic Tiled Victorian Hallway floor Restoration York

Encaustic Tiled Victorian Hallway Floor Restored in York

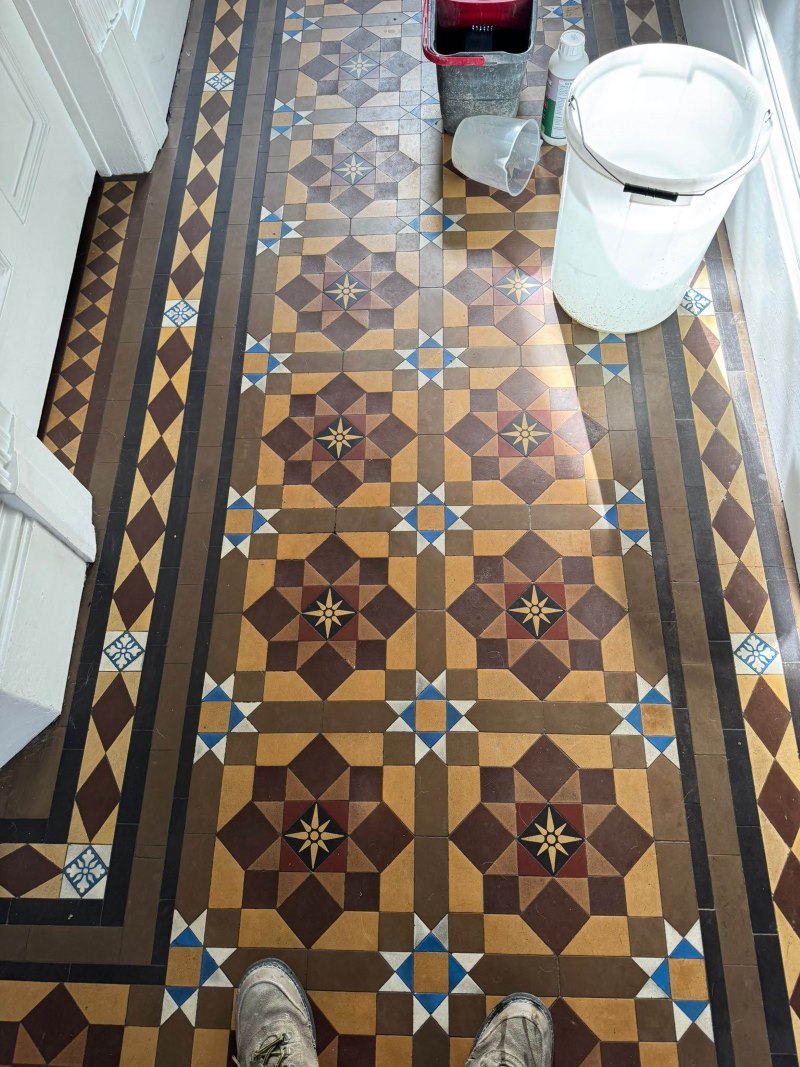
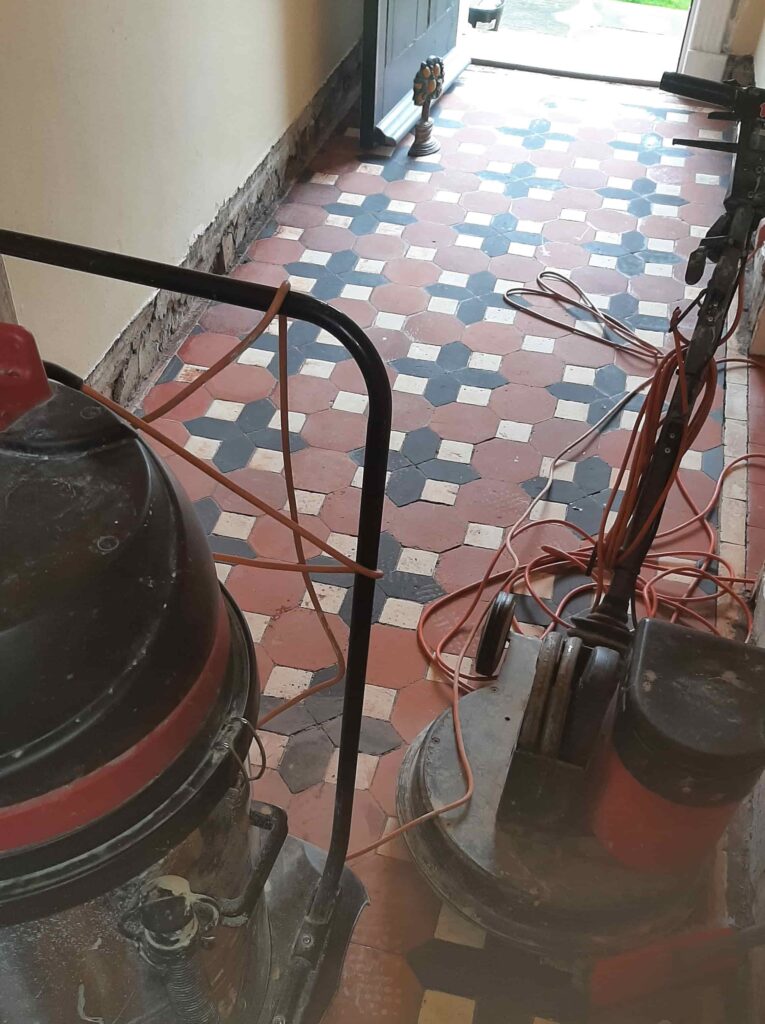
Detailed below is the renovation of an original encaustic tiled floor at a Victorian tiled property in York which was 160 years old. The floor had been cleaned regularly but unfortunately using the wrong cleaning products which were too strong and had prematurely stripped off the sealer. This had left the tiles vulnerable to ingrained dirt and were now proving difficult to keep clean.

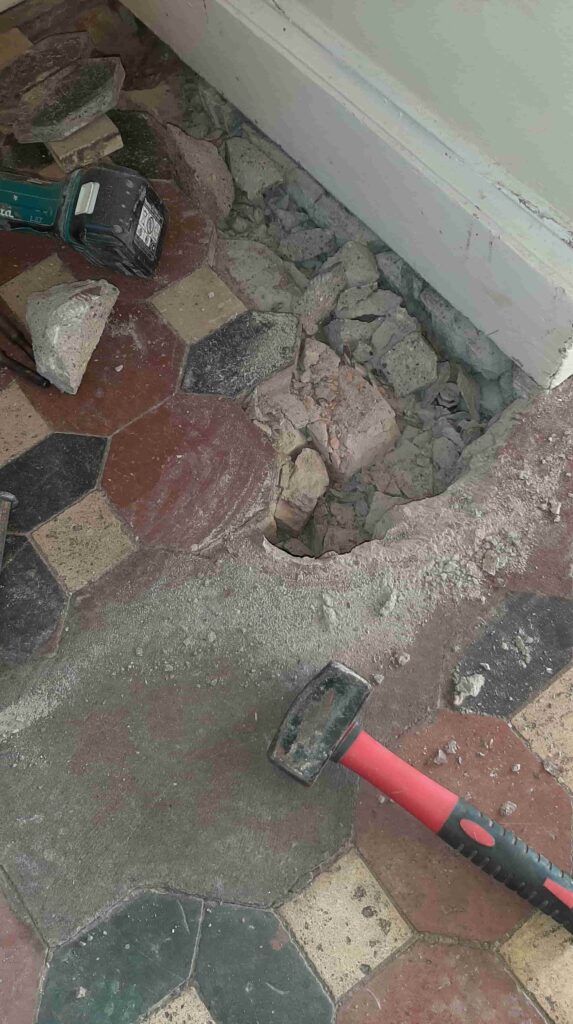
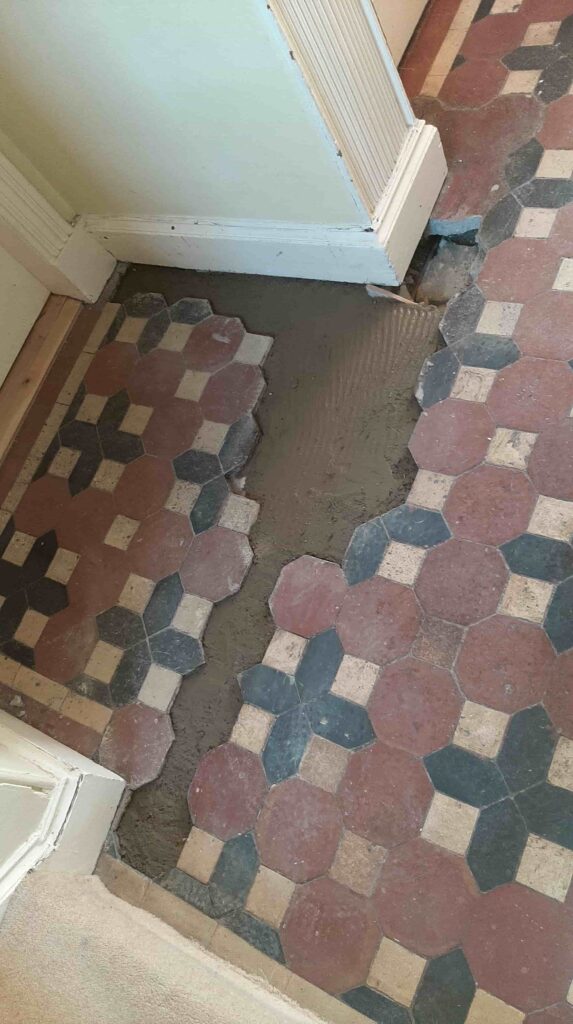
I went over to survey the floor and create a quote for its renovation and discovered areas where the tiles were loose and missing. One area in particular was quite bad and would need more attention to the foundation to make the floor completely level and easier to maintain.

160 Year Old Encaustic Tiled Victorian floor Before Cleaning York 160 Year Old Encaustic Tiled Victorian floor Before Cleaning York

From the survey I was able to create a plan for the restoration and work out a detailed quote that included replacement tiles and products. The quote was accepted and a date agreed for the work to start.

Cleaning an Encaustic Victorian Tiled Hallway

Before cleaning the floor, it was necessary to address all the problems with loose and damaged areas. So, work started with the removal of cracked and broken tiles. This needed to be done carefully so as not to lose any neighbouring tiles and therefore making the job larger than necessary. To solve the badly damaged area I had to remove the tiles and take away the lime mortar foundation underneath. This area then had to be re-levelled and made good before re-tiling with replacement reproduction tiles, I had sourced earlier.

Once the repairs had set properly, I returned to clean the whole floor using a rotary floor machine fitted with a black pad to scrub in a strong dilution of Tile Doctor Pro-Clean. This is an effective tile cleaner that lifts the dirt out of the tiles and removes what was left of the original sealer. This floor was then rinsed with water and the soiled solution extracted with a wet vacuum.

Next step was to give the floor and acid wash using Tile Doctor Grout Clean-Up which neutralises the floor after the use of Tile Doctor Pro-Clean which is alkaline. It also dissolves any salts which may be present in the floor and could appear as white efflorescence as the floor dries.

160 Year Old Encaustic Tiled Victorian floor During Cleaning York 160 Year Old Encaustic Tiled Victorian floor During Cleaning York

Next, I addressed some slight lippage issues that were inherent in the floor. To do this a very coarse 50-Grit milling pad was run over the raised areas to reduce them. I used a heavy polishing machine for this which has an automatic water feed for lubrication. After cleaning away the soiling that was generated, the process was repeated with a 200-grit milling pad to improve the appearance of the tiles.

Sealing an Encaustic Victorian Tiled Hallway

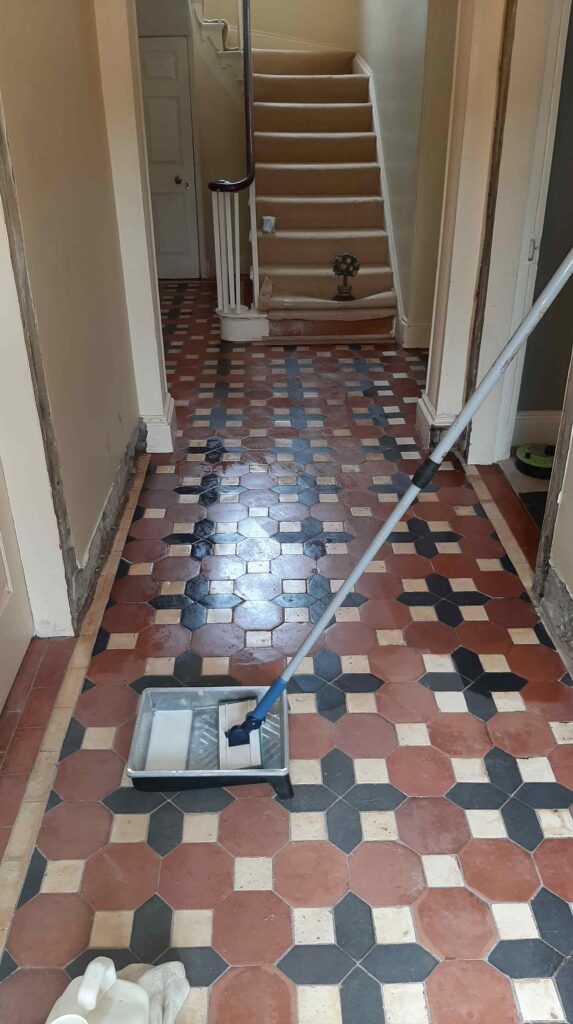
The floor was left to dry overnight and then on my next visit sealed with a couple of coats of Tile Doctor Colour Grow which is a fully breathable colour enhancing impregnator. It’s worth mentioning that using a breathable sealer is very important when choosing a sealer for old floors that don’t have a damp proof membrane.

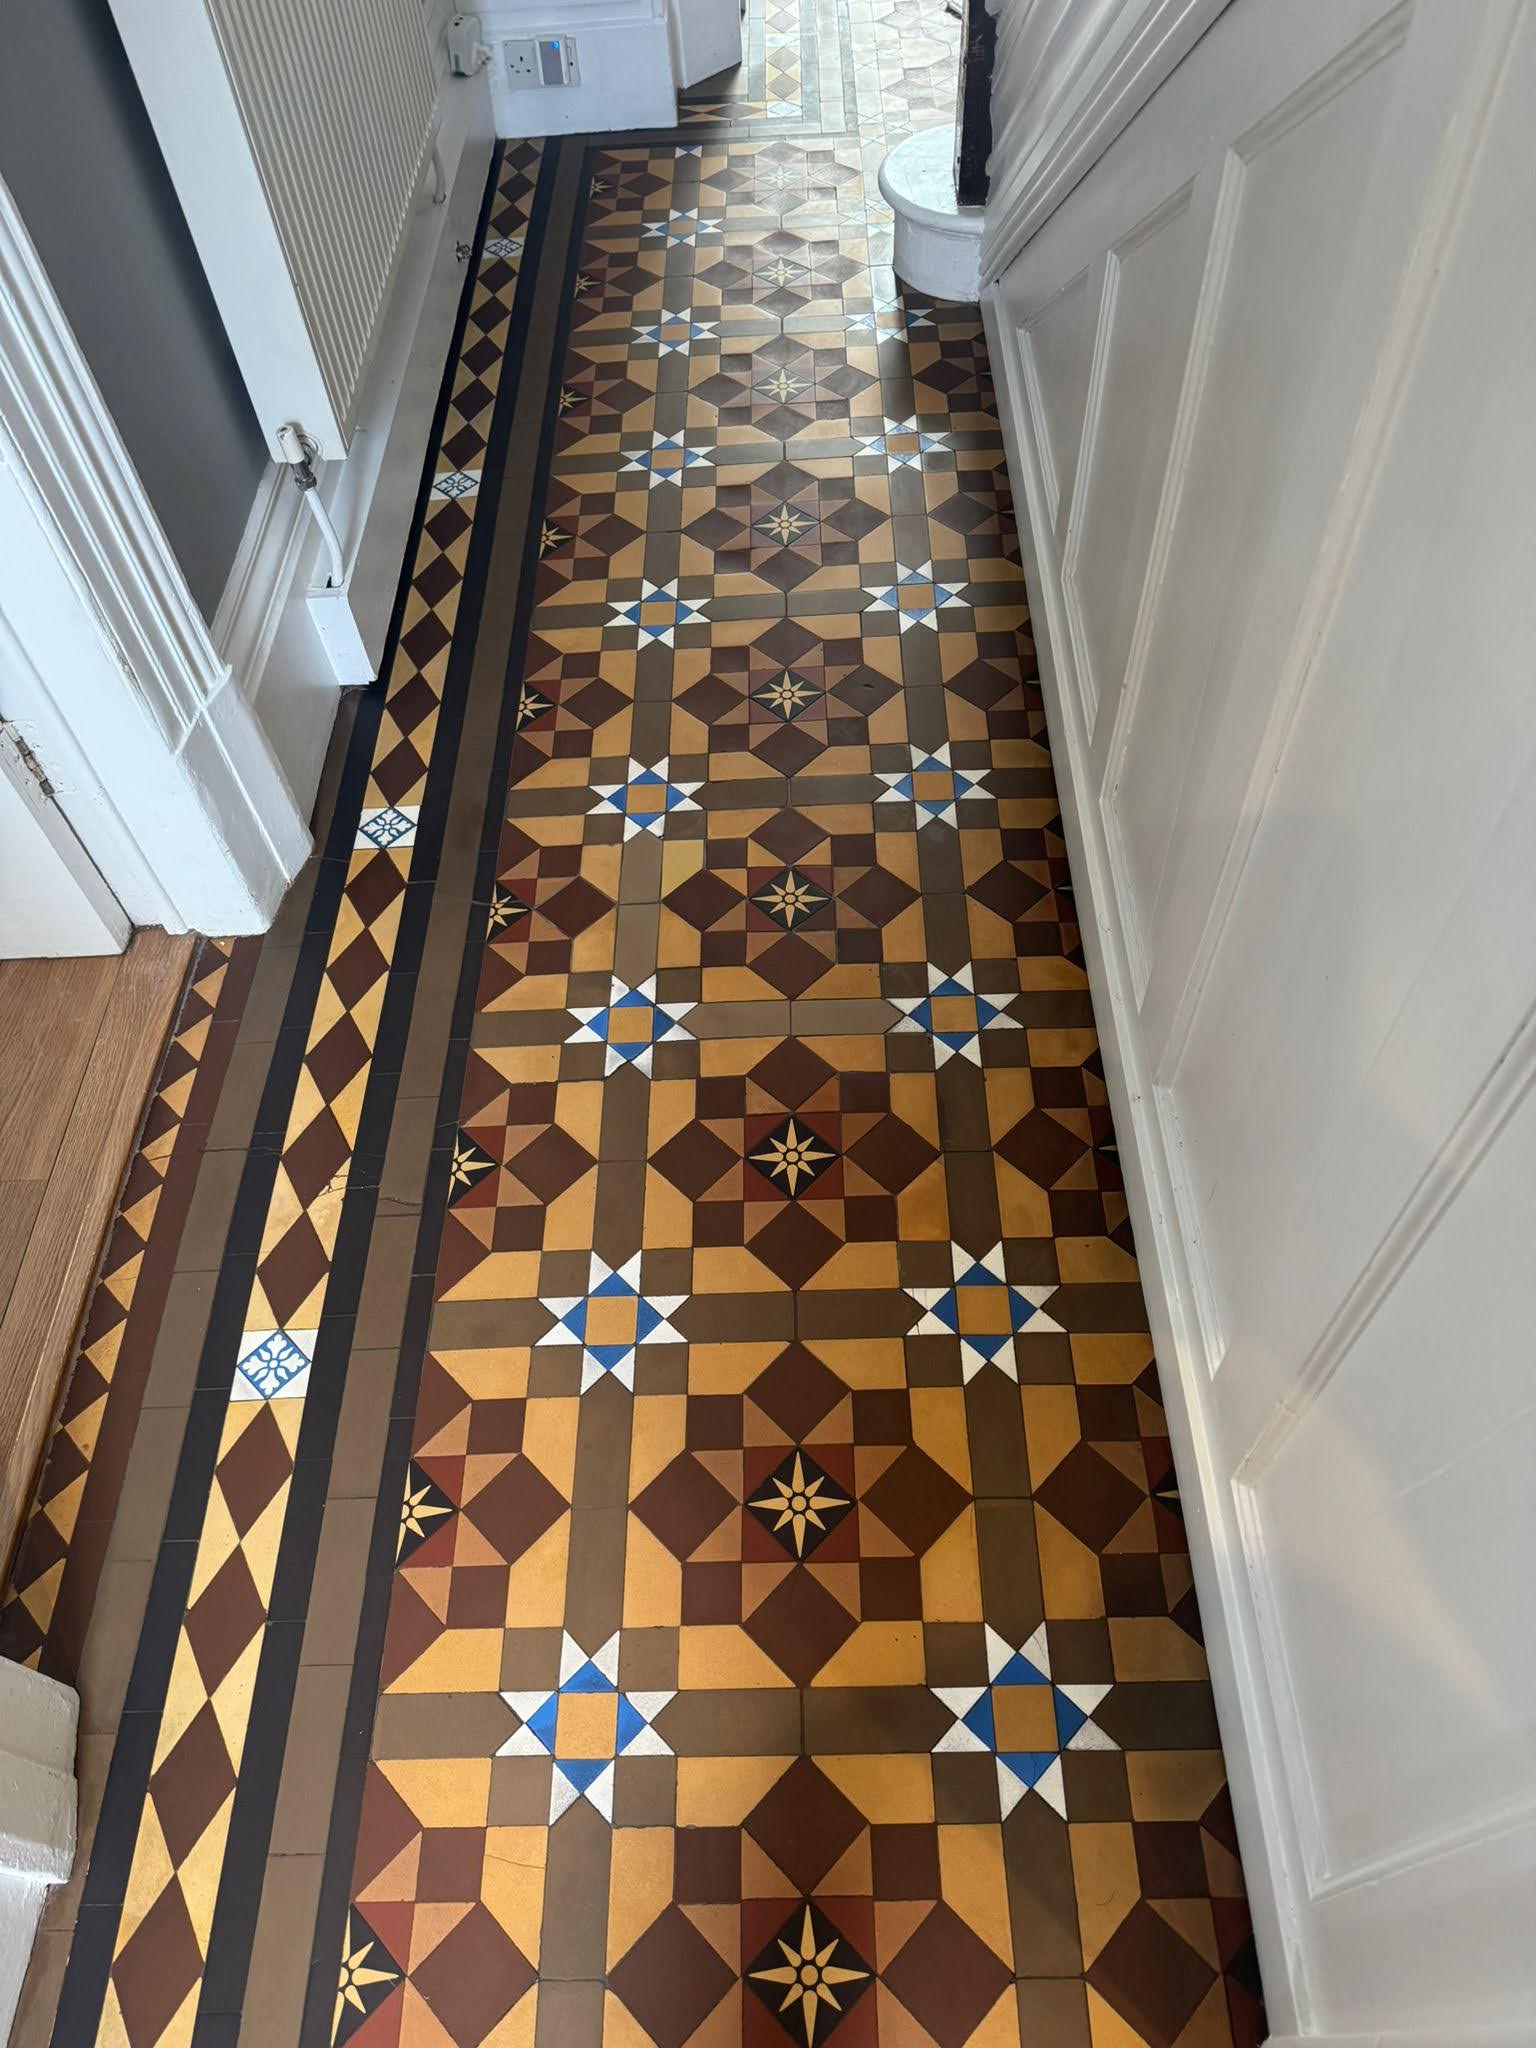
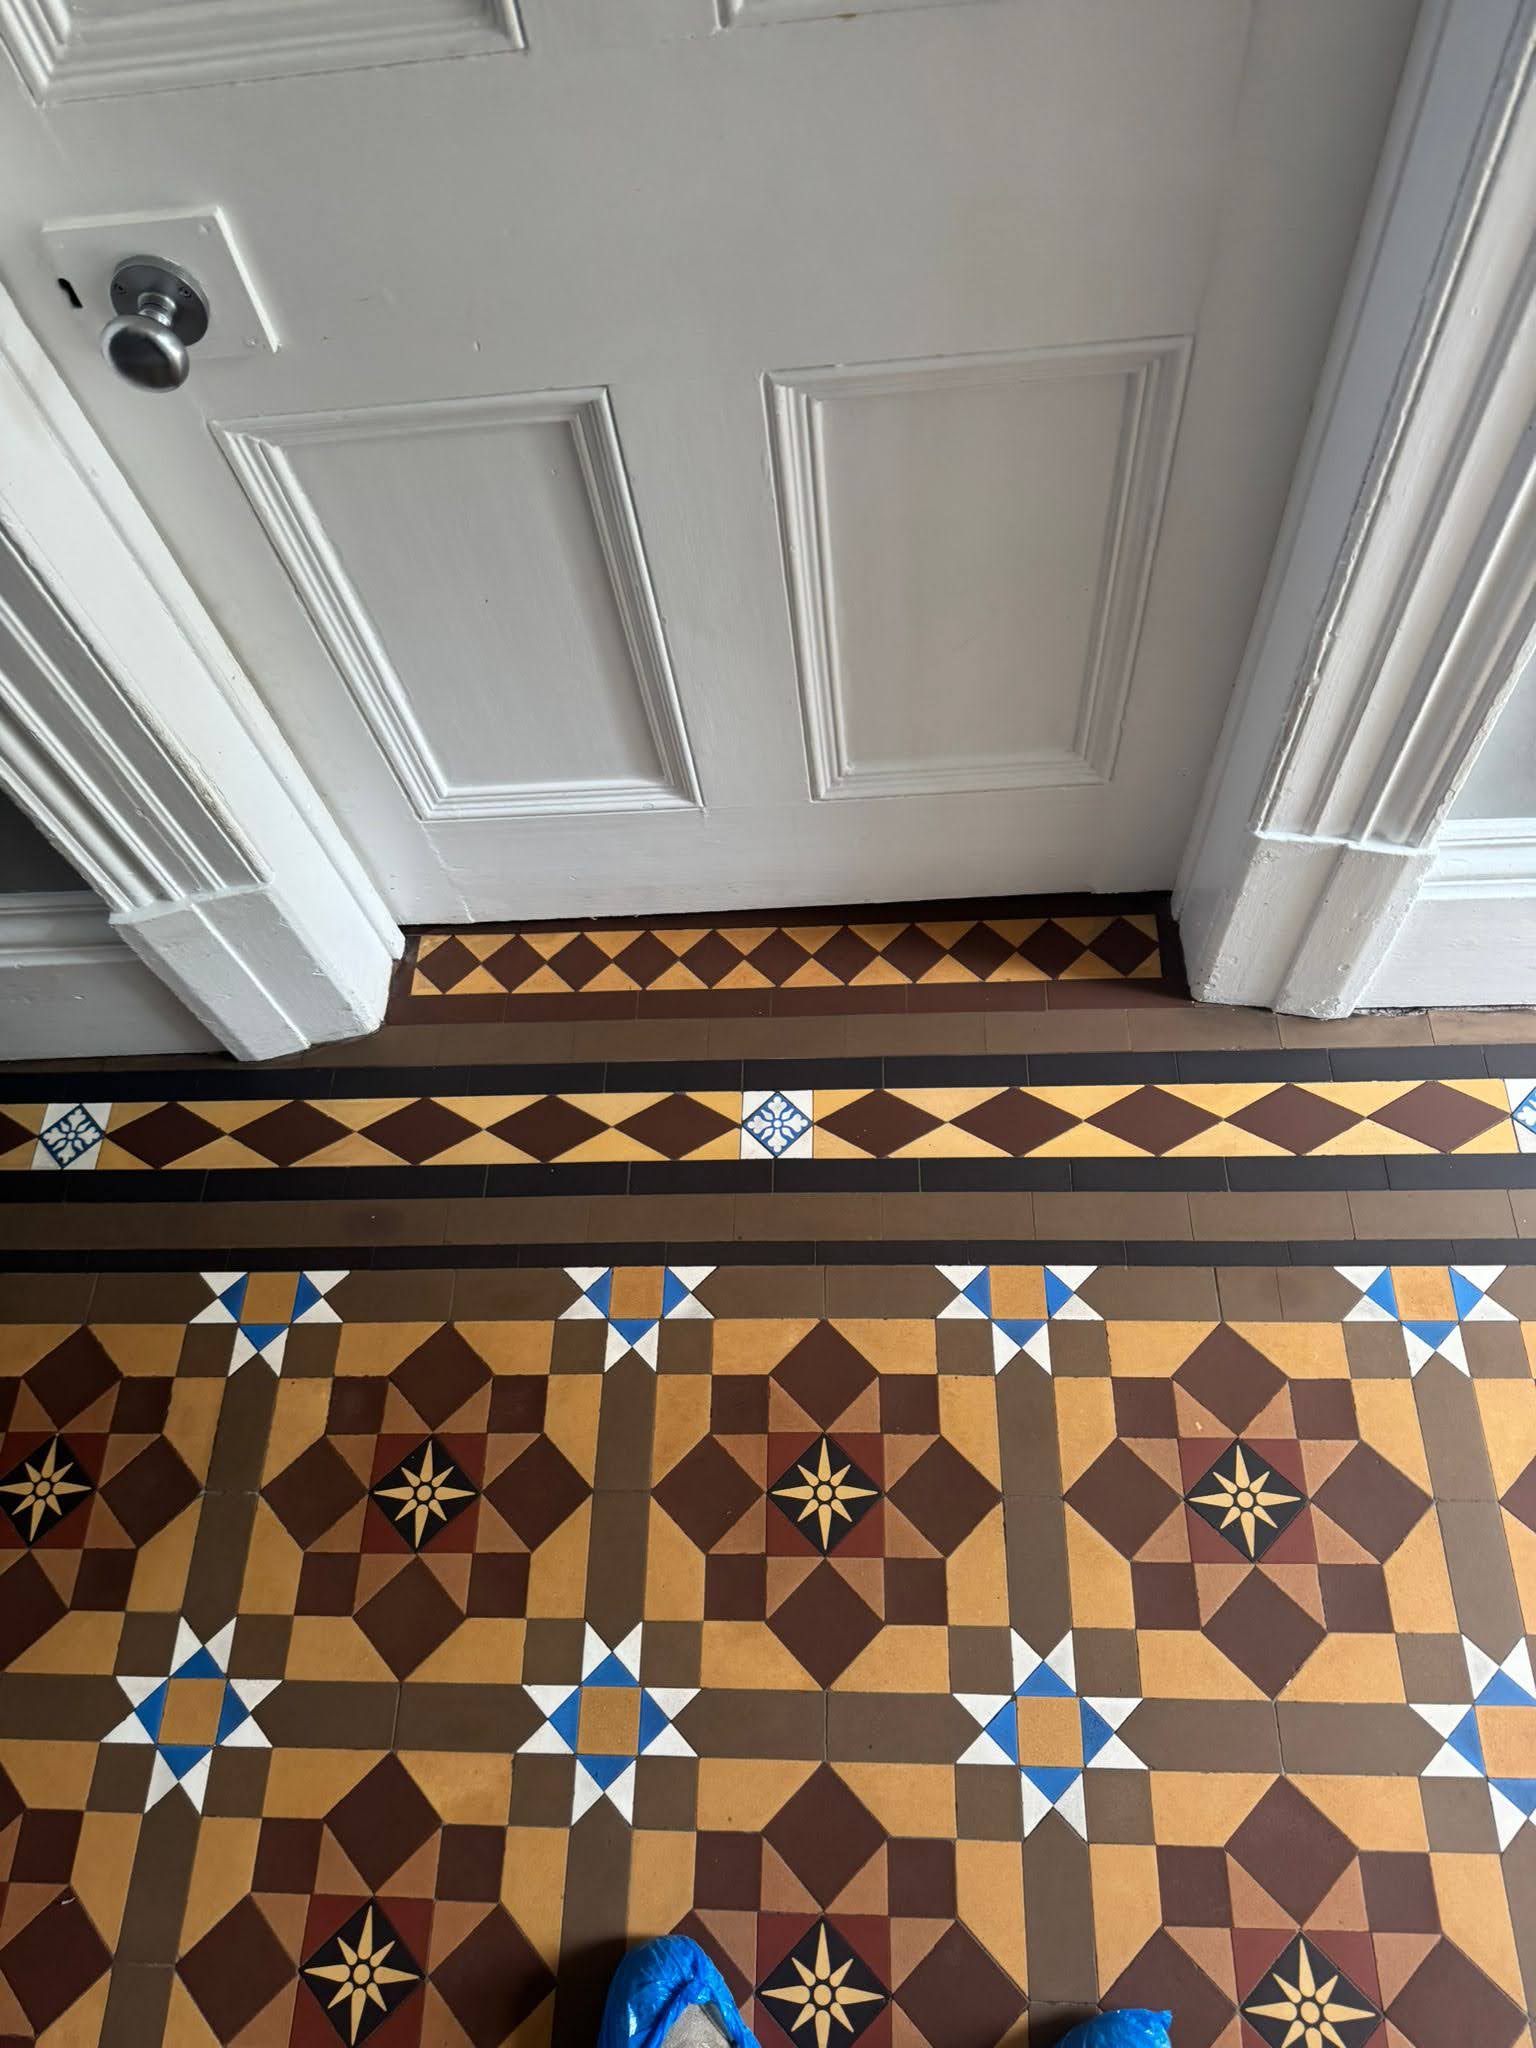
160 Year Old Encaustic Tiled Victorian floor After Restoration York 160 Year Old Encaustic Tiled Victorian floor After Restoration York

Once done, the repaired and restored floor looked much cleaner and made the whole hallway look more inviting. My client was happy with our work and left the following 5-star feedback:

“We had our Victorian hallway tiles refurbished, cleaned and sealed with amazing results. The hallway looks ready for another 150 years. Chris was professional and a real expert”

160 Year Old Encaustic Tiled Victorian floor After Restoration York

For aftercare I had arranged for the client to receive a bottle of Tile Doctor Stone Soap which is an appropriate cleaning product for the regular cleaning of sealed floors.


Professional Restoration of an Encaustic Victorian Tiled Hallway in North Yorkshire

Encaustic Tiled Victorian Hallway Floor Restored in York Read More »

Textured Microporous Porcelain Tiled Floor Renovation Wakefield

Textured Porcelain Tiled Kitchen Floor Renovated in Wakefield

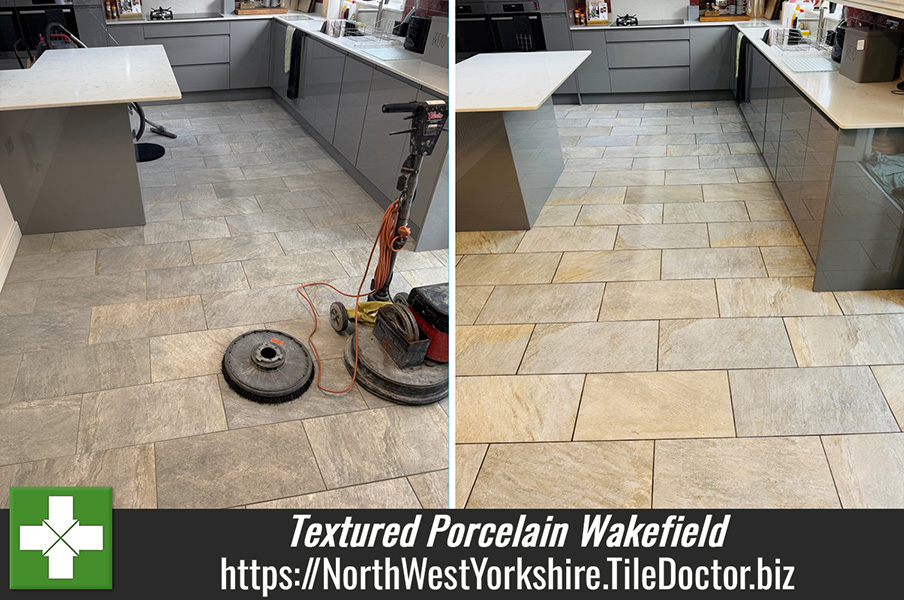
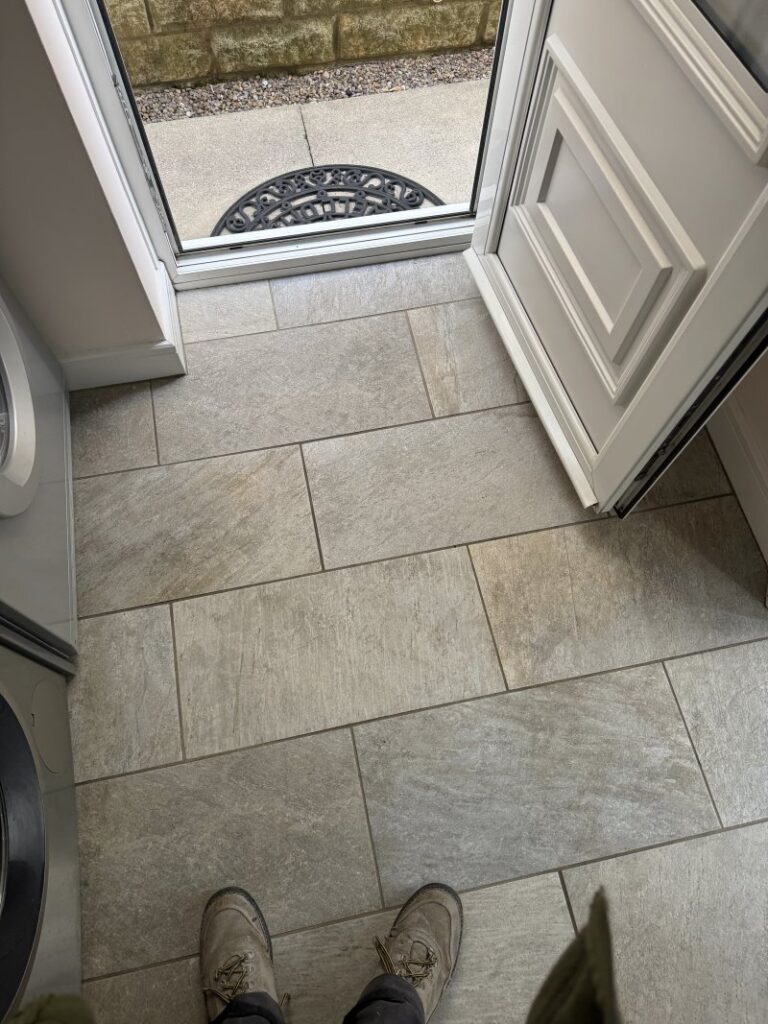
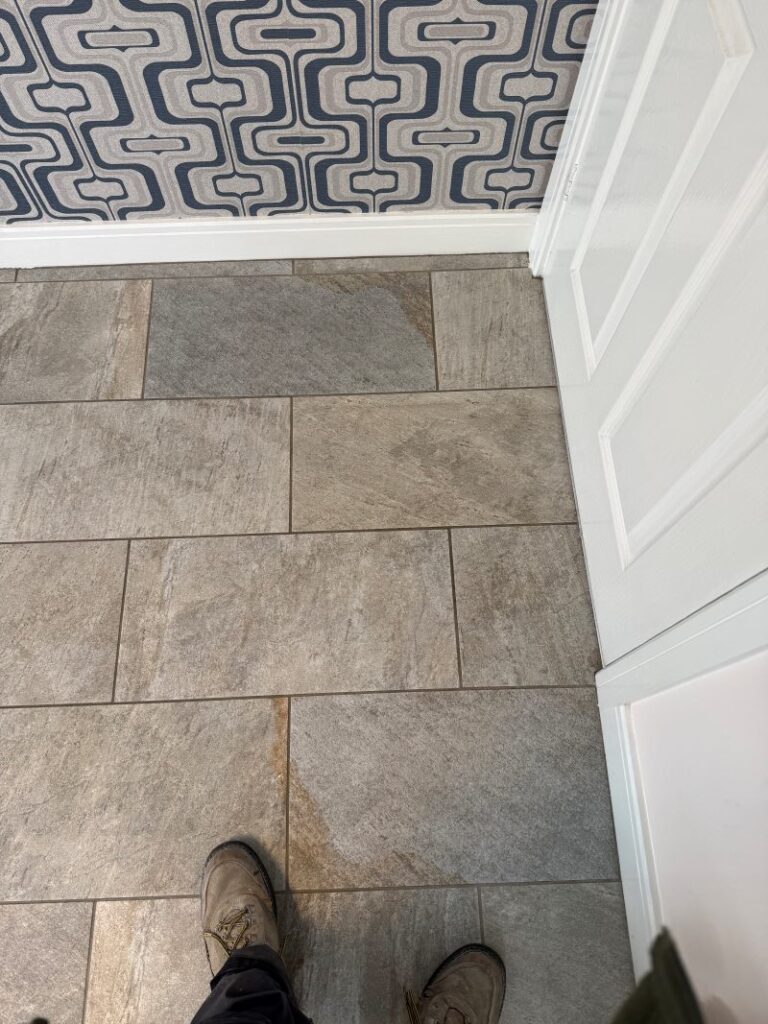
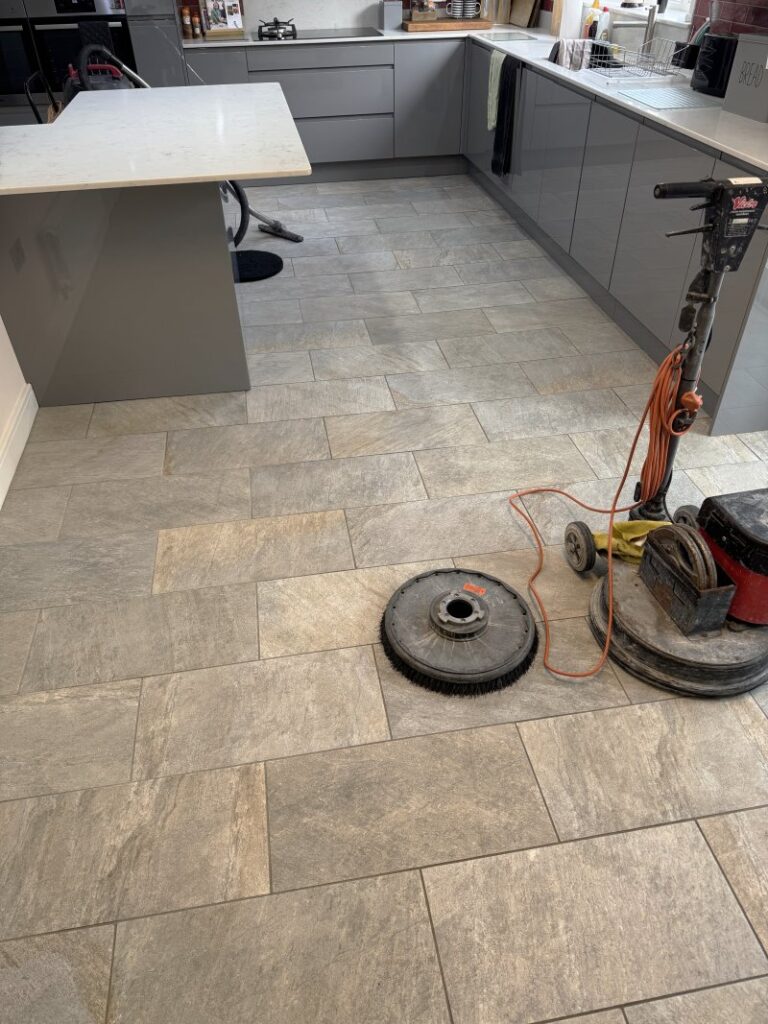
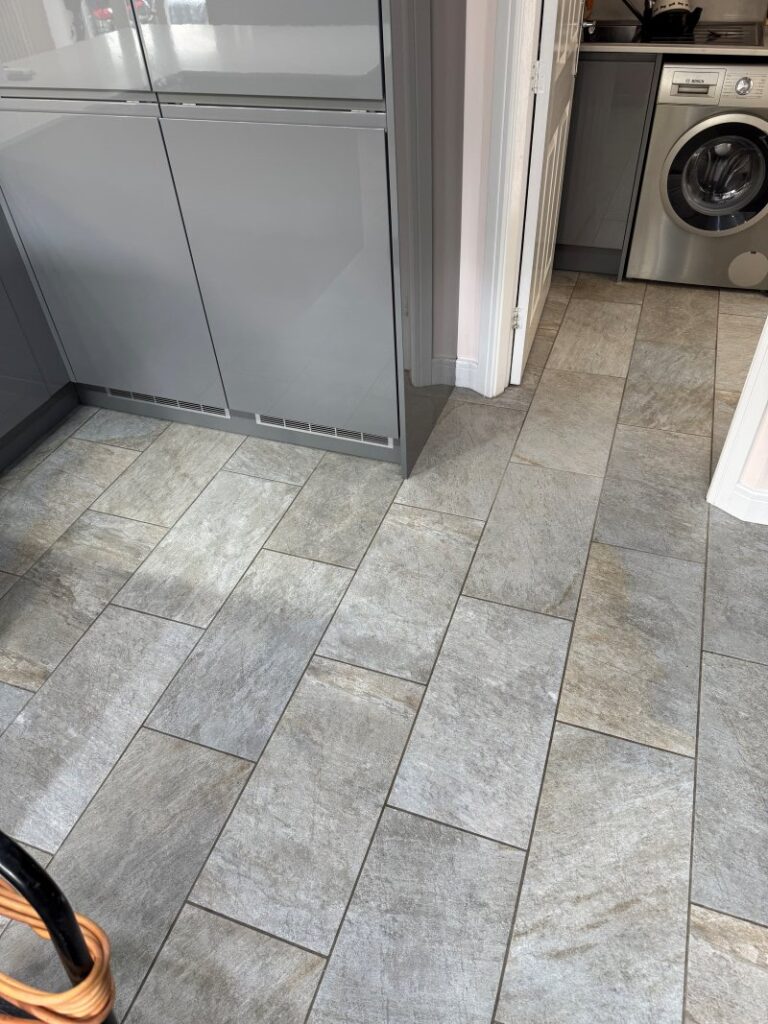
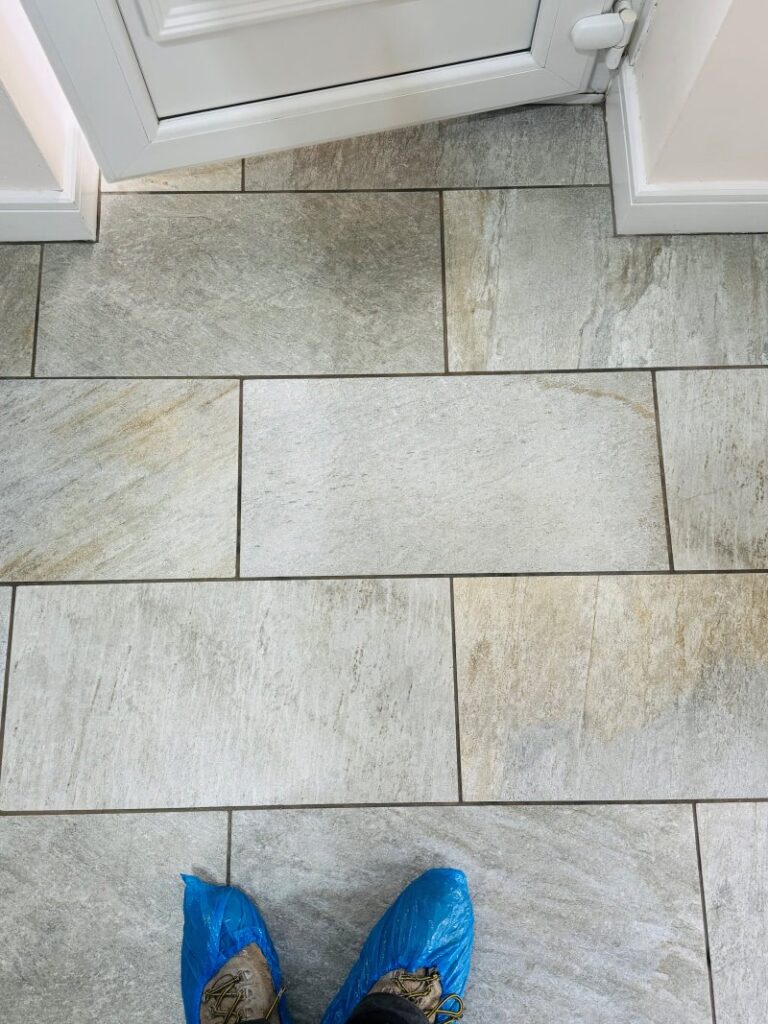
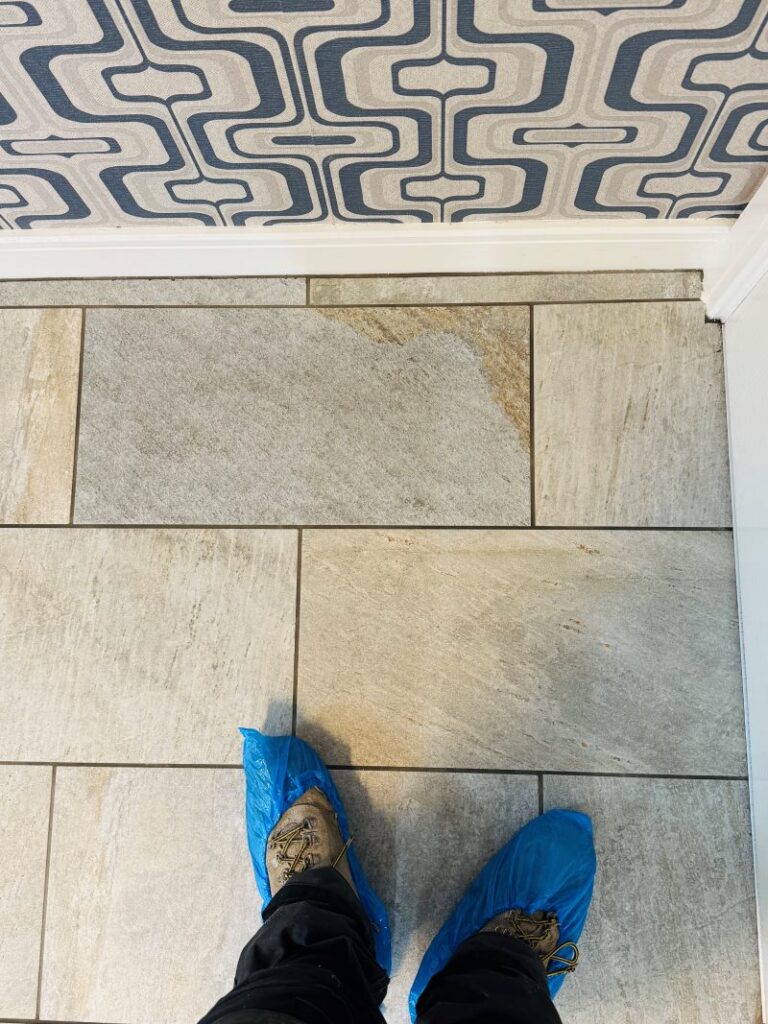
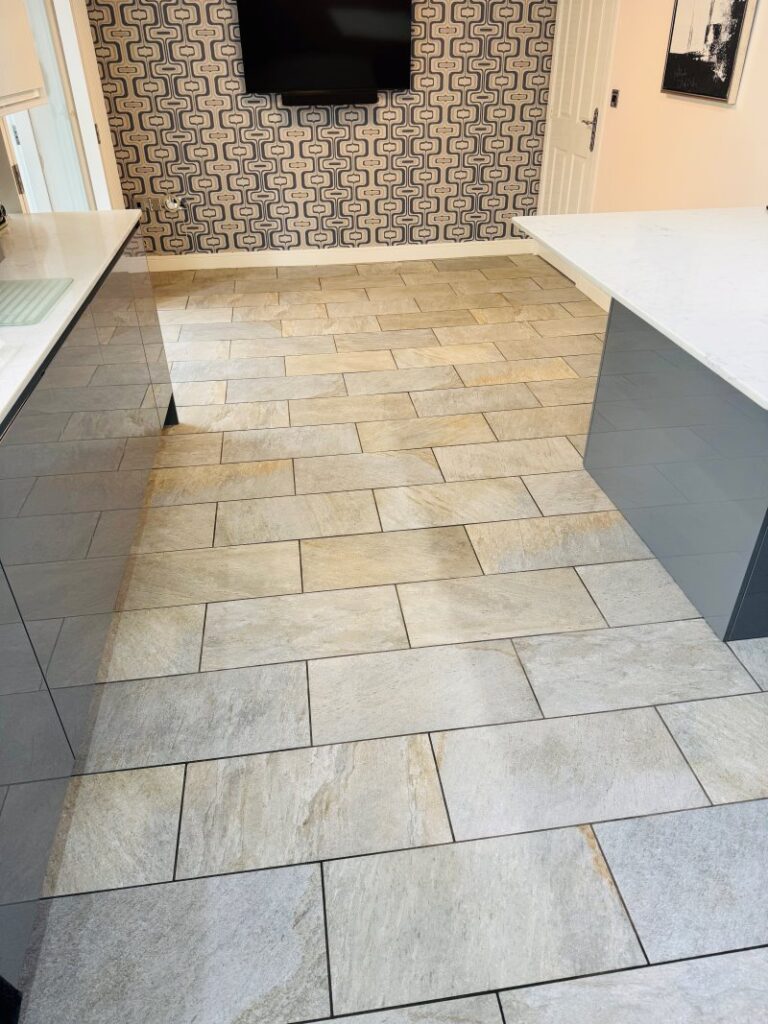
I was called out to a home in Wakefield where the owner wasn’t happy with the state of their Porcelain tiled kitchen floor. It had been down about five years, and while porcelain’s a tough, non-slip tile that’s spot on for kitchens, the textured surface had started to trap muck. The grout lines were just the same – once they get dirty, they don’t half take some shifting.

Porcelain Tiled Floor Before Renovation Wakefield Porcelain Tiled Floor Before Renovation Wakefield

The customer had been grafting away with regular cleaning but couldn’t get rid of the ingrained dirt. Having a couple of dogs running about didn’t help matters either. They were after a proper deep clean and a seal to make life easier.

Porcelain Tiled Floor Before Renovation Wakefield Porcelain Tiled Floor Before Renovation Wakefield

After conducting a test clean first, it showed the porcelain was of the microporous type which meant that a sealer would definitely help to keep it clean. The customer liked what they saw, so we cracked on and booked in a date to renovate the whole floor.

Cleaning a Porcelain Tiled Kitchen

First job was to get the muck shifted; to do this the Porcelain tile and grout was covered in a strong dilution of Tile Doctor Pro-Clean. It was then left it to dwell and soak in for ten minutes so it could get to work on the floor digesting the dirt. Then we got stuck in with a rotary machine fitted with a black scrubbing pad to work the solution deep into the floor.

Now, machines are grand for open areas, but they don’t half struggle to get into grout lines, so the only thing to do was to get down on my knees and give it a good scrub with stiff brush. You could see the improvement during the scrubbing turning the cleaning solution black as the dirt was lifted out.

After scrubbing the floor was rinsed with clean water and then a wet vacuum used to remove the soiling. Stubborn areas were gone over again by hand until they shifted. After another rinse and a thorough vacuum dry, the floor was ready for sealing.

Sealing a Porcelain Tiled Kitchen

Once dry, the Porcelain tile and grout was sealed using Tile Doctor Ultra-Seal. This sealer doesn’t contain a colour enhancer so is invisible to the naked eye. Its also an impregnator that soaks into the pores adding protection from within and ensuring dirt remains on the surface making it much easier to clean going forward.

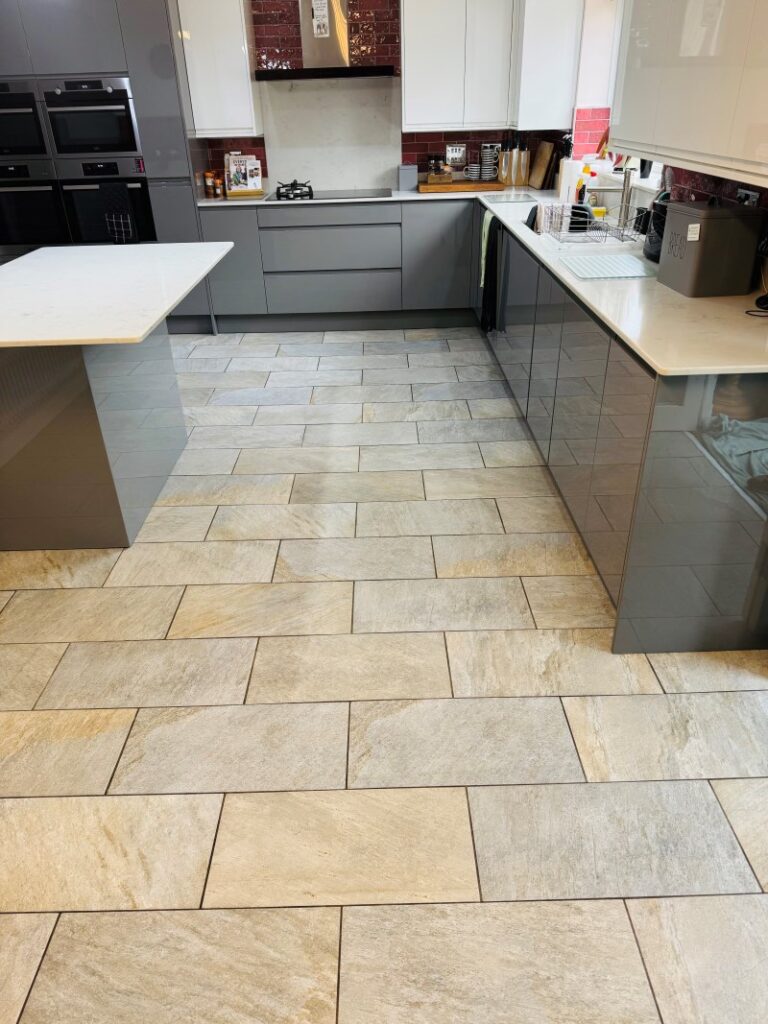
Porcelain Tiled Floor After Renovation Wakefield Porcelain Tiled Floor After Renovation Wakefield

After the work was wrapped up, I’m pleased to say the customer was chuffed with the result and left the following feedback on-line:

“Chris and Zak came on time, prepped the area which was a large kitchen and utility with porcelain tiles. They quickly got on with the job in a professional manner. They worked hard to ensure that they could get the floor cleaned and sealed within a day. The results are brilliant. Wouldn’t hesitate to recommend “

Porcelain Tiled Floor After Renovation Wakefield Porcelain Tiled Floor After Renovation Wakefield

To keep the floor looking grand, we recommended using Tile Doctor Neutral Tile Cleaner. It’s gentle but does the job, and unlike supermarket cleaners, it won’t erode the sealer or leave a residue behind. Used regularly, it’ll make sure the floor stays clean with no messing.


Professional Restoration of a Porcelain Tiled Kitchen in Yorkshire

Textured Porcelain Tiled Kitchen Floor Renovated in Wakefield Read More »

Sandstone Floor Renovation Rylstone Skipton

Gruby Sandstone and Black Limestone Floor Restored in Rylstone Skipton

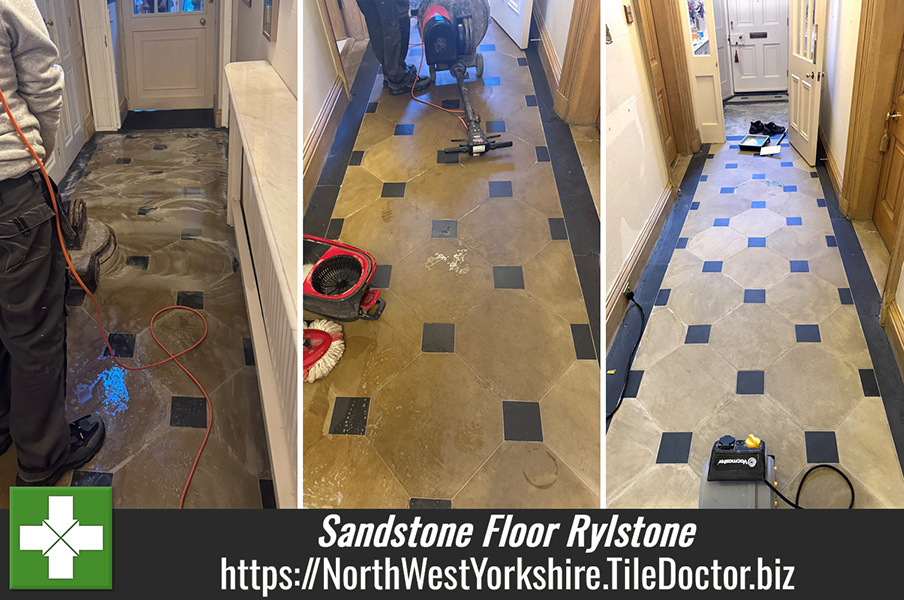
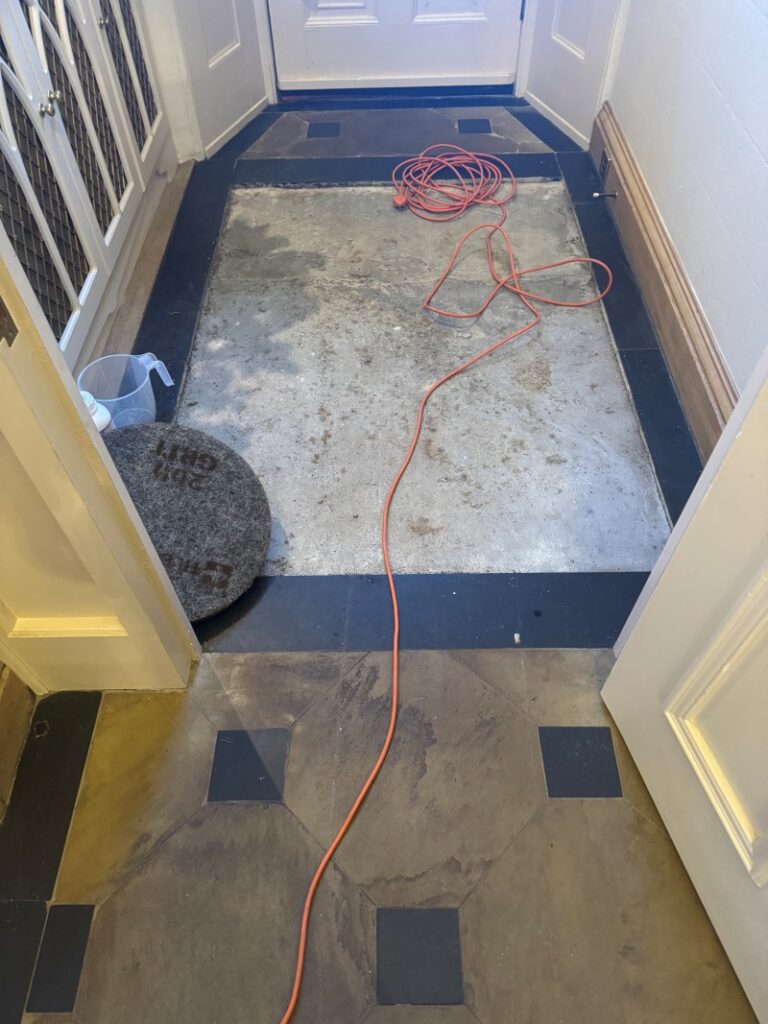
Pictured is a 100-year-old stone floor laid with a mix of sandstone with black limestone edging and inserts in the hallway of a property in the village of Rylstone near Skipton. It was very grubby and any sealer that may have been present was gone leaving it vulnerable to ingrained dirt. I understood the floor had never been cleaned using neutral cleaners and this is most likely the cause of the sealer deteriorating.

Sandstone Floor Before Cleaning Rylstone Skipton

The stone floor was heavily ingrained with dirt and looking very unappealing which was a shame as it was quite an unusual design. I paid a visit to the property the next time I was in the area and after surveying the floor and running a few tests, I discussed what needed to be done to restore the appearance of the stone. Although the floor was intact there were a few areas where the sandstone had delaminated, and the grout needed replacing.

Keen to have the floor looking its best I worked out a quote for the renovation which was accepted and a date set to restore the floor.

Cleaning a Sandstone Tiled Hallway

To restore the appearance of the stone where it had delaminated, I had to apply some very aggressive diamond milling pads. The strongest was a 50-grit flexi pad which really cuts into the surface of the stone removing a thin layer of the stone in the process. Water is used to lubricate the process, and this also helps to capture the dust that is generated. Tile Doctor Pro-Clean was also applied to help clean any staining. A heavy rotary machine fitted with 17″ pads is used for most of the work and where needed small 4-inch pads fitted to a 110v water fed hand polisher is used for the edges and awkward places.

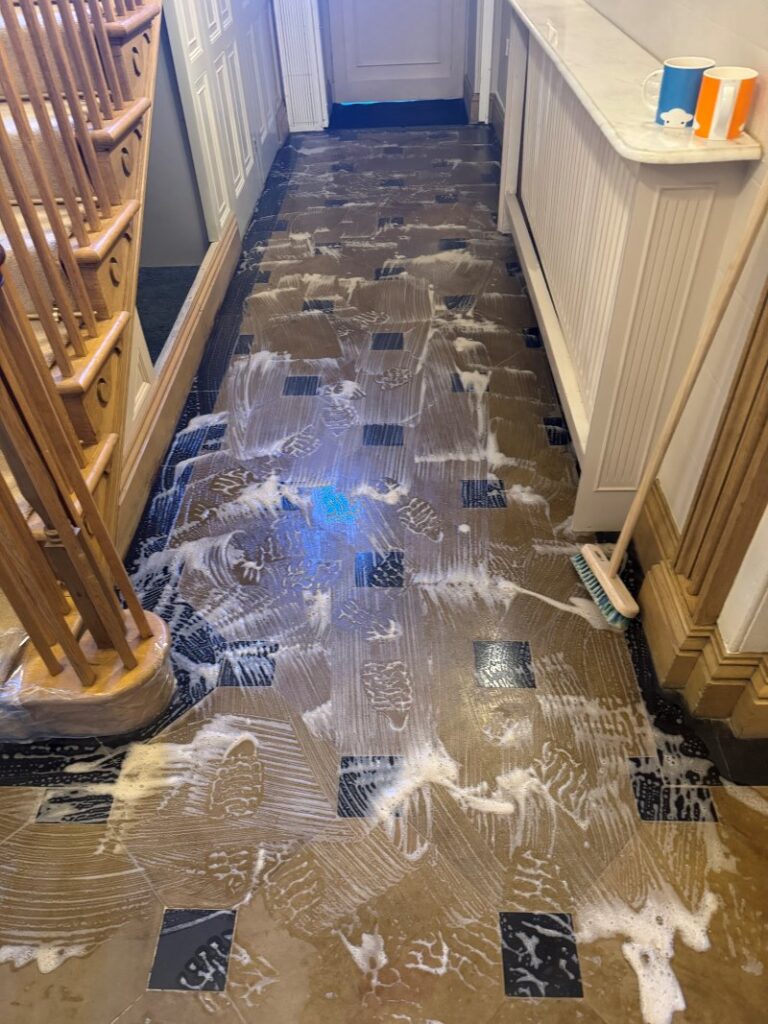
After the 50-grit pad the floor is rinsed with more water and the soiling extracted with a wet vacuum. The process is then repeated using finer 100-grit flexi pad and then the finer 200-grit flexi pad to refine the stone’s appearance, again rinsing and extracting after each pad. More Tile Doctor Pro-Clean was then scrubbed over the grout lines by hand to get them as clean as possible.

Sandstone Floor During Cleaning Rylstone Skipton Sandstone Floor During Cleaning Rylstone Skipton

At this point attention turned to resolving some of the other issues such as the re-grouting with black grout near the doorways which were edged with black limestone. The thresholds around doorways always seem to experience damage in older properties, I suspect its due to the extra stresses surrounding the door frames.

Sealing a Sandstone Tiled Hallway

The floor was left to dry out and I returned later to seal the floor using three coats of Tile Doctor Colour Grow which we felt would help bring out the blackness of the limestone. This product also allows for vapour transmission which is essential in older properties without a damp proof membrane, it’s also an impregnator that soaks into the stone protecting it from within.

Sandstone Floor After Renovation Rylstone Skipton

Once done I was very pleased with the work and the floor looked so much fresher and the contrast between the sandstone and black limestone was much improved. My client was also pleased and took the time to leave me the following on-line feedback:

“Chris restored our 100-year stone hallway. He did an absolutely wonderful job. A really nice chap who likes his Yorkshire tea. Would recommend to anyone “

For aftercare I recommended they use Tile Doctor Stone Soap which is a gentle yet effective neutral tile cleaner that’s ideal for sealed floors as it won’t harm the sealer.

Sandstone Floor After Renovation Rylstone Skipton


Professional Stone Floor Restoration in North Yorkshire

Gruby Sandstone and Black Limestone Floor Restored in Rylstone Skipton Read More »
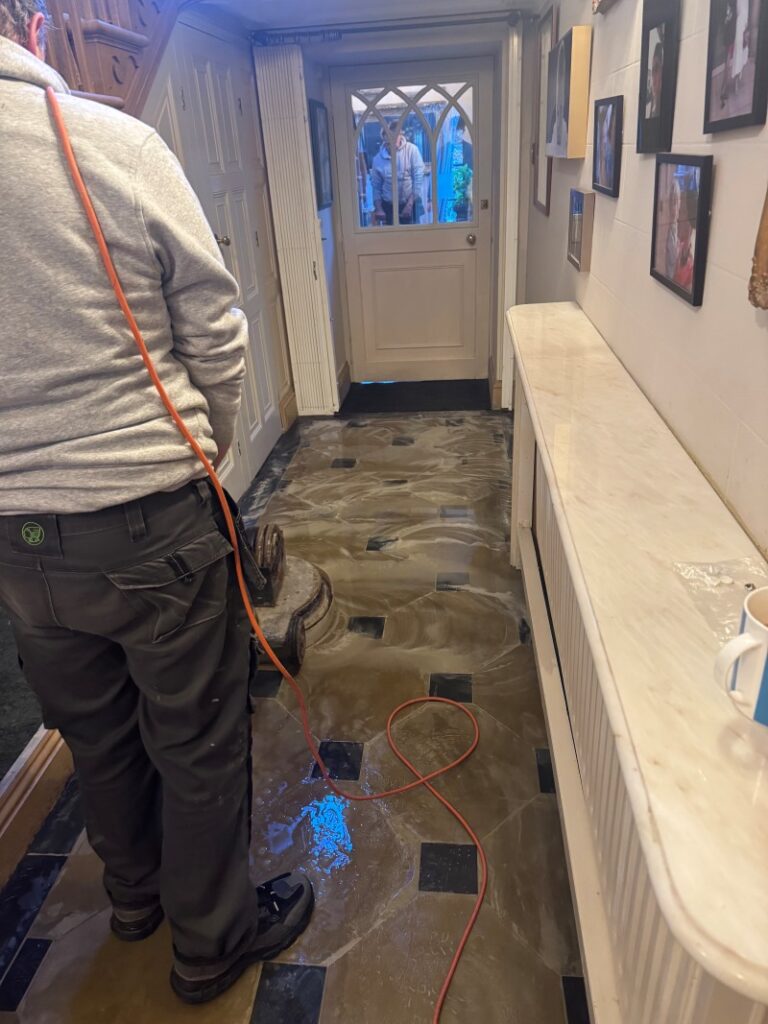
Soot-Stained Limestone Fireplace Renovation Guiseley Yeadon

Soot-Stained Limestone Fireplace Renovated in Guiseley

Detailed below is the cleaning of a Limestone Fireplace surround and hearth at a property in Guiseley near Yeadon on the outskirts of Leeds. Soot

The fireplace had been installed approximately five years prior and was now badly stained with soot and smoke from the wood burner and this readily stood out against the pale Limestone. Having decided to do something about it the owner tried cleaning it but was unhappy with the result and decided to call in some professional help.

Soot-Stained Limestone Fireplace Before Cleaning Guiseley Yeadon

Happy to oblige I was able to provide a quote based on photographs which was accepted and a date scheduled for the renovation which would only take a few hours.

Cleaning a Limestone Tiled Fireplace

Work started by adding protection to the surrounding carpets and the metal work of the log burner. Then to get the Limestone clean I decanted a strong dilution of Tile Doctor Pro-Clean into a spray bottle and sprayed it on to the stone. The spray mixes the solution with air making it lighter and more able to stick to the vertical surface. You can also use Tile Doctor Oxy-Gel for this which is a similar gel-based product. After leaving it to soak in for ten minutes the solution was worked in, using handheld diamond blocks of increasing grits.

Soot-Stained Limestone Fireplace During Cleaning Guiseley Leeds

Sealing a Limestone Tiled Fireplace

Once dry, the fire surround and hearth were sealed with Tile Doctor Ultra-Seal sealer to help protect from more soot. This is an invisible sealer that works by soaking into the pores of the Limestone protecting it from within. This keeps dirt and contaminants on the surface where they can be easily cleaned away with a product such as Tile Doctor Stone Soap. It’s important to use a pH neutral product for the regular maintenance cleaning
of sealed stone as stronger products will erode the sealer prematurely.

Soot-Stained Limestone Fireplace After Cleaning Guiseley Leeds

Once complete the Fireplace looked like new again much to the delight of the homeowner who left the following 5 Star feedback for me:

“Limestone Fireplace in the lounge is very badly stained with soot and smoke. Got in touch with Chris Allen and he did a splendid job bringing it back to its original state. Excellent craftsmanship and kept us informed of what was going on and how to care for the Fireplace in future. Very knowledgeable and lovely gent to have done the work.”


Professional Renovation of a Limestone Fireplace in Northwest Yorkshire

Soot-Stained Limestone Fireplace Renovated in Guiseley Read More »
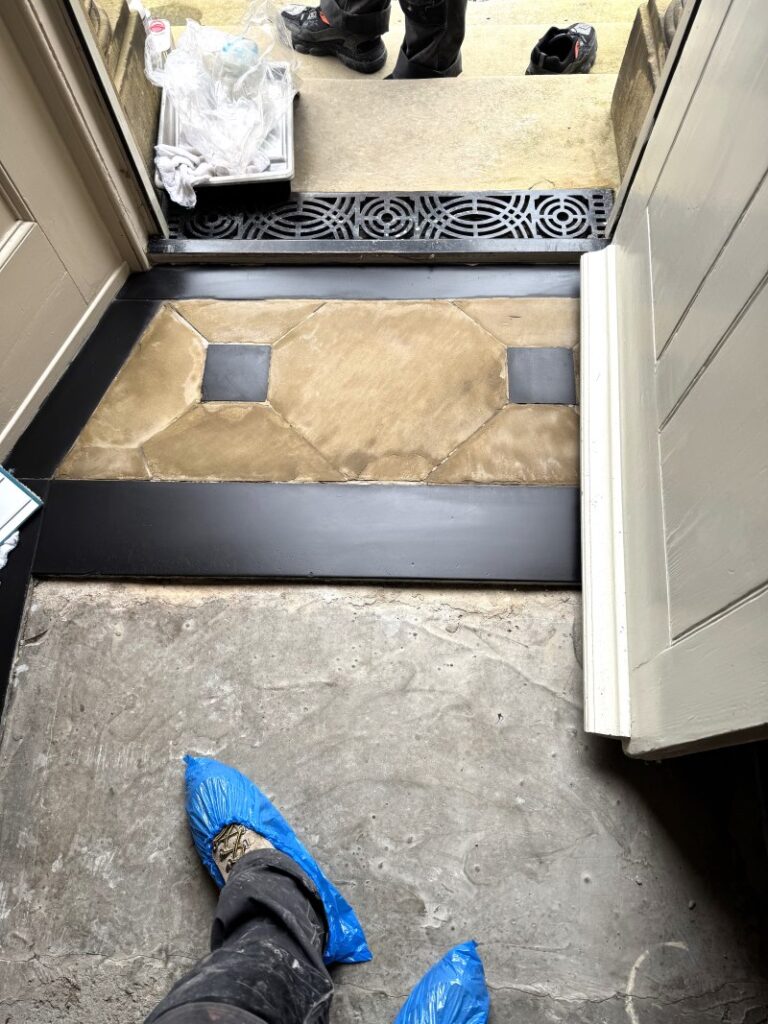
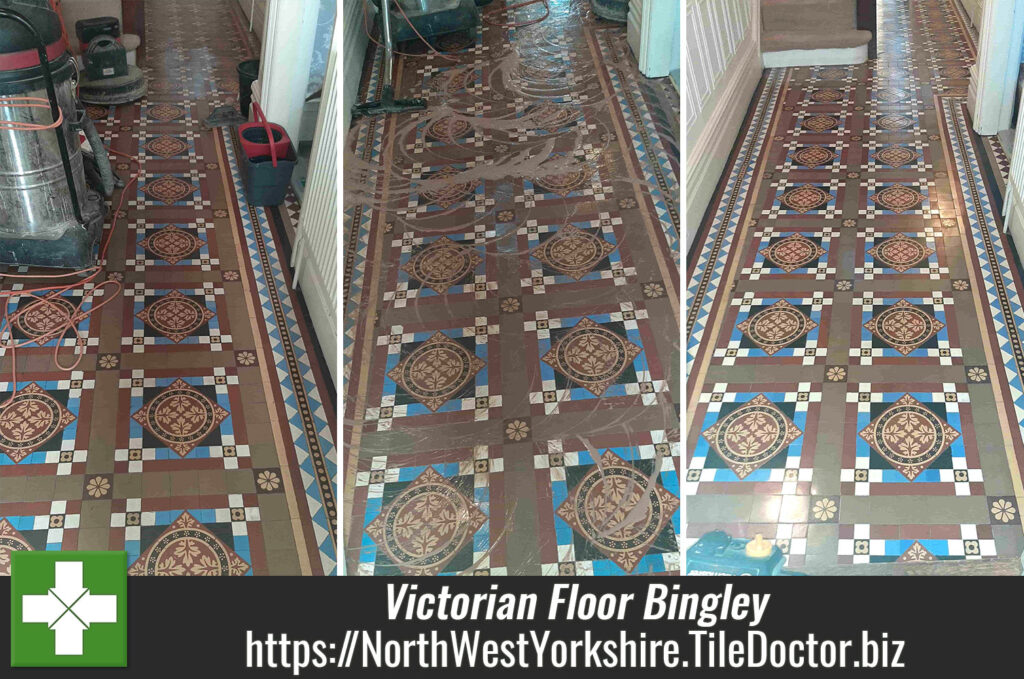
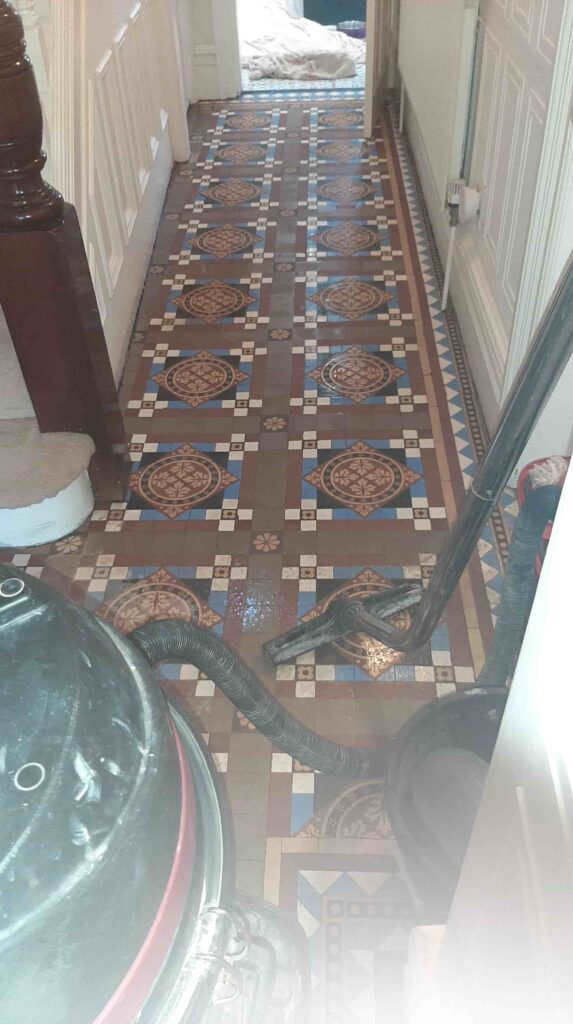
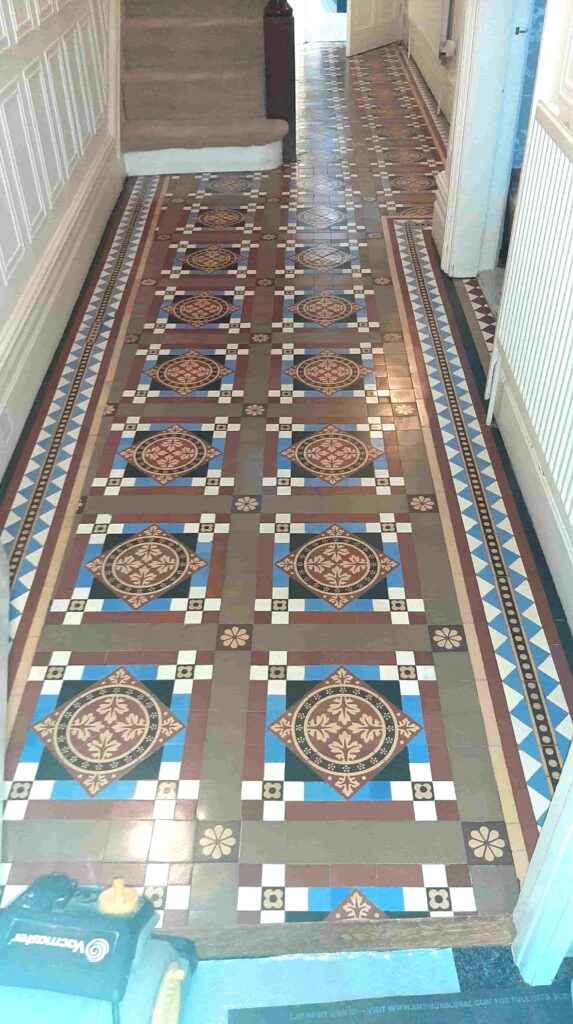
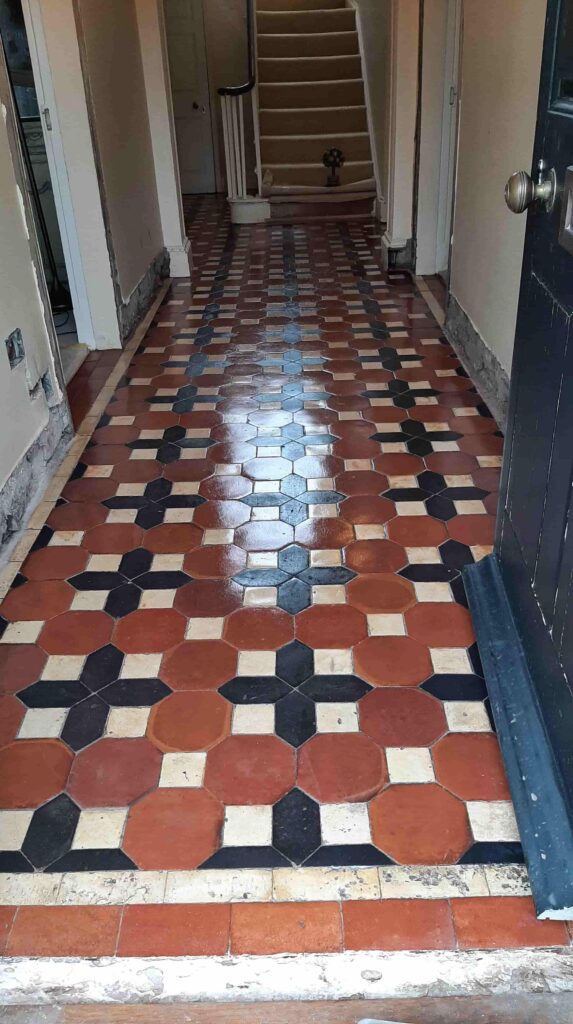
Victorian Tiled Hallway Restoration Bingley

Original Victorian Tiled Hallway Repaired and Renovated in Bingley

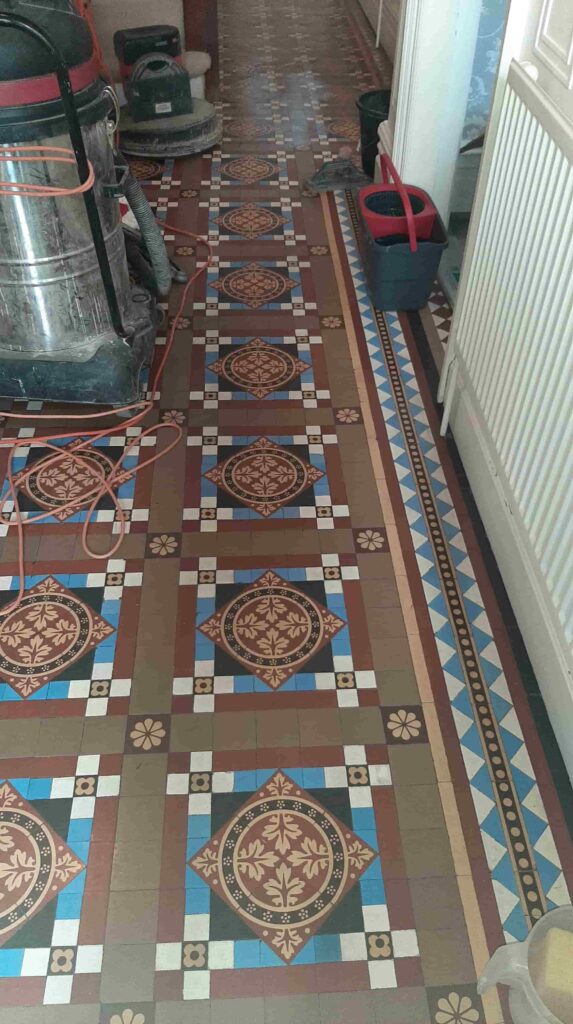
This client called me over to look at the original Victorian tiled floor in the hallway of their property in Bingley. The floor was due a clean and seal and there were a few tiling issues that needed resolving.

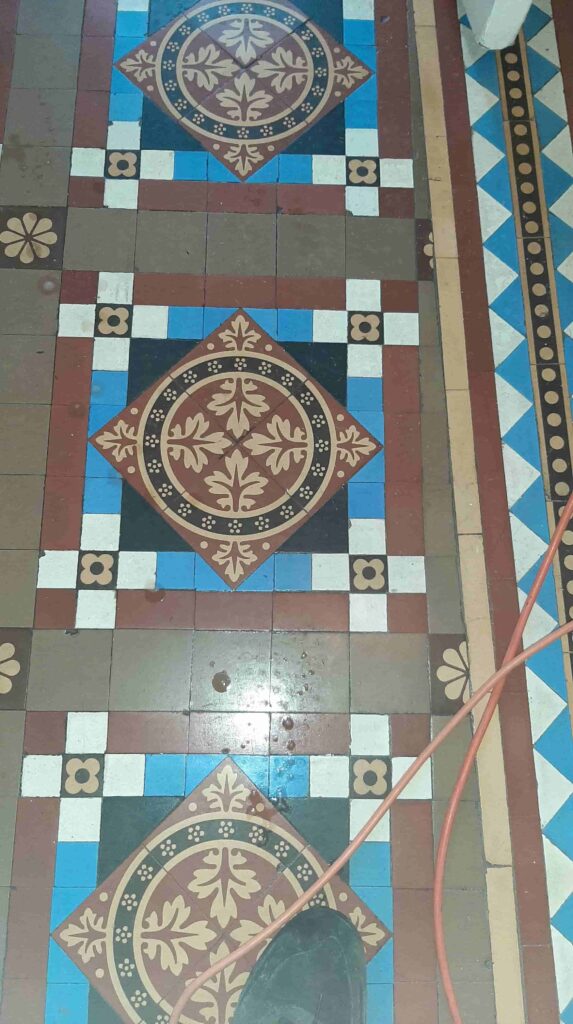
I went over to survey the floor and could see that except for a few broken tiles the floor was in a good condition considering its age. He wanted the broken tiles replaced and then the floor cleaned and resealed. There had been no maintenance over the last ten years which is when they purchased the property so a deep clean and seal was overdue.

Victorian Tiled Hallway Floor Before Cleaning Bingley

I worked out a quote for the work which was accepted and then started looking for replacement tiles which would be needed to complete the repairs.

Victorian Tiled Hallway Floor Before Cleaning Bingley

Repairing and Cleaning a Victorian Tiled Hallway

When I returned to the property the first job was to replace the broken tiles which on a floor like this is intricate and careful work. Each broken tile has to be slowly prised up taking care not to disturb the adjacent tile and thereby making the job larger than it needs to be. With the broken tile out of the way the base is cleaned up and prepared to accept the replacement which has to be cut to fit and match the existing geometric pattern. Once I’m happy with the replacement it is then set in place with rapid drying adhesive.

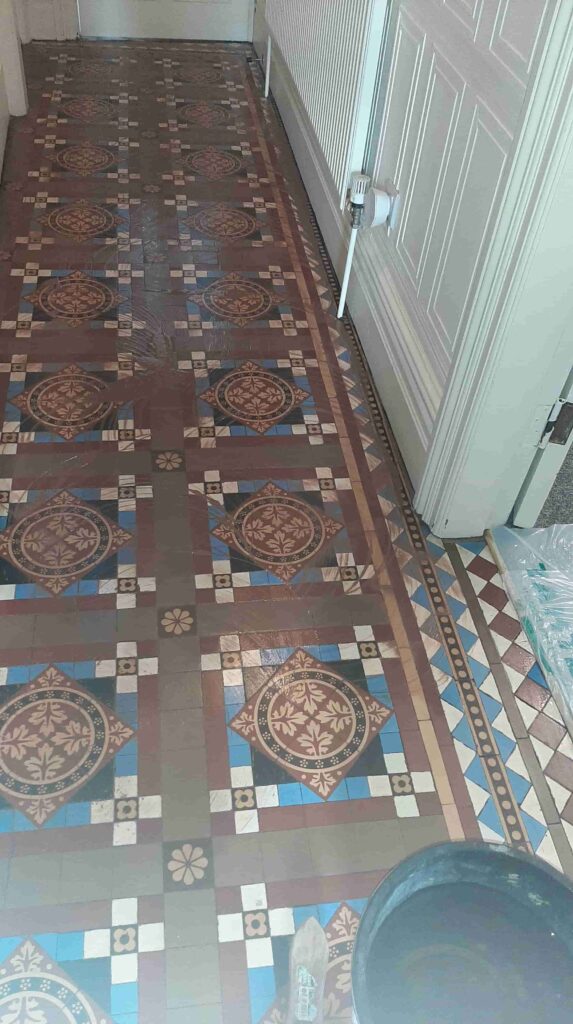
Once the repaired tiles had set, I was able to make a start on getting the floor clean. To do this a strong dilution of Tile Doctor Pro-Clean was sprayed onto the floor and left to soak into the tiles before being worked in with a coarse 100-grit diamond pad. The resultant slurry was removed with a wet vacuum and the process was repeated with a finer 200-grit diamond pad. The pads are run over the tiles using a buffer machine with weights added to improve traction. The floor was then rinsed, and the soiling extracted as before.

Victorian Tiled Hallway Floor During Cleaning Bingley Victorian Tiled Hallway Floor During Restoration Bingley

Next step was to give the tiles an acid rinse using Tile Doctor Grout Clean-up which further cleans up the floor by removing old grout smears and salt deposits that can be a common problem with floors of this age. This was worked in with a black scrubbing pad and rinsed off and extracted as before.

Sealing a Victorian Tiled Hallway

A lot of water was used in the cleaning process so to speed up the drying process as much moisture as possible was removed with the wet vacuum after cleaning and a floor dryer was left in place.

I returned on day three to seal the tiles starting by testing the floor with a moisture meter to check it had dried sufficiently. All was well and I was able to confirm the floor was dry enough to seal for which Tile Doctor Seal and Go Extra was applied. This will protect the tiles from ingrained dirt and gives the floor a nice finish. This product is also fully breathable which is an important consideration when sealing older floors that don’t have a damp proof membrane.

Victorian Tiled Hallway Floor After Restoration Bingley

The client was very happy and gave me a cup of tea and a biscuit as well as the following excellent feedback:

” The experience from start to finish was excellent. The Tile Doctor responded to my query quickly and allocated Chris to the job. Chris arrived promptly and provided a competitive quote. Once booked in Chris arrived on time and did a fantastic job. The hallway looks brilliant. Wouldn’t hesitate to use Chris and Tile Doctor again.”

For aftercare cleaning I recommended Tile Doctor Neutral Tile Cleaner which is a mild yet effective tile and grout cleaner. It’s important to avoid strong cleaner products which contain bleach as this will strip away the sealer.


Professional Restoration of a Ceramic Tiled Bathroom in West Yorkshire

Original Victorian Tiled Hallway Repaired and Renovated in Bingley Read More »
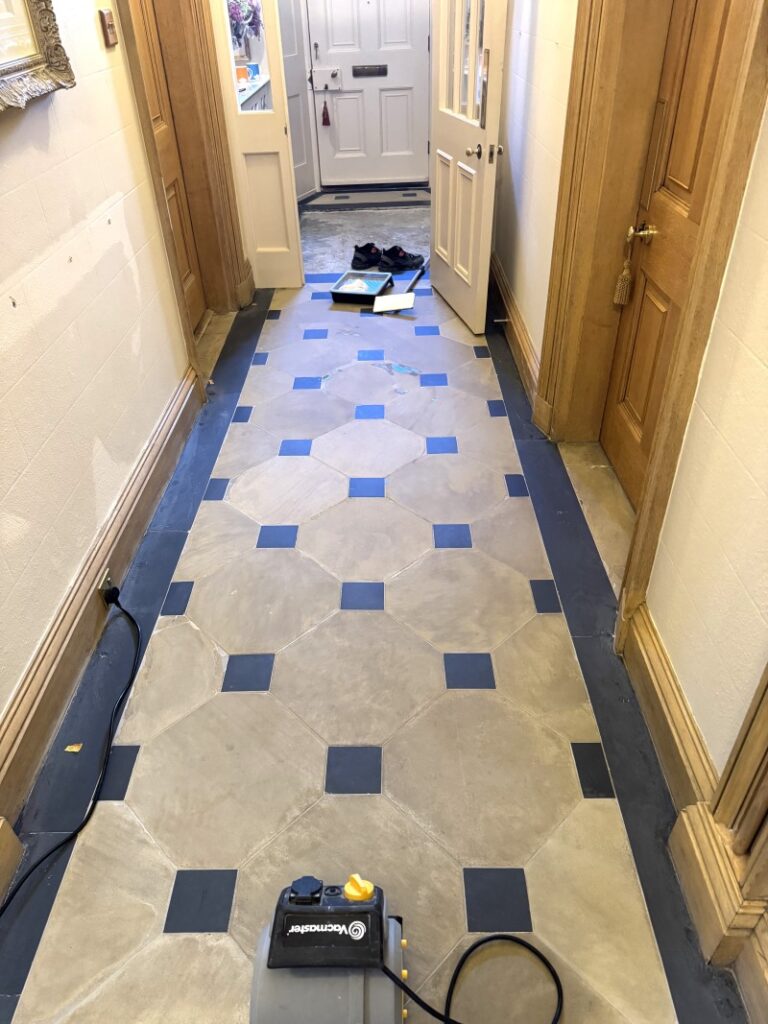
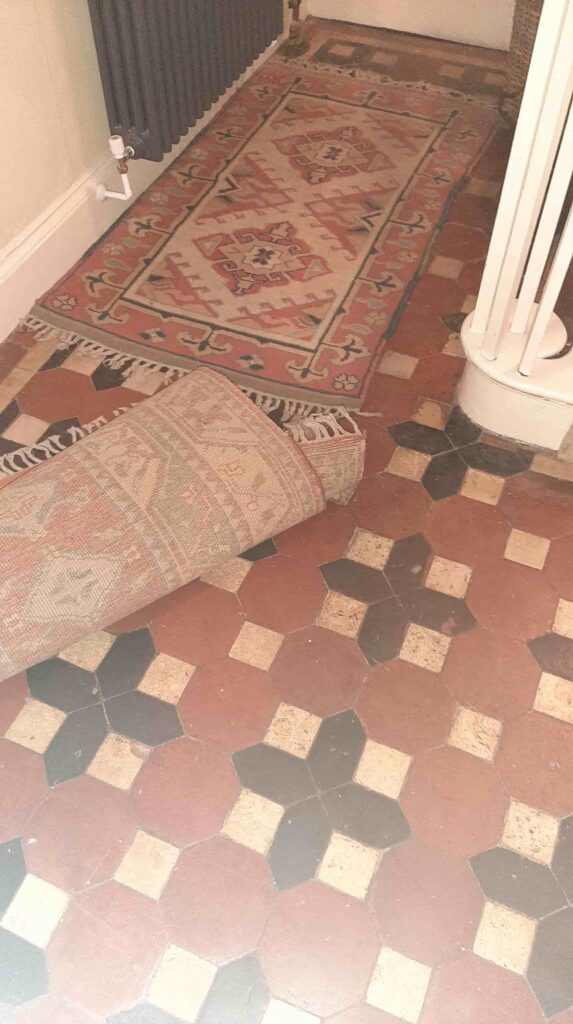
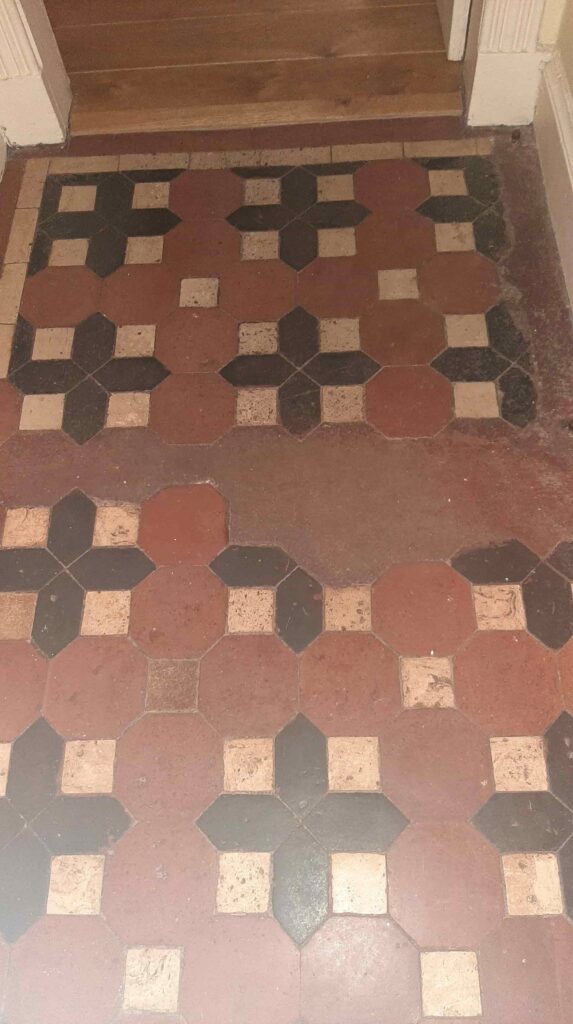
Victorian Tiled Hallway Floor Restoration Thirsk

Damaged 135-Year-Old Victorian Tiled Hallway Floor Fully Restored in Thirsk

This Victorian tiled hallway floor at a property on the outskirts of Thirsk was approximately 135 years old and was in need of deep cleaning and repair. As far as the owners were aware it had never been professionally cleaned but was sealed many times before with some type of varnish/linseed oil.

Unsurprisingly for its age the tiles were fairly worn and unfortunately had some suffered damaged due to the installation of heating pipework that was run under the floor. This area had simply been backfilled with cement and my client asked for this to be replaced with tiles that match the existing type and pattern. The was floor was then to be restored to the best condition possible given its age.

Victorian Tiled Hallway Floor Before Restoration Thirsk Victorian Tiled Hallway Floor Before Restoration Thirsk

I’ve worked on these sorts of issues before so more than happy to take on the project. It took a little time to track down the replacement tiles but once I had everything costed, I was able provide an accurate quote to the owner who gave the go ahead to start the work.

Cleaning and Repairing a Victorian Tiled Hallway

To start I gave the whole floor a deep clean with a strong dilution of Tile Doctor Remove and Go combined with Tile Doctor Pro-Clean to remove the several coatings from the tiles worked in with coarse 100 and 200-grit diamond pads fitted to a rotary machine. I also used hand-held diamond blocks around the edges. The soiling was then rinsed off with water and extracted with a powerful wet vacuum.

Victorian Tiled Hallway Floor During Cleaning Thirsk

Next, I turned my attention to the damaged areas where the tiles had been dug out and backfilled with cement. This cement was at the same height as the floor, so it had to be carefully removed and then replaced with a lower screed mix with protection over the pipes to stop any corrosion.

Victorian Tiled Hallway Floor During Repair Thirsk Victorian Tiled Hallway Floor During Repair Thirsk

Once the screed had set the area was re-tiled using the replacements I had managed to source earlier making various cuts as required to achieve the original geometric pattern.

The repaired and cleaned floor was then left for approximately four days until it was dry enough to seal. These old floors don’t have the benefit of a damp proof course and sealers work best when applied to dry tiles, so it is always worth waiting if there is any doubt.

Sealing a Victorian Tiled Hallway

On my return I used a moisture meter to confirm the floor was dry and ready to be sealed.
The hallway is above ground level and away from the problems of rising moisture, however it is important to use a breathable sealer on these old floors that will allow any moisture to evaporate at the surface and not get trapped underneath where it could cause problems.

Victorian Tiled Hallway Floor During Sealing Thirsk

So, for this floor we used Tile Doctor Seal and Go Extra which is breathable and results in a nice shine finish which the client requested. Four coats where needed before the tiles were fully sealed.

The client was very pleased with the result and even added a tip to their payment.

“Thanks Chris, all paid. – I added something extra for some beers or a meal down at Piece Hall as a thank you!”

Victorian Tiled Hallway Floor After Restoration Thirsk

The new sealer will keep the dirt on the surface of the floor where it can be easily cleaned away. For which I recommend using Tile Doctor Neutral Tile Cleaner, it’s a gentle but effective product that won’t impact the sealer.


Professional Restoration of a Victorian Tiled Hallway Floor in North Yorkshire

Damaged 135-Year-Old Victorian Tiled Hallway Floor Fully Restored in Thirsk Read More »

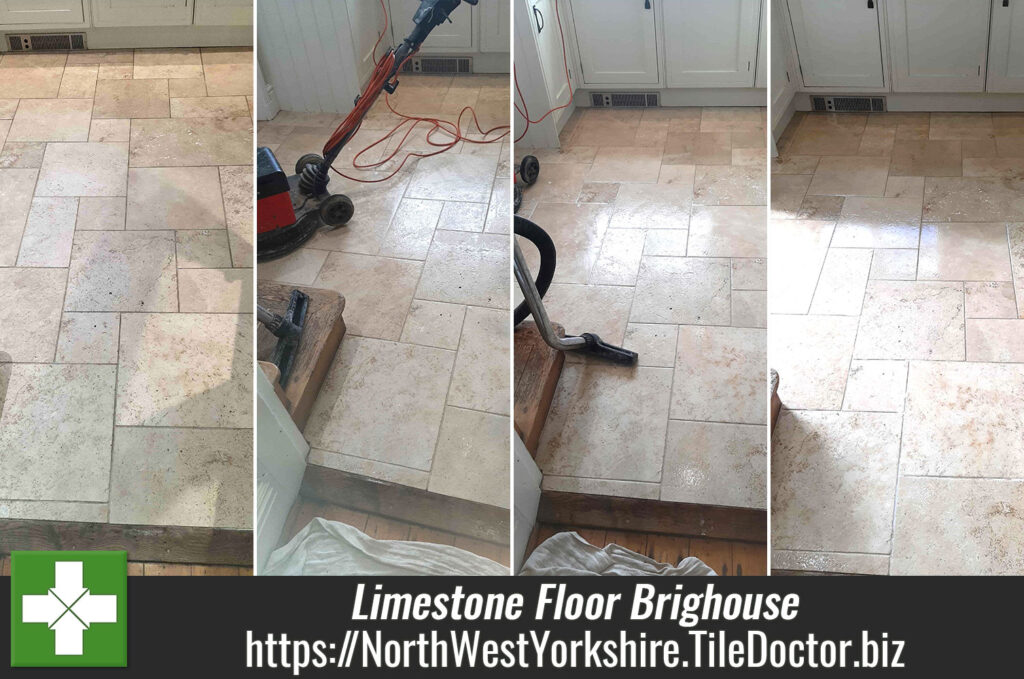
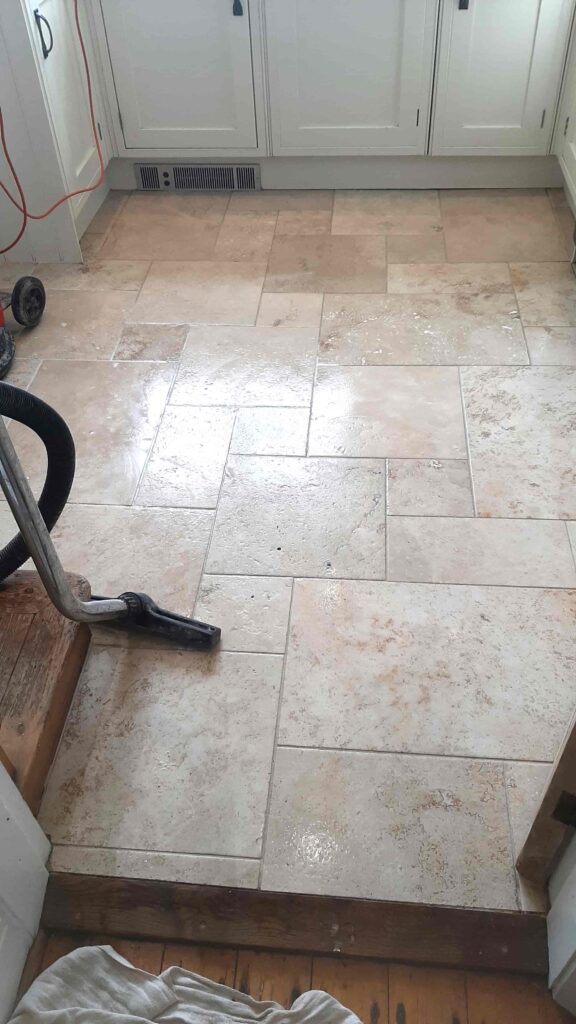
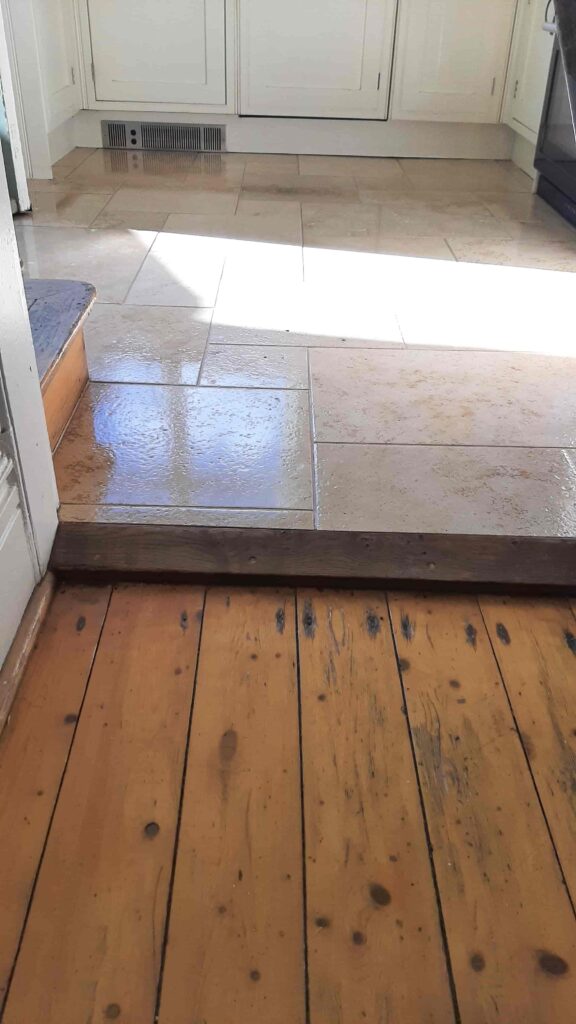
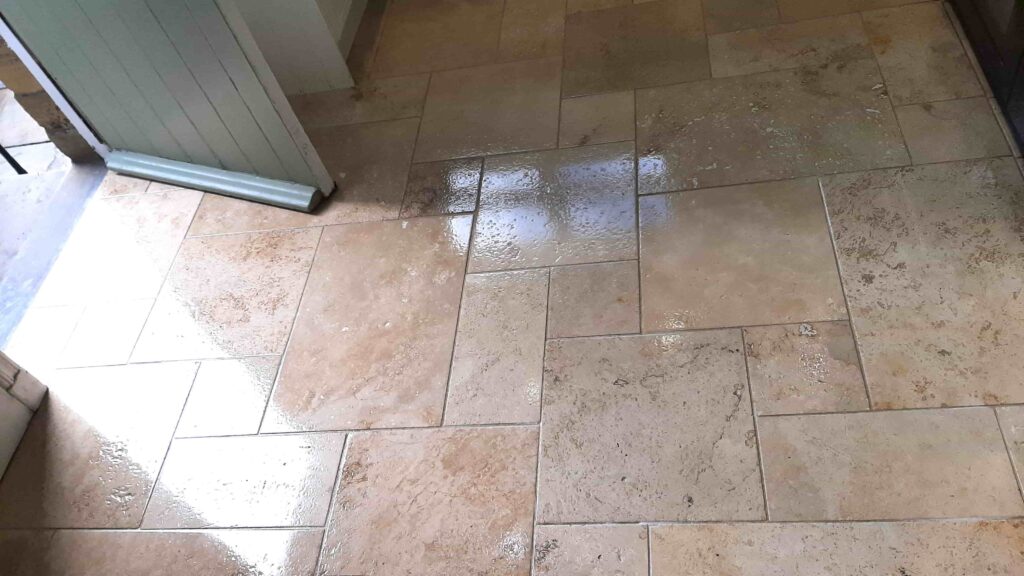
Limestone Kitchen Floor Cleaned and Sealed Brighouse

Limestone kitchen floor in Brighouse

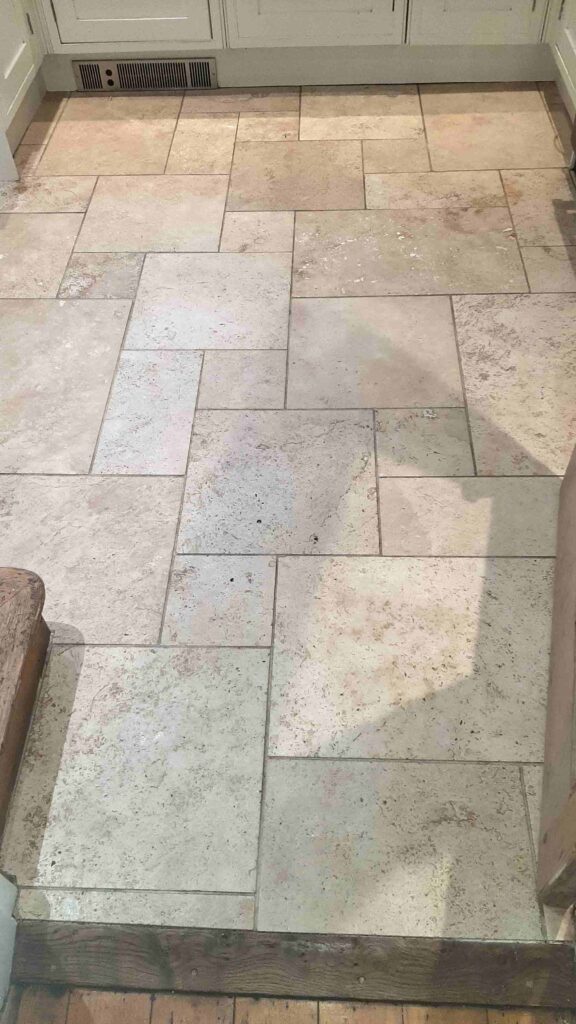
This limestone floor in the kitchen at a property in Brighouse was laid over five years ago and since then the sealer had worn off allowing dirt to become ingrained in the stone and grout lines. It now needed to be deep cleaned with attention to the grout lines and then sealed to protect it going forward.

Limestone Kitchen Floor Before Cleaning Brighouse

I visited the property to survey the floor and work out a restoration plan that would renovate the stone back to its original condition. The work required was straight forward so it didn’t take long to work out a quotation for the renovation.

Happy with the quote we agreed a date for my return.

Cleaning a Limestone Tiled Kitchen

To deep clean and renovate the Limestone I used a set of 17-inch diamond burnishing pads which included 400, 800, 1500 and 3000 grits. Before I could get to work though the wooden kitchen units had to be protected from the cleaning solutions by applying a thin line of clean silicone sealant between the floor and the base boards. Doing this ensures water doesn’t soak into the wood where it can cause them to warp.

The Kitchen was quite small and the equipment proved to be a challenge to operate in such a confined space. I was using a weighted rotary floor buffer and triple motor wet vacuum, so extra care was needed.

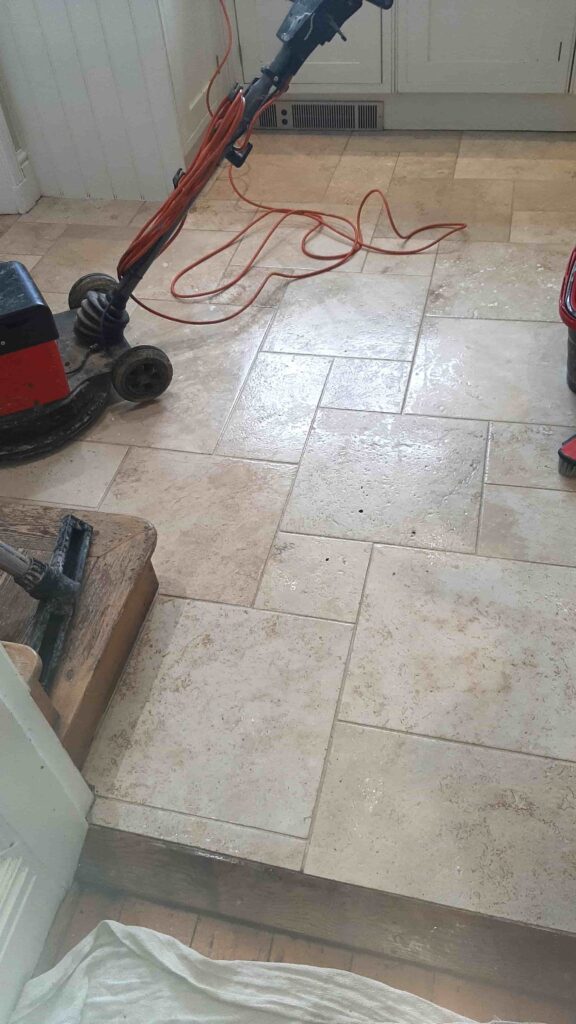
I began the stone floor cleaning with the application of a 400-grit pad fitted to a rotary buffer and ran over each tile four to five times using water for lubrication. The soiling generated from this action was then extracted with a wet vacuum and I turned my attention to the grout lines.

Limestone Kitchen Floor During Cleaning Brighouse Limestone Kitchen Floor During Cleaning Brighouse

To clean the grout, I used a strong dilution of Tile Doctor Pro-Clean which was left to soak into the grout for ten minutes before being scrubbed by hand along joint lines. This was then rinsed off and extracted as before. Switching back to the limestone floor the burnishing work continued with the 800 and 1500 grit pads, applied as before with water for lubrication and rinsing and extracting afterwards.

After the end of the first day the floor looked much cleaner, and it was left overnight to dry out.

Sealing a Limestone Tiled Kitchen

The next day I continued with the stone burnishing using the last pad in the set which is a very fine 3000-grit pad that adds a nice polish to the limestone. This pad is applied dry with only a small amount of water sprayed onto the tiles. This last pad leaves the floor dry and ready to be sealed.

The floor was then sealed with Tile Doctor Ultra-Seal which was chosen to keep the floor looking as close to its natural light colour as possible. Ultra-Seal is a virtually invisible sealer that soaks into the pores of the stone protecting it from within and works well on limestone.

Limestone Kitchen Floor After Renovation Brighouse

The client was very happy with the result and the finish, and the new sealer would ensure dirt remains on the surface of the stone where it can easily be cleaned away with a product such as Tile Doctor Stone Soap. I always recommend this product for cleaning polished stone floors as its formula helps maintain the patina.

Limestone Kitchen Floor After Renovation Brighouse


Professional Restoration of a Limestone Tiled Kitchen Floor in West Yorkshire

Limestone kitchen floor in Brighouse Read More »

Scroll to Top