
Mouldy Ceramic Tile and Grout Bathroom Renovation in Huddersfield
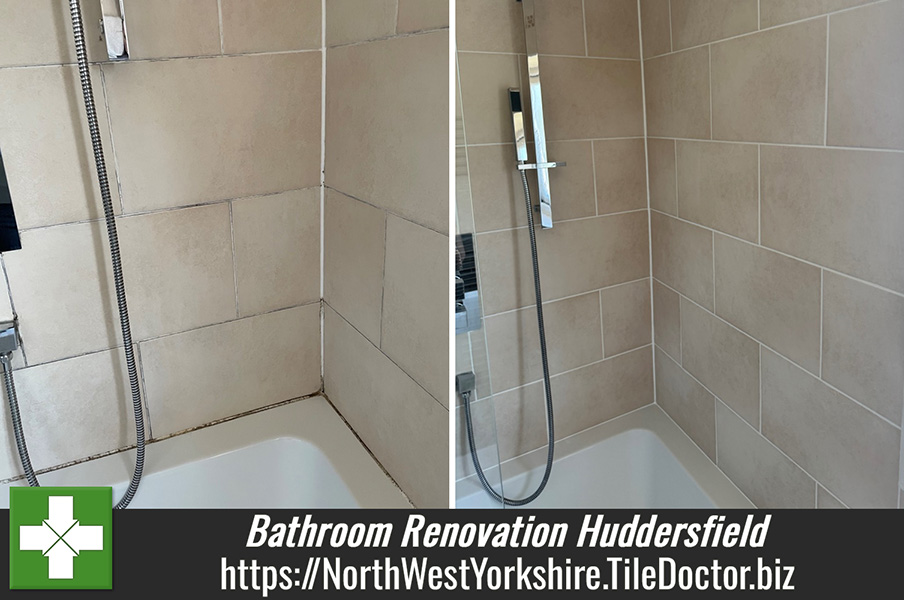
I thought I would share with you this example of a ceramic tiled bathroom I refurbished earlier this year at a property in Huddersfield. The shower and tiling had been installed two years earlier and unfortunately since then the grout and silicone sealant had become discoloured with dirt and mould. My customer had tried to resolve it themselves but without success, and did not fancy replacing the silicone seal so called us in.
 |
 |
The tiles were ceramic which are reasonably easy to keep clean however once mould gets a grip it can be a struggle to remove it, especially on Silicone which is best dealt with by stripping it out and replacing. I was confident in being able to renovate the bathroom so it looked like a new installation however this won’t resolve the underlying cause which is usually a lack of adequate ventilation.
Cleaning/Repairing Bathroom Tiles
I first washed the ceramic wall tile and grout surrounding the bath with Tile Doctor Duo Clean to remove staining from the usual combination of dirt, grime, body oil, and soap scum. Being a spray this product sticks well to vertical surfaces where its best left for five to ten minutes before scrubbing in so it can get to work breaking down the dirt. I then rinsed the wall tiles with water and re-treated any stubborn stains with a repeat of the process until all the tile and grout was clean.
This process did a good job of cleaning the grout however there were a few areas of grout that were very badly stained. To resolve this and achieve a consistent appearance the grout was replaced. I don’t normally like doing this as you risk chipping the tile also it’s quite messy. The alternative is to colour the grout using a Grout Colourant but that looks best when the whole bathroom is done and that wasn’t the case.
Once happy with the tile and grout I began to strip off the silicone mastic with a sharp knife and then clean up the surface. The bath was then filled with water before applying a fresh thin bead of white silicone sealant. Applying mastic well takes a lot of practice to get a nice smooth finish but having carried out numerous bathroom and kitchen refurbs over the years it’s a skill I’ve manage to acquire. Once the fresh mastic was dry the water was emptied from the bath, this technique ensures the silicone is positioned correctly.
As you can see from the pictures there was quite a remarkable transformation. The job was completed in less than a day so no inconveniences, the customer was very happy and said they were delighted with the results, all that remained was to redecorate the ceiling.

For aftercare cleaning you can’t go wrong with Tile Doctor Aqua Pro which comes with a spray attachment and is designed for cleaning shower tile and grout.

Professional Bathroom Tile & Grout Renovation in Northwest Yorkshire
Mouldy Ceramic Tile and Grout Bathroom Renovation in Huddersfield Read More »


