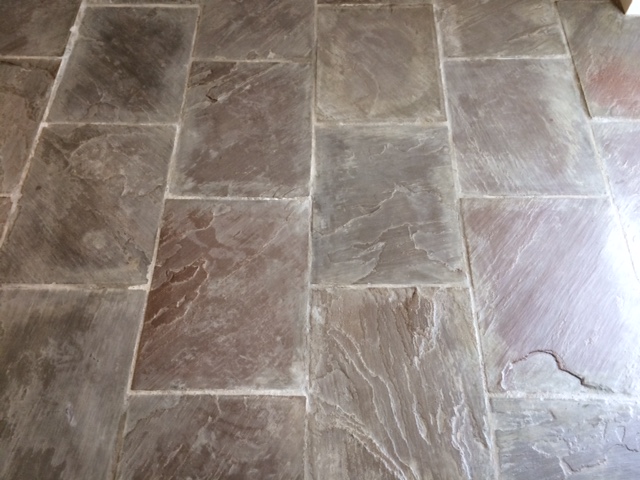
north yorkshire

Limestone Tiled Floor Before After Renovation York

Restoration Clean of a Limestone Tiled floor in York

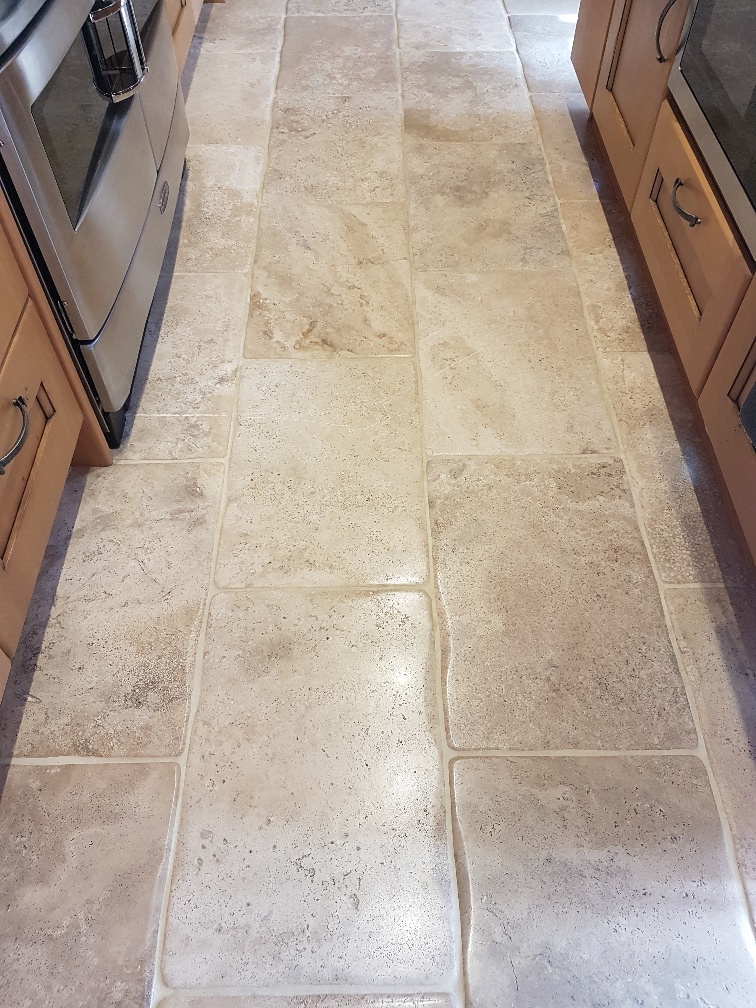
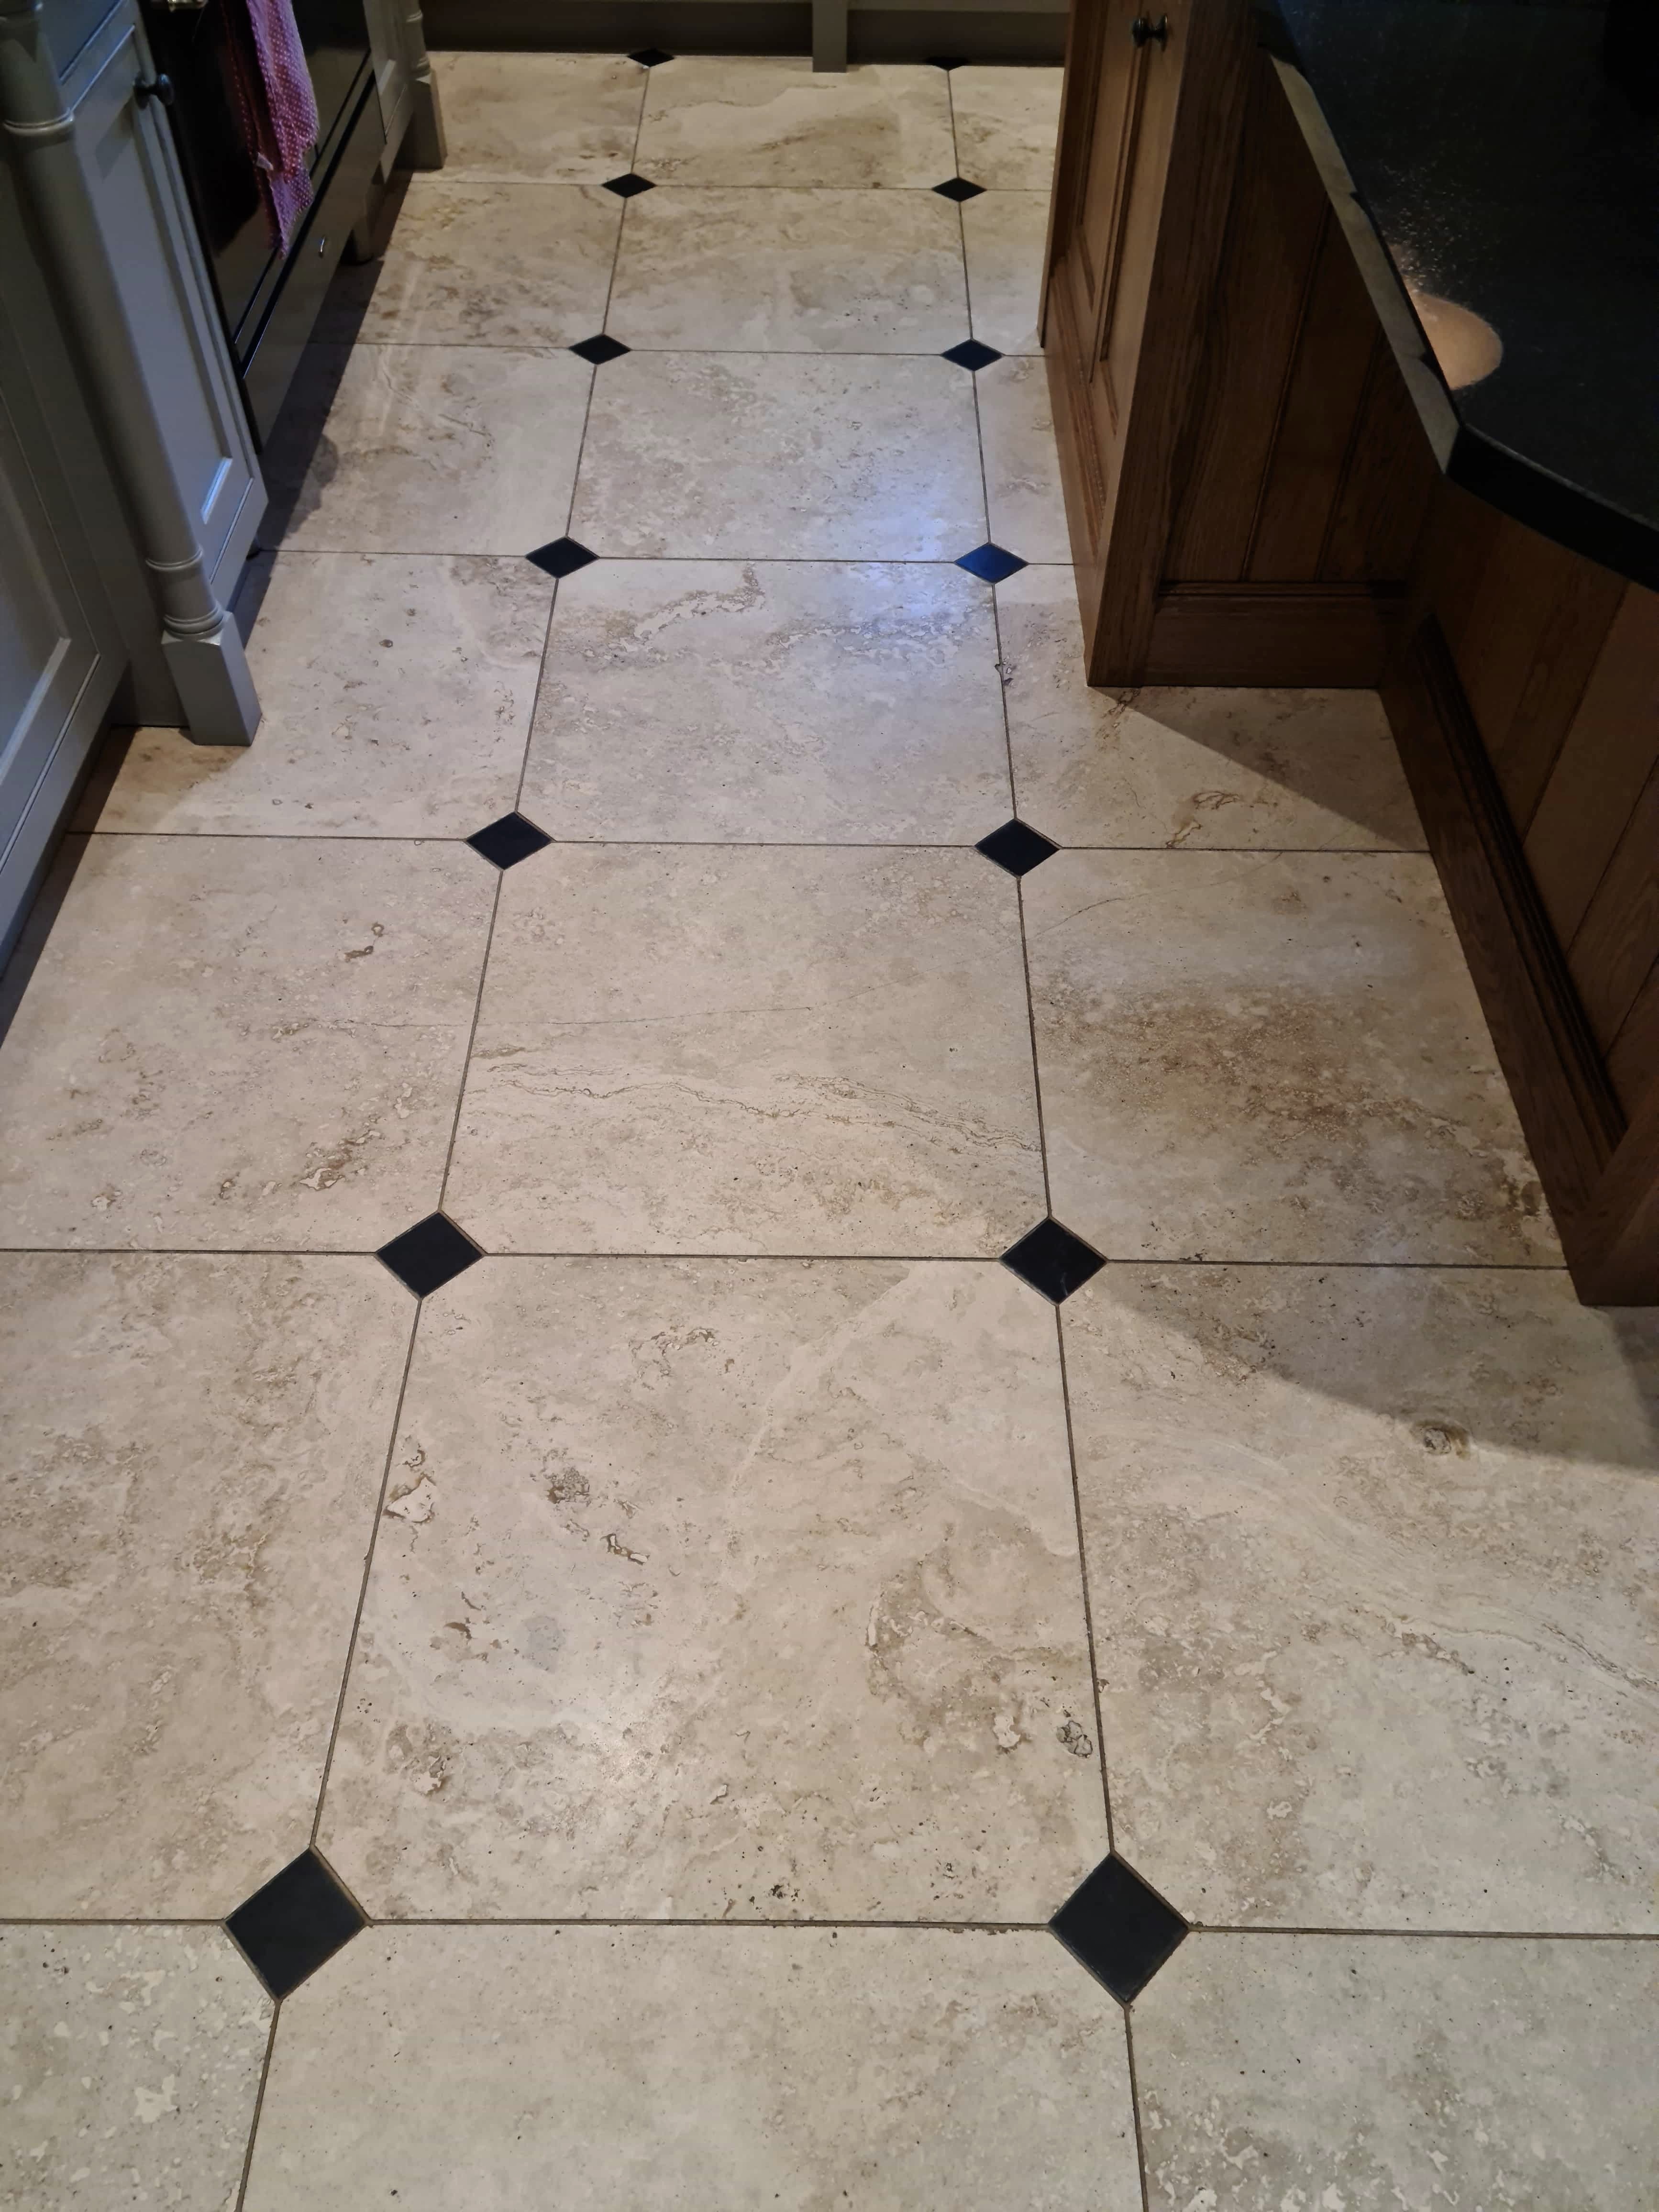
The pictures show a large Limestone floor laid through much of the ground floor of a property situated on the outskirts of York seventeen years prior.
Limestone Tiled Floor Before Cleaning York Limestone Tiled Floor Before Cleaning York

The owners had three dogs that slept in their own doggy room. The floor in this room was in the worst condition of the five rooms as it had been subject to significant wear and tear. The Limestone tiles looked dull with ingrained dirt and the grout was stained and patchy.

Limestone Tiled Floor Before Cleaning York

The original tiler had laid the floor well, but he had applied a satin topical sealer to the stone most of which had worn off over the years. A floor like this would need a little maintenance and the sealer reapplying from time to time to maintain it.

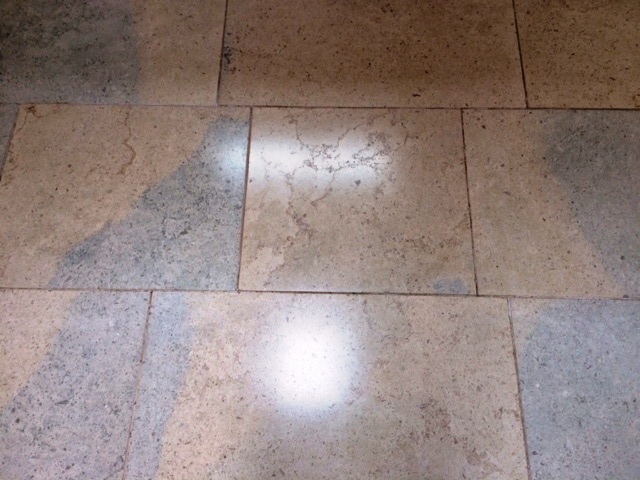
I completed a test clean for the client to show them what could be achieved which came out well. Happy with the result they accepted my quote for the restoration work, and we booked in a suitable time to complete the work.

Cleaning a Limestone Tiled Floor

The area was quite large, so I separated the job into rooms and started by protecting the skirtings and woodwork from splashing etc. I decided to do a chemical clean first to remove what was left of the old sealer but more importantly to give the grout a thorough clean which was making the floor look scruffy.

For this I opted to apply a strong dilution of Tile Doctor Pro-Clean which was left to dwell for a short while and then worked in with a mechanical rotary cleaner. It gets to work on the ingrained dirt and sealer. It should also help to get rid of the doggy smells. This process turns the cleaning solution black and is then extracted using a wet vacuum keeping the mess to a minimum. I paid particular attention to the grout which was deeply discoloured and found that some areas required going over a couple of times to get them clean. I was only just getting started on the cleaning but immediately the floor was looking so much better.

I then deep cleaned the Limestone with a set of diamond burnishing pads, working in sequence from the 400 grit through to 1500 grit. A small amount of water was used to aid the lubrication and after each pad have been over the entire area few times the solution is rinsed off with more water and extracted with the wet vacuum.

The floor came back to almost new and as the client wanted a satin finish, I ended by applying a 3000-grit pad to add a deeper polish to the Limestone. The floor was then left overnight to dry.
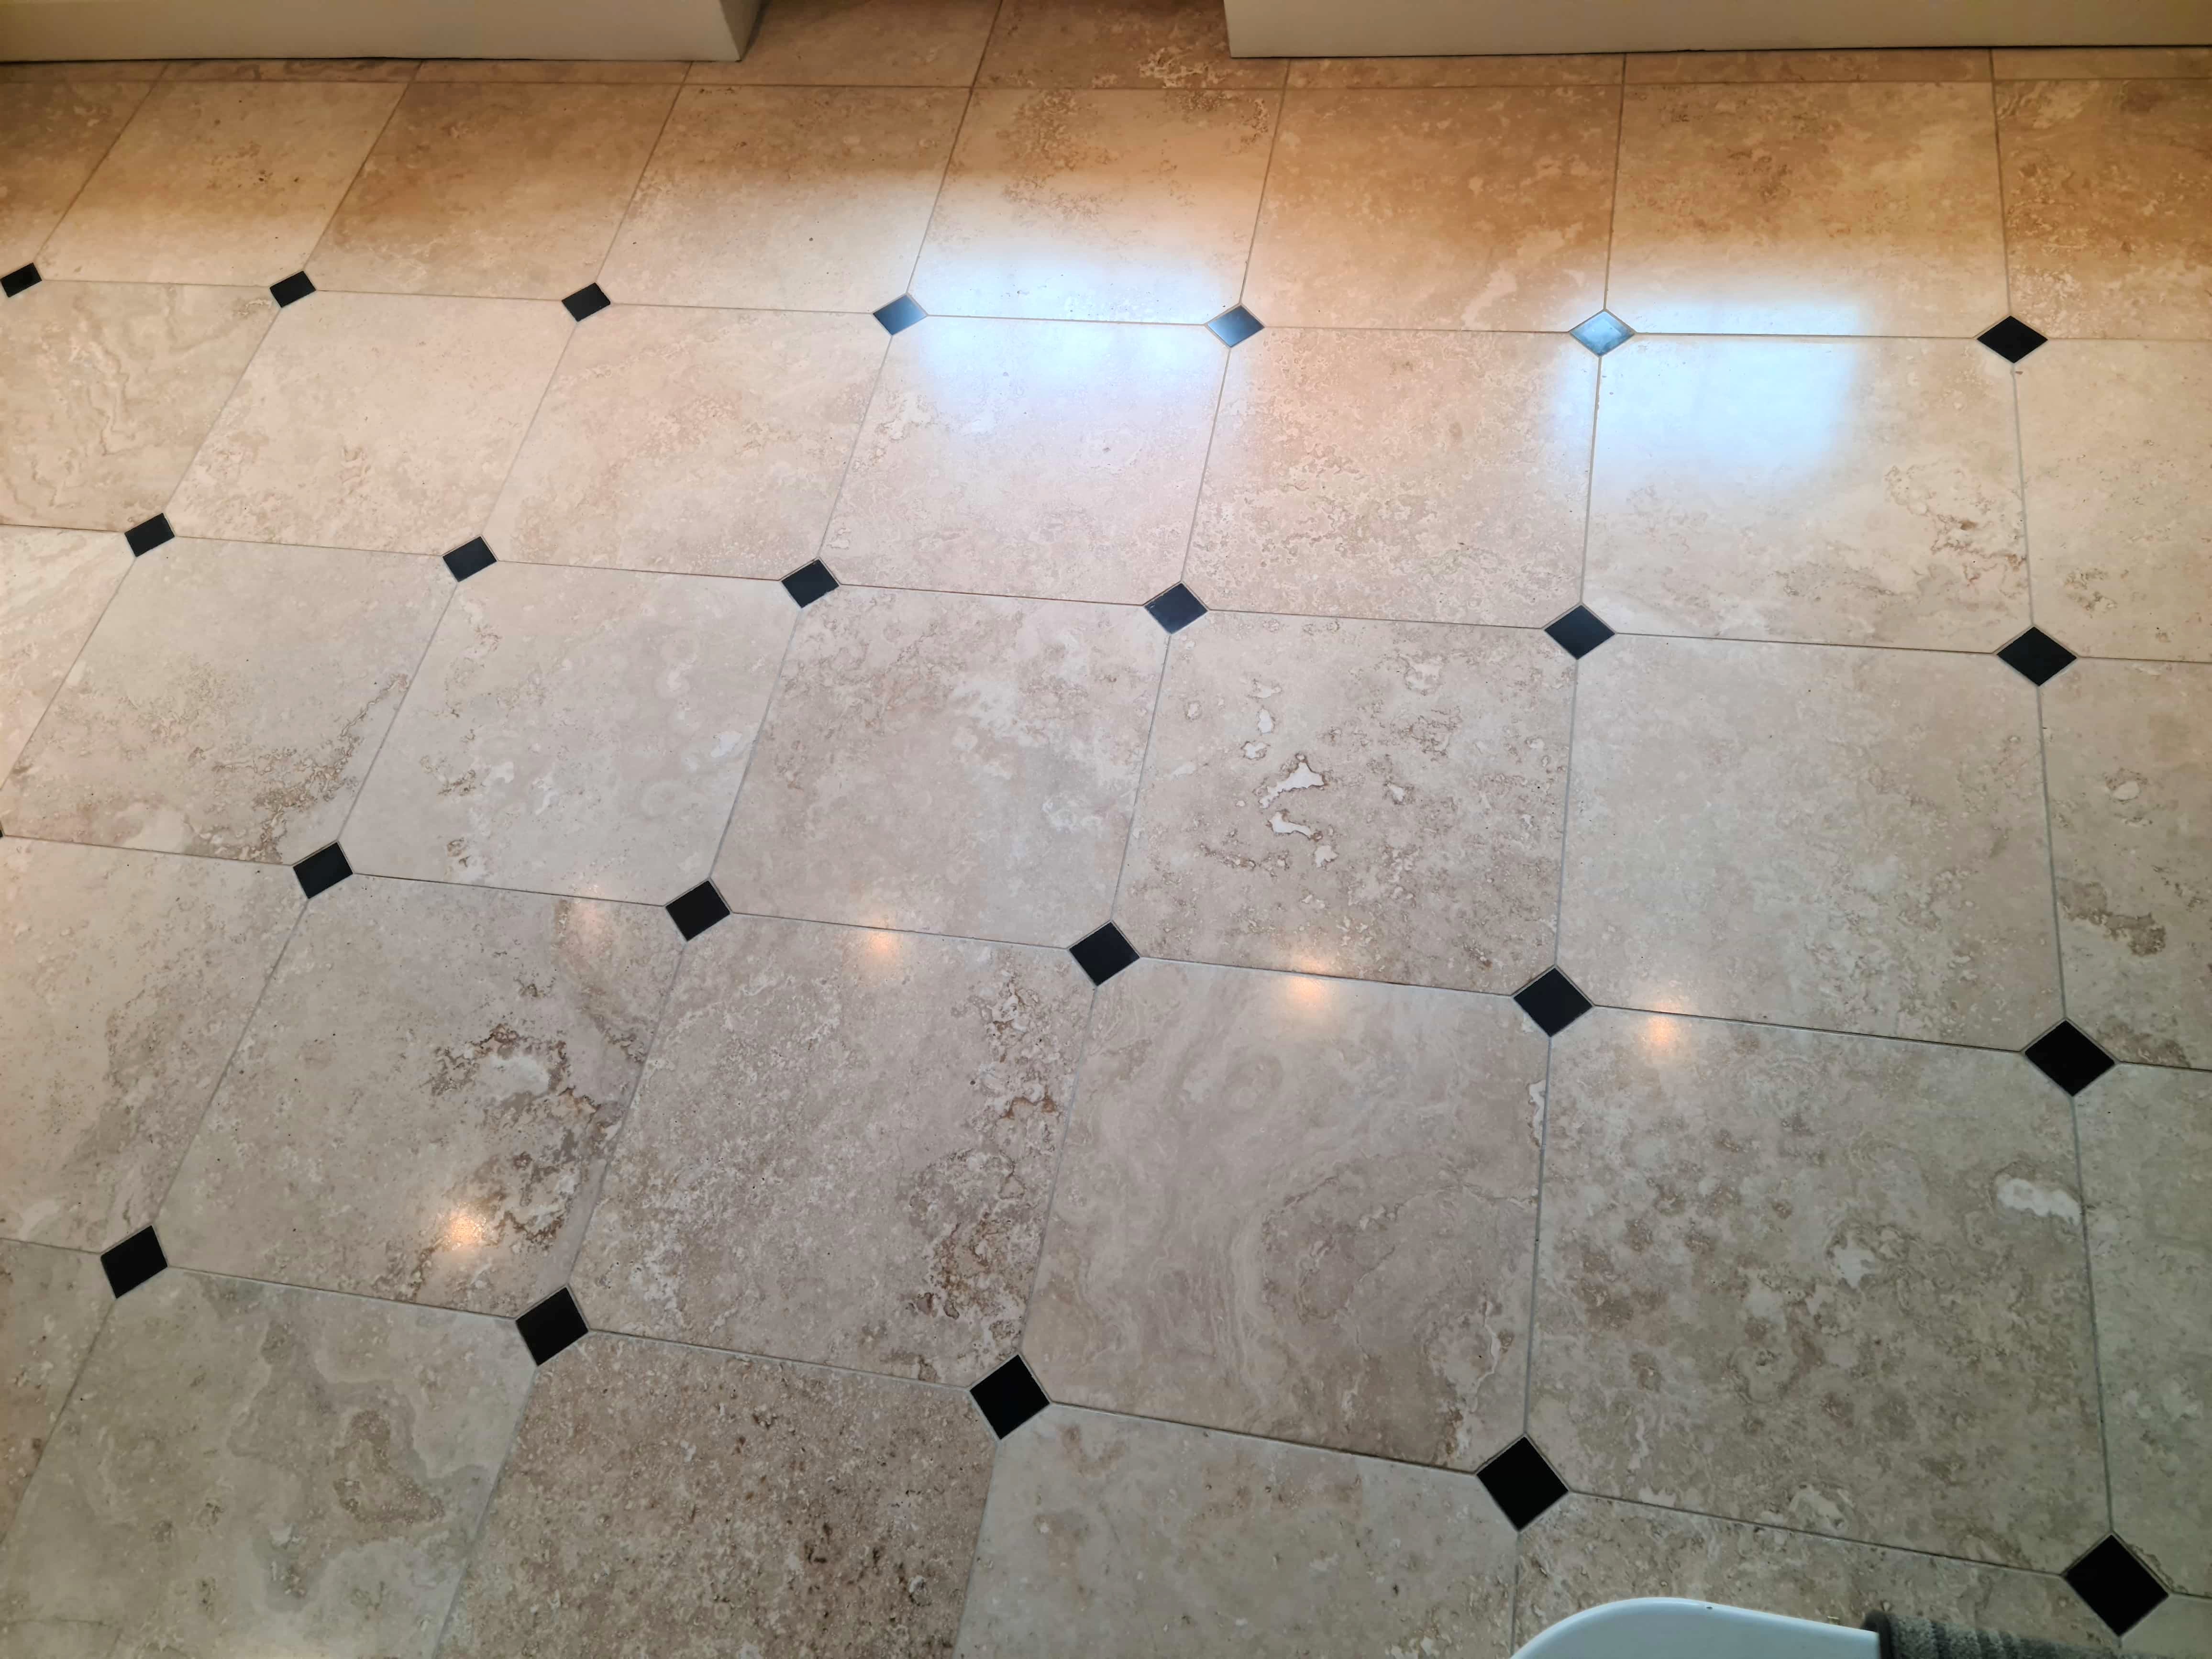
Limestone Tiled Floor After Cleaning Sealing York

Sealing a Limestone Tiled Floor

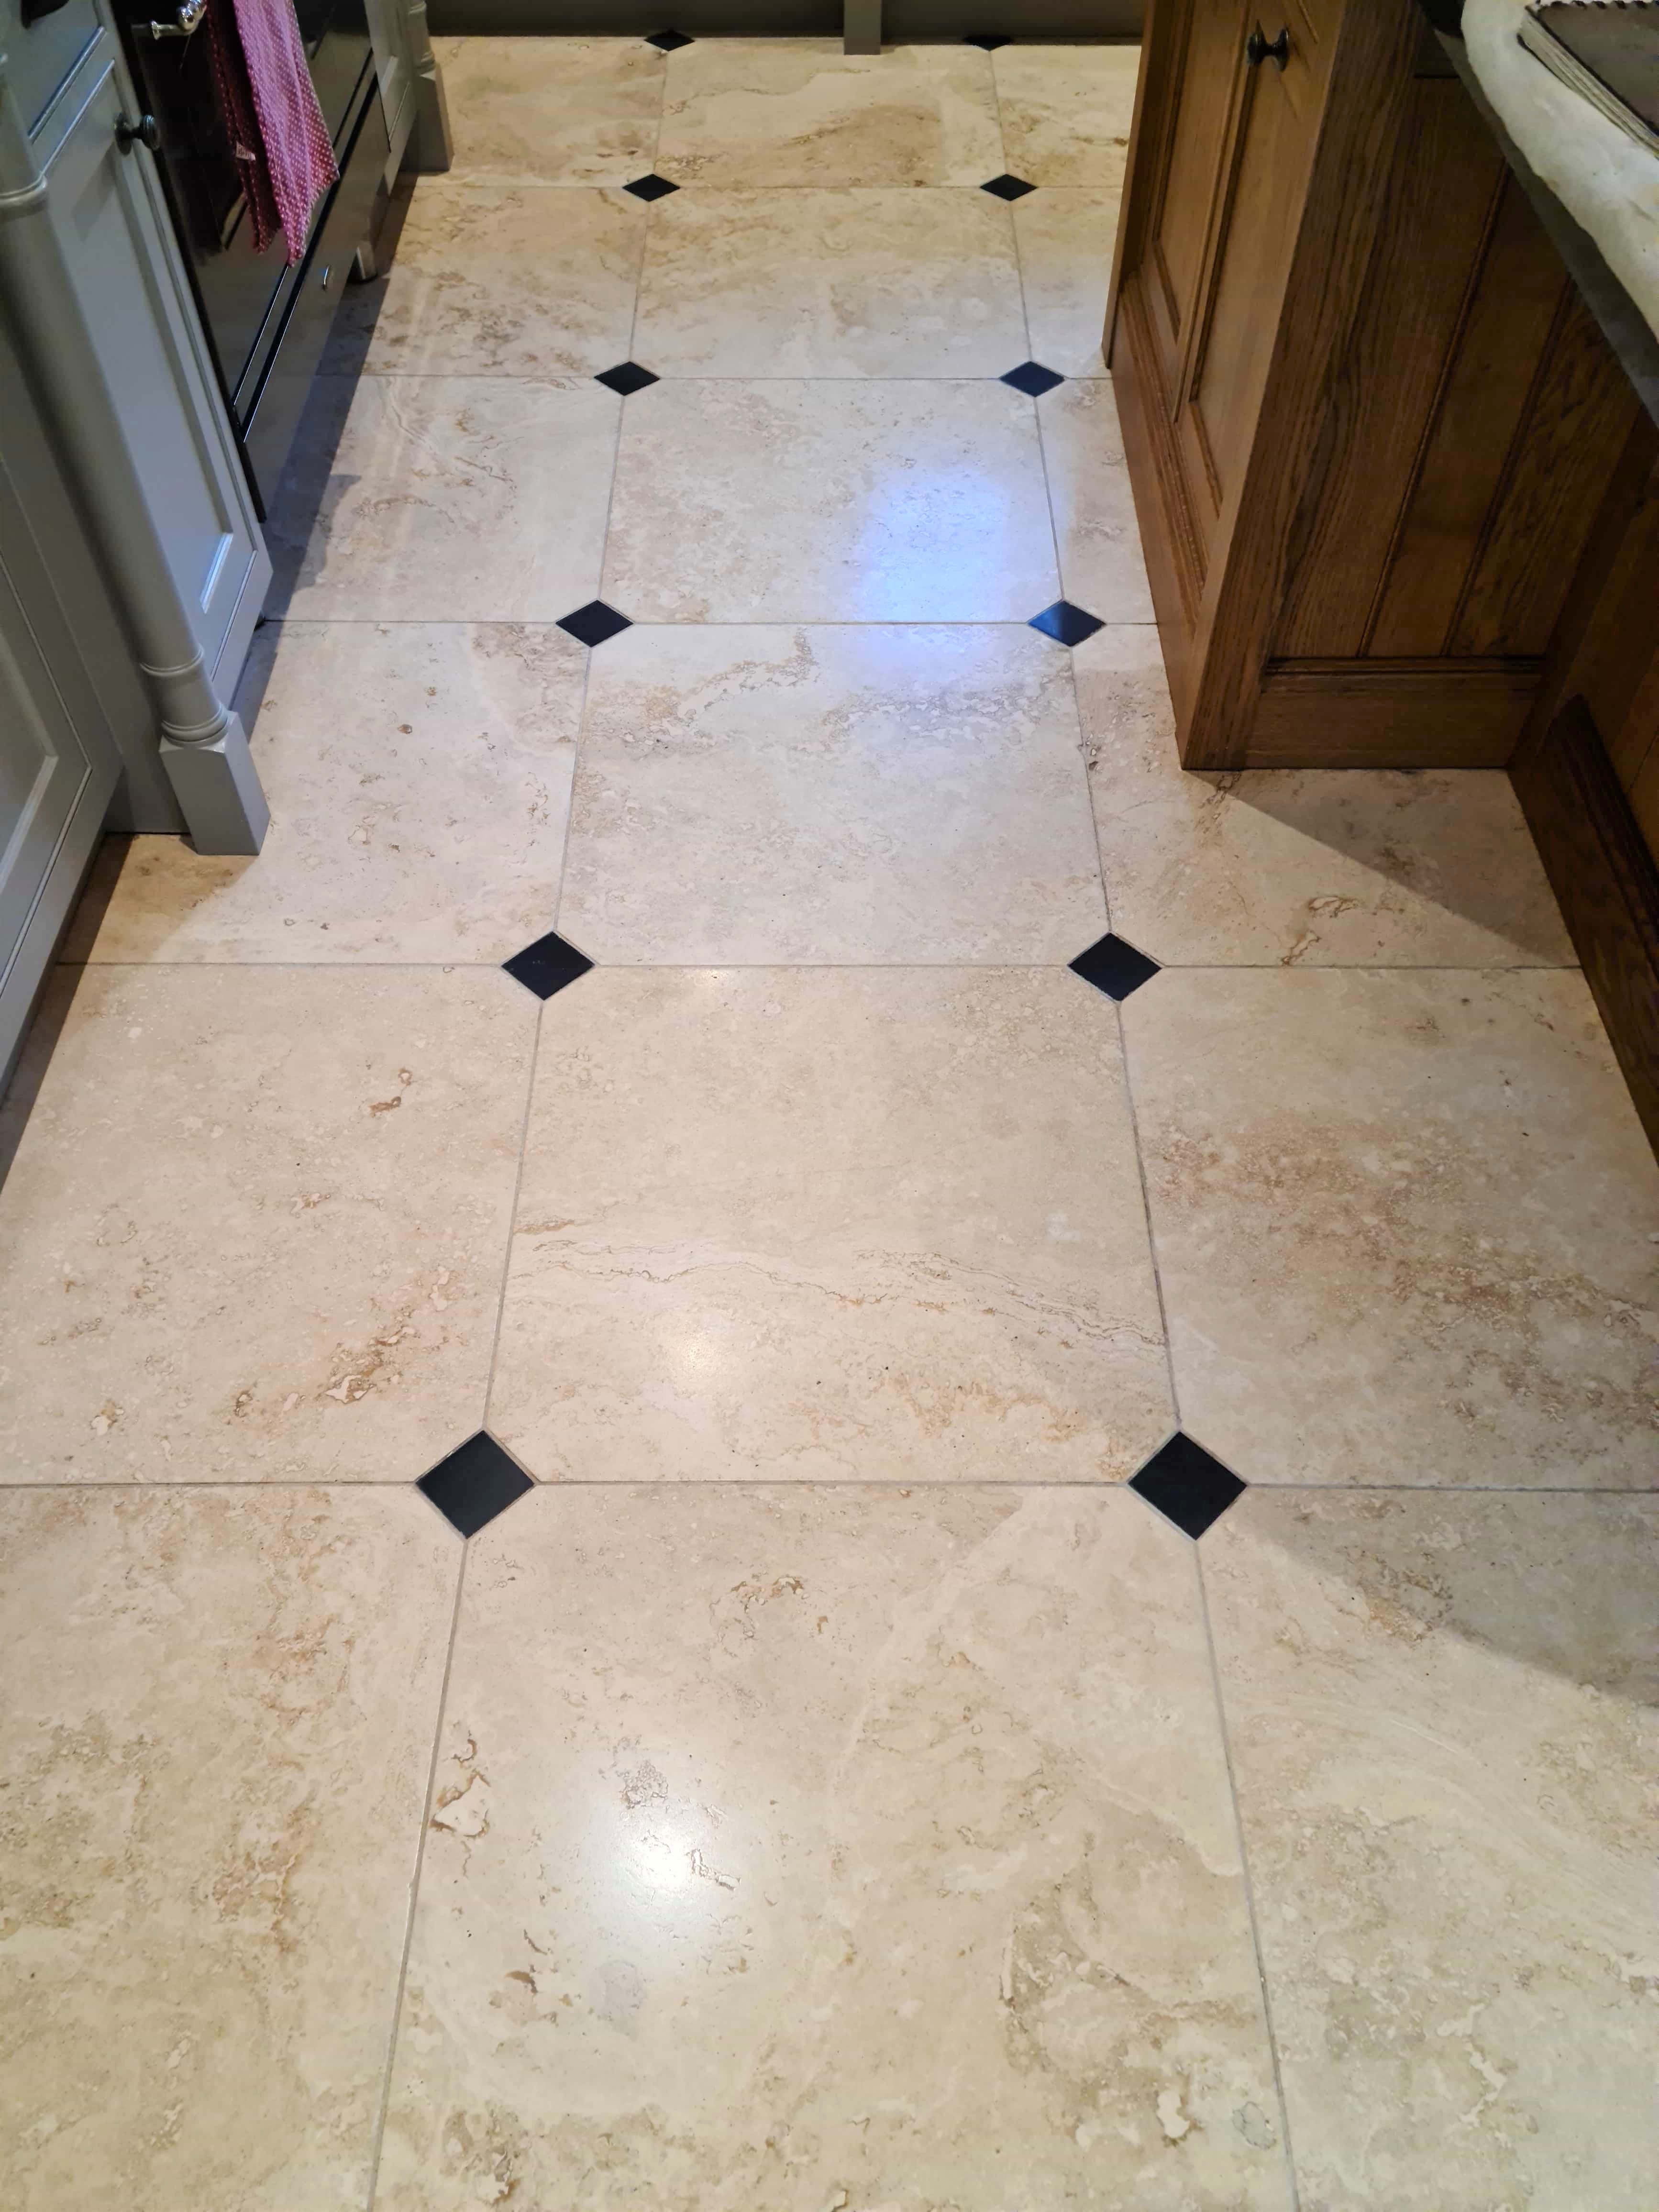
The last step of polishing with the 3000-grit pad already leaves the floor quite dry however I always like to check before sealing so just to be sure I took some reading with a damp meter. The readings were fine, so I started applying the first of two coats of Tile Doctor Ultra Seal to finish the floor. This is an impregnating sealer (as opposed to the previous topical sealer) that soaks into the stone protecting it from within but without affecting its appearance. This product was chosen in consultation with the client who was specific about how they wanted to floor to look.
Limestone Tiled Floor After Cleaning Sealing York Limestone Tiled Floor After Cleaning Sealing York

The floor now looked superb. Both the client and l were very pleased with the finished floor and so where the dogs! For aftercare I recommended Tile Doctor Stone Soap which is designed for cleaning polished stone floors like these, it’s a gentle stone cleaner that helps maintain the patina and ideal for this type of floor.


Professional Restoration of a Limestone Tiled Hallway in North West Yorkshire

Restoration Clean of a Limestone Tiled floor in York Read More »

Victorian Tiled Hallway Floor Before After Restoration Masham

Restoration of a Carpet Covered Victorian Tiled Hallway in Masham

I was contacted by a homeowner who had moved into a property in the small Yorkshire market town of Masham and discovered a Victorian tiled floor under the hallway carpet. Realising this was a valuable period feature he was keen to see if it could be restored. As you can imagine he was delighted when I told him that it should be possible, and he was keen to get it uncovered and back on show.

Victorian Tiled Hallway Before Paint Splashes Removed in Masham

After discussing the floor on the phone, I visited the property and removed the carpet so we could take a long look at the Victorian tile’s underneath. The carpet had protected the floor well and it was in good physical order, (i.e. no cracks etc.) it was just very dirty but was also marked with paint splashes from some untidy decorating work from the past. I confirmed none of these issues should present a problem and got the go ahead for the work to start.

Victorian Tiled Hallway Before Paint Splashes Removed in Masham

Cleaning/Repairing a Victorian Tiled Hallway Floor

There was no sealer on the floor, so I started the cleaning process using a medium dilution of Tile Doctor Pro-Clean which was worked into the tiles using a coarse 200-grit pad fitted to a rotary floor buffer. I then used a 400-grit hand-held diamond block to clean the edges which couldn’t be reached by the machine. This also removed the paint splashes which should have been on the skirting boards and not the floor!

The floor was then rinsed with water and the soil extracted with a wet vacuum. I was able to inspect the floor at this stage and spot treat areas that needed more work as they were a little stubborn. It wasn’t a large hallway and except for the paint it only needed a light clean. The result was I was able to complete the cleaning process by lunch time. I dried the floor as much as possible and left an air blower in the space for a couple of hours.

I returned later that afternoon and checked the floor for moisture using a damp meter. The floor was mostly dry, but some areas needed some more help with a heat gun. It was late summer and so still warm and so there was no need on this occasion to leave the floor overnight.

Sealing a Victorian Tiled Hallway Floor

Once I was happy the floor was dry, I started sealing the tiles with the first of four coats of Tile Doctor Seal and Go. This is a specially formulated water-based blend of acrylic polymers that provides both a stain resistant surface seal and a durable low-sheen finish. It is perfect for a floor of this age as it allows moisture vapour to pass through, this is an important feature when considering a sealer for old floors which will not have a damp-proof membrane installed. If you were to apply a non-breathable sealer moisture can get trapped under the floor causing it to spread out to the walls resulting in rising damp.

Victorian Tiled Hallway After Paint Splashes Removed in Masham

The combination of the cleaning and new sealer brought the floor back to life and it now looked in keeping with the rest of the property which had numerous other period features. My client was over the moon with the difference and very happy to see the back of the grubby carpet.

Victorian Tiled Hallway After Paint Splashes Removed in Masham


Professional Restoration of a Victorian Tiled Hallway in North Yorkshire

Restoration of a Carpet Covered Victorian Tiled Hallway in Masham Read More »

White Moleanos Limestone Kitchen Floor Before After Renovation Leeds

White Moleanos Limestone Kitchen Floor Renovated in Leeds

Moleanos Limestone is a very difficult stone to work with due to its’ porous chalky nature and needs to be sealed to prevent dirt accumulating in the stone. Without a sealer in place dirt builds up in the pores leaving it looking dirty and this is exacerbated in the case of White Moleanos Limestone which really shows up the dirt. I mention this as I was asked to visit a property in Leeds which had White Moleanos Limestone installed in the Kitchen and was now suffering this exact problem with the client unable to get it clean. The grout was also quite badly discoloured.

White Moleanos Limestone Kitchen Floor Leeds Before Cleaning White Moleanos Limestone Kitchen Floor Leeds Before Cleaning

I visited the property to survey the floor and quote for renovating the stone. I ran some tests and could see that as suspected the original sealer had broken down leaving the stone vulnerable. Sealers typically last around three to five years depending on use, but this can be significantly reduced if a strong household cleaning product is used to clean the floor.

Without a seal in place dirt was able to get into the porous stone and once ingrained it can be very difficult to remove without the right products and equipment. I completed a demonstration clean on a small area to show how the floor should look and the result was immediate. Confident I was able to get the floor clean my client booked me in and we agreed a date to complete the work.

Cleaning White Moleanos Limestone Kitchen Tiles

To restore the appearance of the stone I used a set of Tile Doctors Burnishing Pads which are encrusted with industrial diamonds and are used to hone the stone, remove dirt and restore its appearance. This is a slow steady process and involves working through the different grades of burnishing pads from coarse to very fine. The pads are applied with a small amount of water to lubricate and the soil generated by the process is extracted with a wet vacuum afterwards, to keep the mess to a minimum.

All the grout was cleaned by hand using a strong dilution of Tile Doctor Pro-Clean which is scrubbed into the grout lines by hand with a stiff brush. For best results I leave it to dwell for ten minutes before scrubbing, this allows it more time to break down and lift the dirt from the cementitious grout lines.

After cleaning I left the floor to dry off fully overnight.

Sealing a Moleanos Limestone Tiled Kitchen Floor

The following morning, I returned to the property and checked the floor was dry using a moisture meter. This is always worth checking as applying a sealer to a damp floor can result in a patchy appearance.

I had discussed the effects of the different sealers suitable for use on Limestone and the client specified they were after a natural look that wasn’t over shiny. With this in mind I selected Tile Doctor Ultra Seal which is a penetrating sealer formulated to provide maximum stain protection and is especially recommended for use in kitchen areas. Ultra-seal doesn’t change the look of the stone which made it a nice match for the client’s needs, it’s also a good grout sealer and will ensure the grout looks cleaner for longer.

Three coats of Ultra-Seal where applied allowing each one to dry before applying the next. With the new sealer in place the stone is protected from ingrained dirt and would prove to be much easier to keep clean in future.

White Moleanos Limestone Kitchen Floor Leeds After Cleaning White Moleanos Limestone Kitchen Floor Leeds After Cleaning

The client was very pleased with the finished result and before leaving I recommended, they maintain the floor using Tile Doctor Stone Soap which is designed for the cleaning of polished stone.


Professional Restoration of a Moleanos Limestone Tiled Kitchen in North West Yorkshire

White Moleanos Limestone Kitchen Floor Renovated in Leeds Read More »

Terracotta Tiled Floor Before After Renovation Bramhope

Removing Grout Haze from a new Terracotta Conservatory floor in Bramhope

I was asked to visit a property in the old Yorkshire village of Bramhope to view a Terracotta conservatory floor. The owners of the property been recently had the floor laid and were unhappy with its appearance. The Terracotta tiles looked faded and washed out and did not have the finish they were expecting; they were also finding it difficult to clean.

I viewed the floor and went through with them what the tiler had done. Apparently, he started ok by giving each tile two coats of linseed oil which is a traditional approach but not something I would recommend these days. He then laid the floor and grouted it and told the customer that it didn’t need further sealing and that a good wash the next day would get rid of the grout and the dull appearance of the floor. Unfortunately, despite the customer washing the floor nothing he could do improved the appearance of the tiles and they remained dull and un-inviting.

Terracotta Tiled Conservatory Floor Before Cleaning

I was asked my opinion and having come from a tiling background of many years I can tell you his advice was completely wrong. Linseed oil is like a pre-seal so even touching it with greasy or dirty hands will permanently stain the tile so now grout was stuck in the linseed oil ruining the appearance of the terracotta. To clean up the tile and give it the appearance it deserved I would have to remove the grout haze and then seal with a more suitable product. The client was relieved that the floor could be salvaged and was happy to go ahead with my quote.

Cleaning a Terracotta Tiled Conservatory Floor

To remove the grout haze, I applied a 400-grit coarse diamond burnishing pad to the floor which was run over the tiles with a dilution of Tile Doctor Grout Clean-Up. The acidic nature of Tile Doctor Grout Clean-up combined with the abrasive properties of the diamond pad dealt with the unwanted surface grout and helped close the pores of the tile improving its appearance.

After thoroughly rinsing with water and extracting the soil with a wet vacuum the floor looked immediately better. The floor was inspected, and any problem areas retreated using the same process until I was happy with the floor.

Sealing a Terracotta Tiled Conservatory Floor

I left the floor to dry out for two days and then returned to seal with Tile Doctor Seal and Go which is ideal for Terracotta and being a water-based product, it doesn’t leave a smell as it dries. Seal and Go is a specially formulated water-based blend of acrylic polymers that provides both a stain resistant surface seal and a durable low-sheen finish. It restored the natural colour of the terracotta and gave the floor the lovely sheen that the customer originally wanted.

Terracotta Tiled Conservatory Floor After Cleaning

The floor now looks as it should. The client was really pleased with the renovation, the conservatory is now a pleasure to use!


Professional Restoration of a Terracotta Tiled Conservatory in North West Yorkshire

Removing Grout Haze from a new Terracotta Conservatory floor in Bramhope Read More »

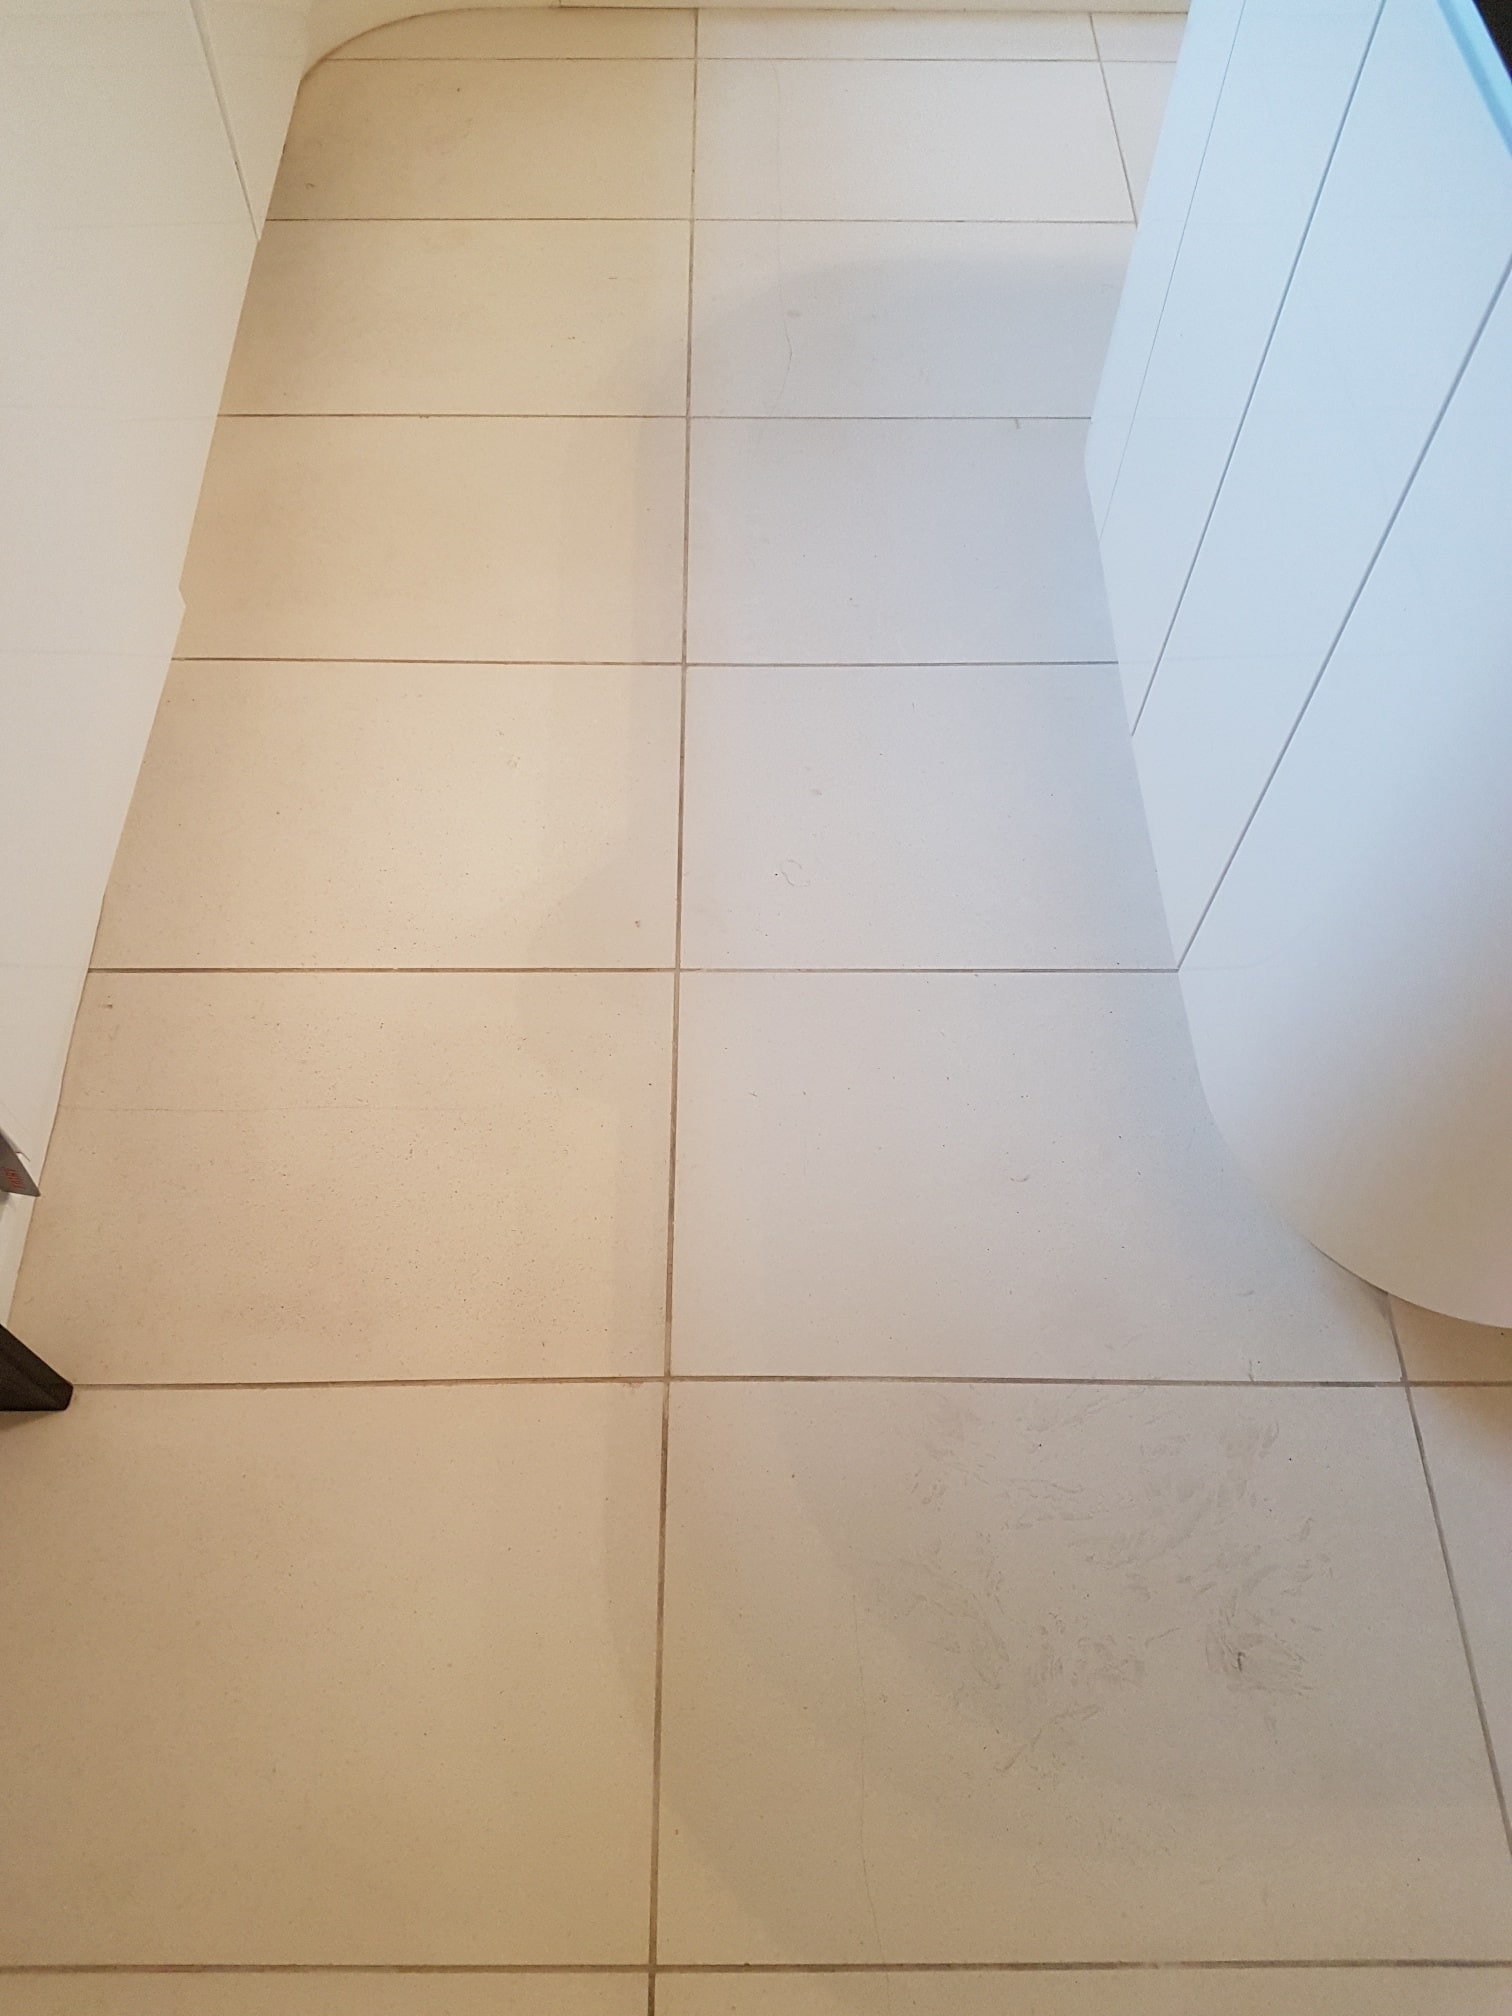
Bath Tile Before After Renovation Harrogate

Leaking Bath Mastic Replaced and Tile Renovated in Harrogate

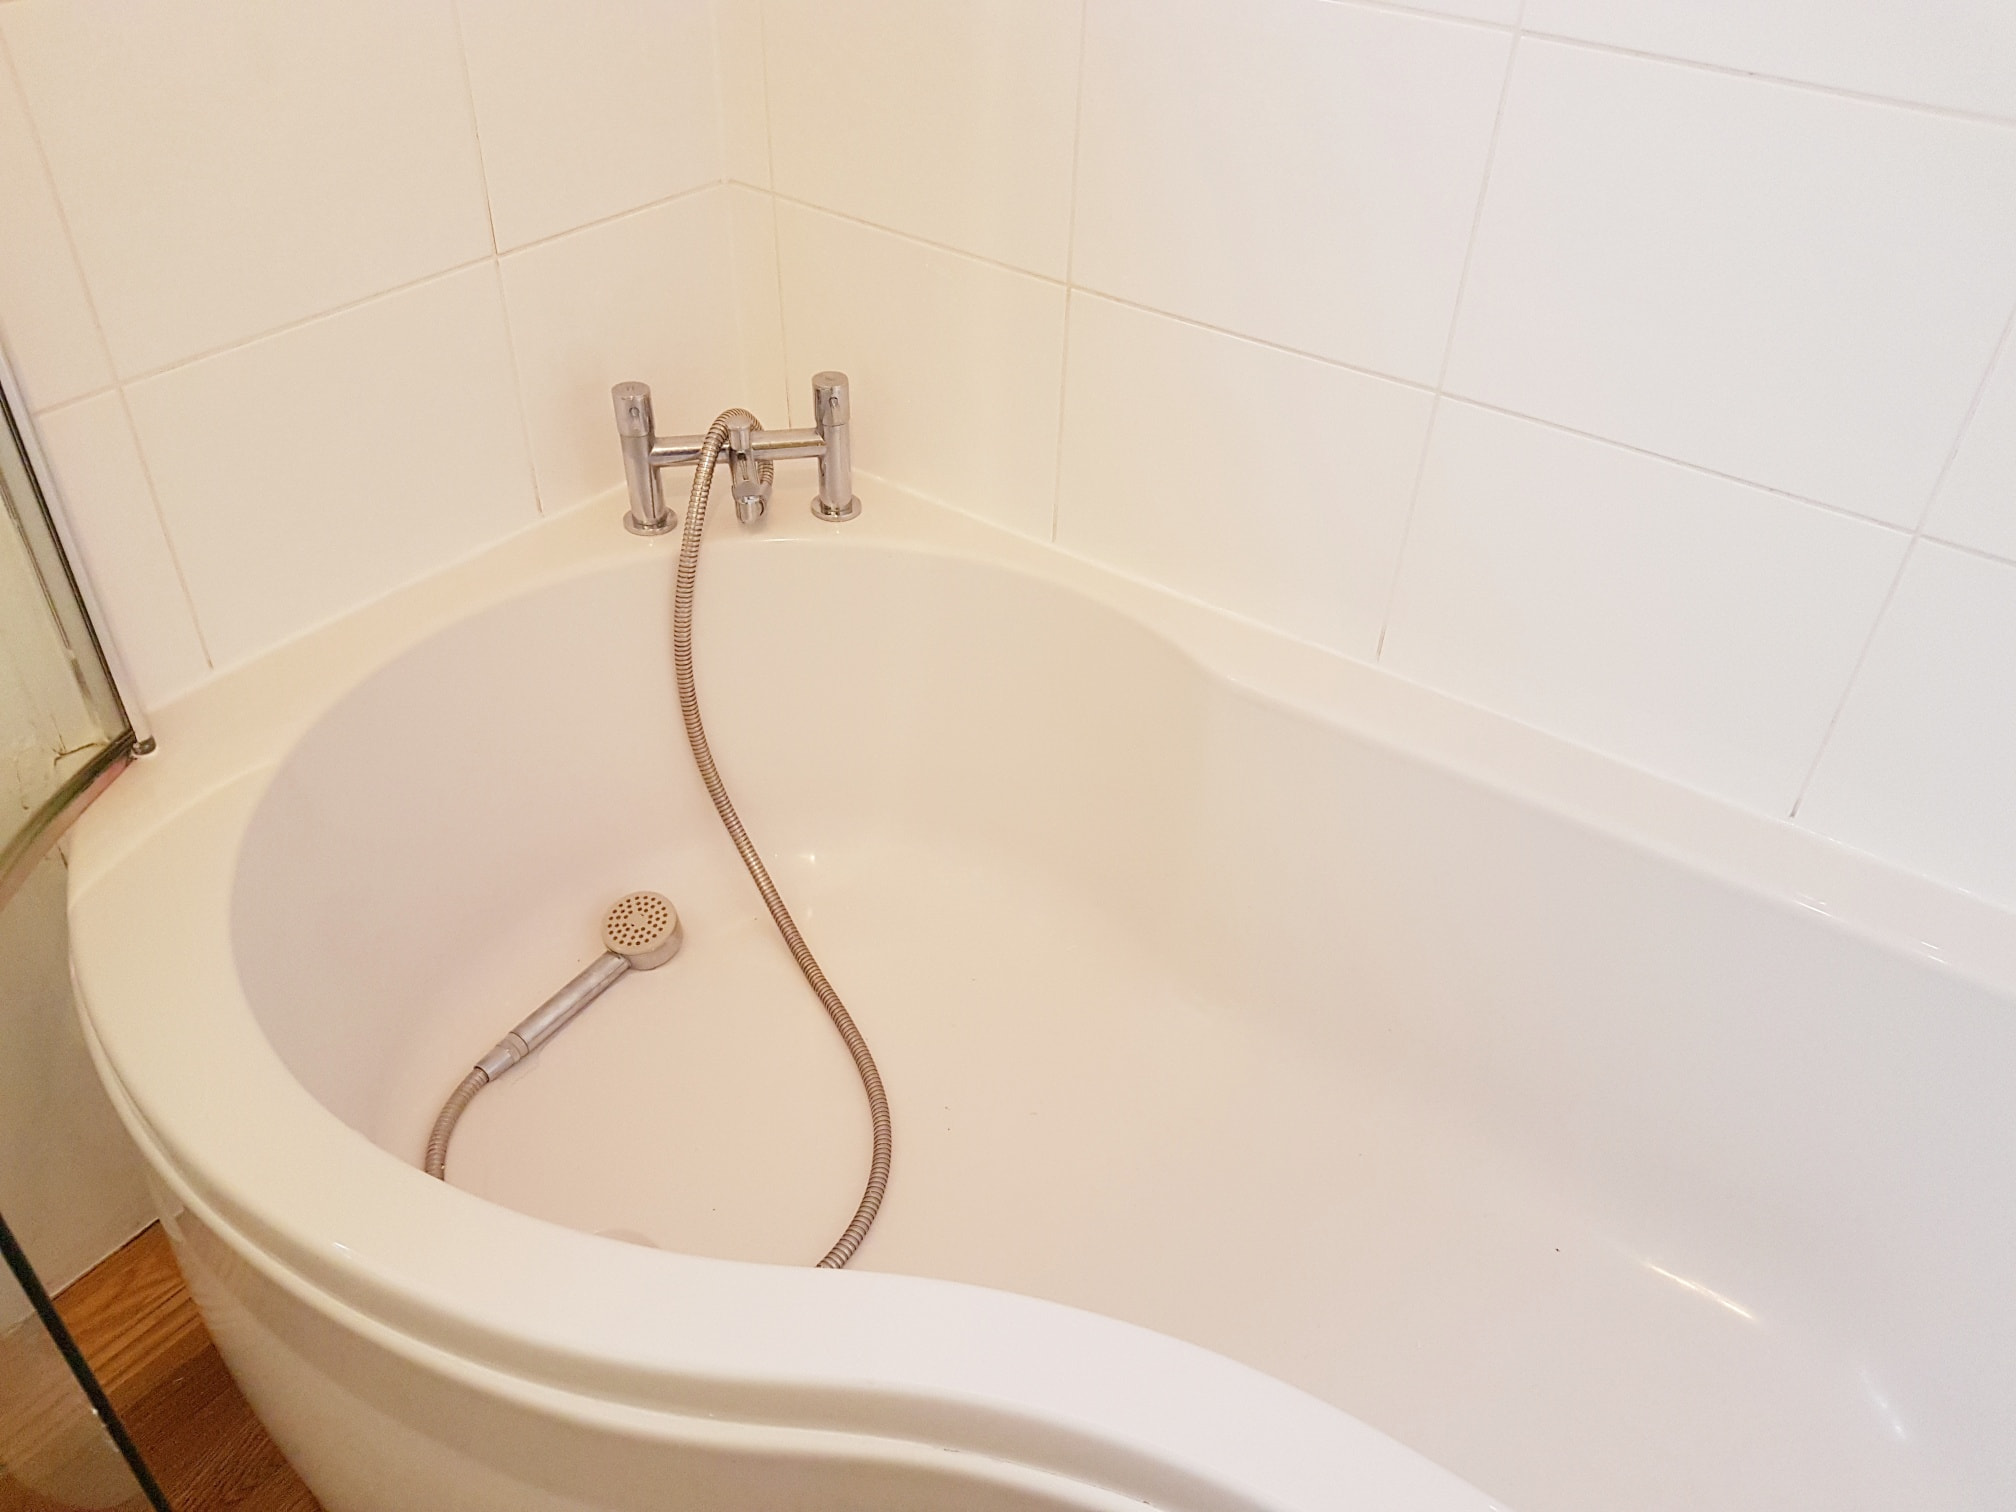
I couldn’t believe the state of the mastic sealant that had been applied to this bathtub at a house in the North Yorkshire Spa town of Harrogate. As you can see from the pictures, it was a mess. There were at least three layers of white silicon mastic sealant then a layer of clear silicone had been applied with a spatula then some grout on top of that! I feared the worst.

Renovating White Ceramic Tiled Bathroom Harrogate Before

It was the result of a succession of bodge jobs that didn’t work and continued to let water leak down to the room below where it had left brown stains on the ceiling. The client had unfortunately tried to get it patched up but had just made the problem worse. The problem needed to be resolved properly so the ceiling below could dry out, be repaired and then re-painted.

Had the problem been dealt with immediately the damage would not have been so bad. By the time the water shows itself on the ceiling the leak has probably already been there for some time. The bathroom itself was in good condition but the mastic sealant was really letting it down. I discussed with the client what needed to be done and we agreed a price for the work and returned the following week.

Renovating White Ceramic Tiled Bathroom Harrogate Before

Cleaning/Repairing Bathroom Tiles

I first washed the Ceramic wall tile and grout surrounding the bath with Tile Doctor Oxy-Gel to remove staining from the usual combination of dirt, grime, body oil, and soap scum. Being in gel form, this product sticks well to vertical surfaces where its best left for five to ten minutes before scrubbing in so it can get to work breaking down the dirt. I then rinsed the wall tiles with water and re-treated any stubborn stains with a repeat of the process until all the tile and grout was clean.

Once happy with the tile and grout I began to strip off the layers of silicone mastic. This is a slow process by hand, with care not the damage the tiles or the bath. After 4 hours it was all off. The final layer of white silicon was jet black, so had come away from the bath a long time ago. It is essential to have a nice clean surface to apply new silicon to ensure the best result. Adding layer upon layer will not solve the underlying problem.

Once l completely removed all traces of silicone l ran a heat gun over gap for about half an hour to remove the moisture. If any moisture had been left the new sealant wouldn’t adhere to the bath and tile properly causing it to peel off later and we would be back to square one.

The last step of the renovation was to fill the bath with water before applying a fresh thin bead of white silicone sealant. Applying mastic well takes a lot of practice to get a nice smooth finish but having carried out numerous bathroom and kitchen refurbs over the years it’s a skill I’ve manage to acquire. Once the fresh mastic was dry the water was emptied from the bath, this technique ensures the silicone is positioned correctly.

Renovating White Ceramic Tiled Bathroom Harrogate After

As you can see from the pictures there was quite a remarkable transformation. The client was speechless, the difference to the overall look of the bathroom was astounding. It would no longer be a chore for them to use the bathroom. Now they just need to allow the downstairs ceiling to dry out so they can redecorate.

Renovating White Ceramic Tiled Bathroom Harrogate After

Glazed Ceramic tiles are easy to clean however Grout can be a problem due to its cementous nature which traps dirt therefore I recommend protecting the grout with grout sealer which forms an invisible barrier over the grout and makes it easier to wash clean. For aftercare you can’t go wrong with Tile Doctor Aqua Pro which is designed for cleaning shower tile where the grout has been sealed.


Professional Restoration of a Bathroom Tiles in North West Yorkshire

Leaking Bath Mastic Replaced and Tile Renovated in Harrogate Read More »

Jerusalem Stone Floor Before After Cleaning York

Jerusalem Limestone Floor Renovation in the City of York

Jerusalem Stone is a pale variety of Limestone that comes from Israel and is available in different colours. It’s a high-quality material that has been used in construction for thousands of years however like all Stone used as flooring, it benefits from being sealed to prevent dirt from becoming ingrained in the stone.

Jerusalem Limestone Before Cleaning York

This ground floor of this house in the historic walled city of York had around 60 metres of Jerusalem Limestone installed throughout the kitchen area and some adjacent steps. Its appearance had degraded with use and was now looking flat, dirty and generally uninviting. Additionally, the customer didn’t like the natural pitting in the stone which proved to be a trap where dirt became ingrained making it more difficult to clean.

Jerusalem Limestone Before Cleaning York

I surveyed the floor and discussed the process required to restore the floor including restoration work to fill the pitting. I also worked out a price which was agreed and booked a date in the diary for the work to be done.

Cleaning and Filling a Jerusalem Limestone Tiled Kitchen Floor

My first task was to fill the holes using three different colours of grout. The floor was a mixture of shades, so I chose the best match based on the different colours in the stone. This work was tedious and a little slow but worked well and I was very pleased with the result. I come from a Tiling background so am quite used to working with grout in this manner.

Jerusalem Limestone Before Filling York Jerusalem Limestone After Filling York

Next the floor was deep cleaned with the 400, 800 and 1500 grit diamond burnishing pads fitted to a weighted floor buffer and lubricated with water. The pads are applied in sequence starting with the 400-grit pad first and the soil generated is rinsed off with water in-between. This process removes grease marks, old sealers, ingrained dirt and builds the polished finish of the limestone. I also used a hand-held burnishing block on the steps to get into the intricate corners.

The grout was particularly dirty and was cleaned by hand using Tile Doctor Pro-Clean scrubbed in with a narrow stiff brush and the soil rinsed off with water and extracted with a wet vacuum. This product is a multi-purpose cleaner and degreaser and it really gets to work on the hard to shift build-up of dirt, grime and grease.

The floor was left to dry off overnight, the lovely warm weather was a blessing as the floor was pretty large, thankfully we didn’t need to install any driers on this occasion.

Jerusalem Limestone During Grout Cleaning York

Sealing a Limestone Tiled Kitchen Floor

I returned the next day to finish the polishing with the final 3000-grit pad applied with a little water sprayed onto the tile. once done I tested the floor with a damp meter to make sure it was nice and dry and ready for sealing. The filled areas were looking particularly good, eliminating the issue the customer was having with dirt getting stuck in them.

To seal the Jerusalem Limestone and protect it from ingrained dirt I used two coats of Tile Doctor Ultra-Seal which is a natural look sealer that doesn’t alter the appearance of the stone. As well as providing the natural no-sheen look that the customer wanted it will provide stain protection and is recommended for food preparation areas such as kitchens. It also was excellent for sealing the grout and the areas I had filled.

Jerusalem Limestone After Cleaning York

The customer was very happy with the result and couldn’t believe how fast we had worked to restore the floor. She was relieved it would now be much easier to clean and maintain.

Jerusalem Limestone After Cleaning York


Professional Restoration of a Limestone Tiled Kitchen in North West Yorkshire

Jerusalem Limestone Floor Renovation in the City of York Read More »

Black Carrara Marble Tiles Before After Polishing Harrogate

Carrara Marble Orangery Floor Harrogate

These photographs are of a large Black Carrara Marble floor at customers house in nearby Harrogate, a North Yorkshire spa town which is steeped in history. In-fact the town became known as ‘The English Spa’ in the Georgian era, after its waters were discovered in the 16th century. In the 17th and 18th centuries its ‘chalybeate’ waters (containing iron) were a popular health treatment and the influx of wealthy but sickly visitors contributed significantly to the wealth of the town.

Black Carrara Marble Orangery floor Harrogate Before Polishing

When I reached the clients’ property she showed me to the Orangery. This was a lovely garden room and it had a large and expensive Black Carrara Marble tiled floor installed. The floor was installed some time ago and had since lost some of its shine and lustre which is not unusual as foot traffic on the floor will wear down the shine over time particularly as it was a dark black colour.

Black Carrara Marble Orangery floor Harrogate Before Polishing

Polishing a Black Carrera Marble Orangery Floor

I was aware that Carrara Marble is usually polished at the factory and re polishing to achieve the same high-end finish requires the use of some very expensive machinery which most Tile Doctors including myself don’t carry.

However, I am always up for a challenge and not to be beaten there were a couple of things we could do to improve the appearance of the floor. Carrara Marble by the way gets its name from the city where it’s quarried which is in the province of Massa and Carrara in the Lunigiana, the northernmost tip of modern-day Tuscany, Italy. It is not surprising that such a beautiful material comes from such a lovely place! In use since Roman times Carrara Marble is an expensive, high quality marble used in sculptures and building décor.

So, after discussing all this with the customer and a little history, l set about giving the tiles a spray burnish with a very fine 3000-grit diamond burnishing pad and a little water sprayed onto the Marble. The 3000-grit pad is a very fine grade that would not damage the surface of the marble, simply restore the shine. This pad had the desired effect and did a good job of bringing back the deep polished look of the floor.

Sealing a Black Carrera Marble Orangery Floor

Once I had finished the spray burnish and ensured the floor was dry, I applied two coats of Tile Doctor Colour Grow, this product is an impregnating colour intensifying sealer that provides durable stain protection by occupying the pores in the stone thus preventing dirt from becoming ingrained there. I chose to use this primarily to seal and protect the stone but also to enhance the beautiful natural colours.

Black Carrara Marble Orangery floor Harrogate After Polishing

The job was completed in a single day and the result was a big improvement on the dull Marble tiles I had come across that morning. It’s probably difficult to tell from the photographs but I felt the combination of spray burnishing and sealing had completely changed the appearance of the floor.

The customer was very happy indeed, the floor looked much brighter and with the sun shining through the huge area of glass, the highly polished look had definitely been restored.

Black Carrara Marble Orangery floor Harrogate After Polishing


Polishing Black Carrara Marble Floor Tiles in North Yorkshire

Carrara Marble Orangery Floor Harrogate Read More »

Lapicida Sandstone Tiled Floor Before and After Deep Cleaning Bedale Yorkshire

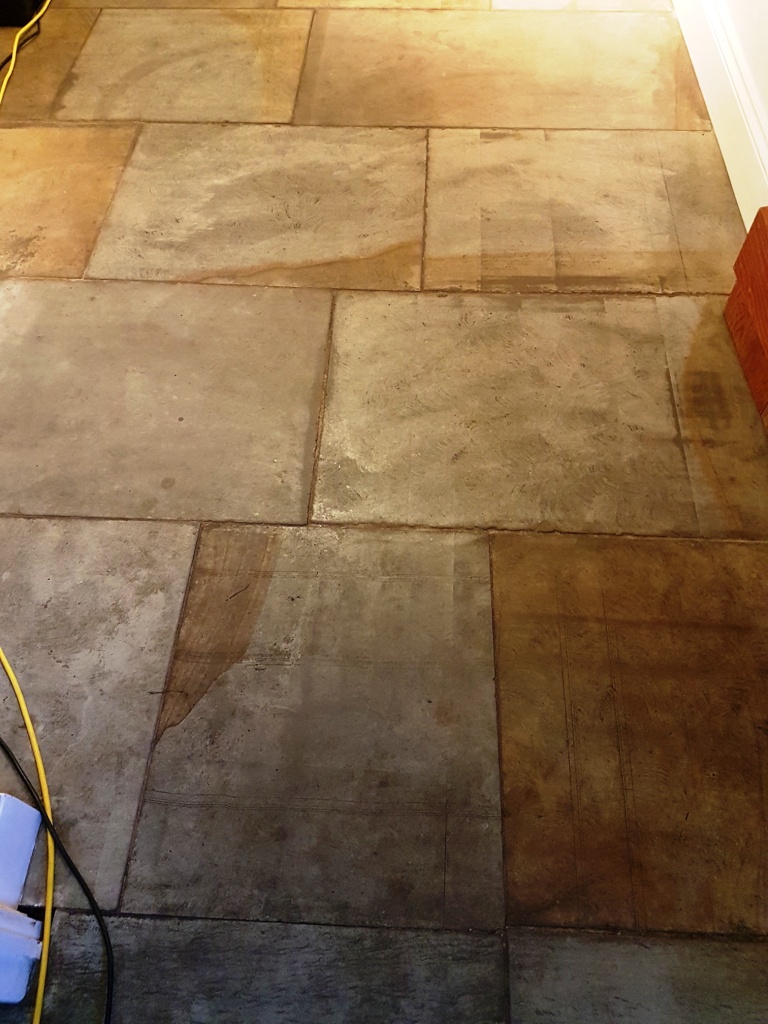
Deep Cleaning Lapicida Sandstone Flagstones in Bedale

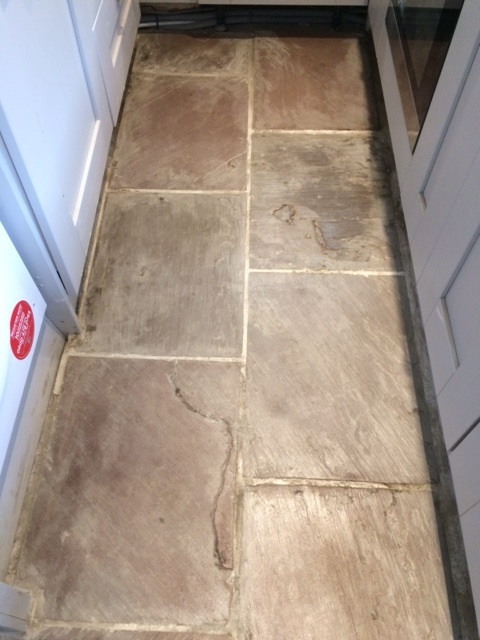
This customer who lived in the old North Yorkshire market town of Bedale, had a Lapicida Sandstone floor installed many years prior and over the years the sealer had worn off and dirt had become ingrained into the pores of the stone making it dull and difficult to clean effectively. Based in Harrogate, where they have Europe’s largest stone gallery, Lapicida are a premier Tile and Stone company that specialise in reclaimed Sandstone with prices that range from £79 to £594 per square metre.

Dirty Lapicida Sandstone Floor Before Cleaning Bedale
Naturally having such an expensive stone floor installed my customer wanted it to look its best however when your living with a stone floor day in, day out you fail to notice the gradual decline in its overall appearance. Then one day you suddenly realise the floor is overdue a deep clean and reseal and call in Tile Doctor; there is an alternative however, simply speak to Tile Doctor about setting up an annual Maintenance Plan whereby we pop by once a year to clean the floor and top up the sealer.

Dirty Lapicida Sandstone Floor Before Cleaning Bedale

Deep Cleaning a Lapicida Sandstone Floor

To deep clean the floor the sandstone flagstones were covered in a strong 1:3 dilution of Tile Doctor Pro-Clean which was left to dwell and soak into the stone for ten minutes before being scrubbed clean using a rotary buffing machine fitted with a black pad. The now dirty cleaning solution was then removed using a wet vacuum and then the whole floor washed down with water and stubborn areas re-treated until I was satisfied. Unusually for Sandstone it was all graded and uniformly flat which made cleaning a lot easier.

With the floor clean and all the dirt removed it revealed some black marks, most of which were from candle wax which is very difficult to get off. To tackle this problem a heat gun was used to melt the wax and then it was dappled with a clean cloth. This process was mostly successful, but some still left a faint Mark which the customer was ok with.

After giving the floor a final rinse and drying it as much as possible with a wet vacuum it was left to dry off fully overnight.

Sealing a Lapicida Sandstone Floor

I returned the next day to seal the floor first checking it for dampness using a damp meter. The flagstones were dry. I was going to seal the Stone with Tile Doctor Colour Grow which would have enhanced the natural colours in the stone, but the customer liked the light appearance of the cleaned stone, so l used Tile Doctor Ultra Seal instead; Ultra-seal is a natural look sealer, so it doesn’t darken the stone. Both sealers are what we call impregnators which work by soaking into the pores of stone protecting it from within by preventing dirt from becoming ingrained.

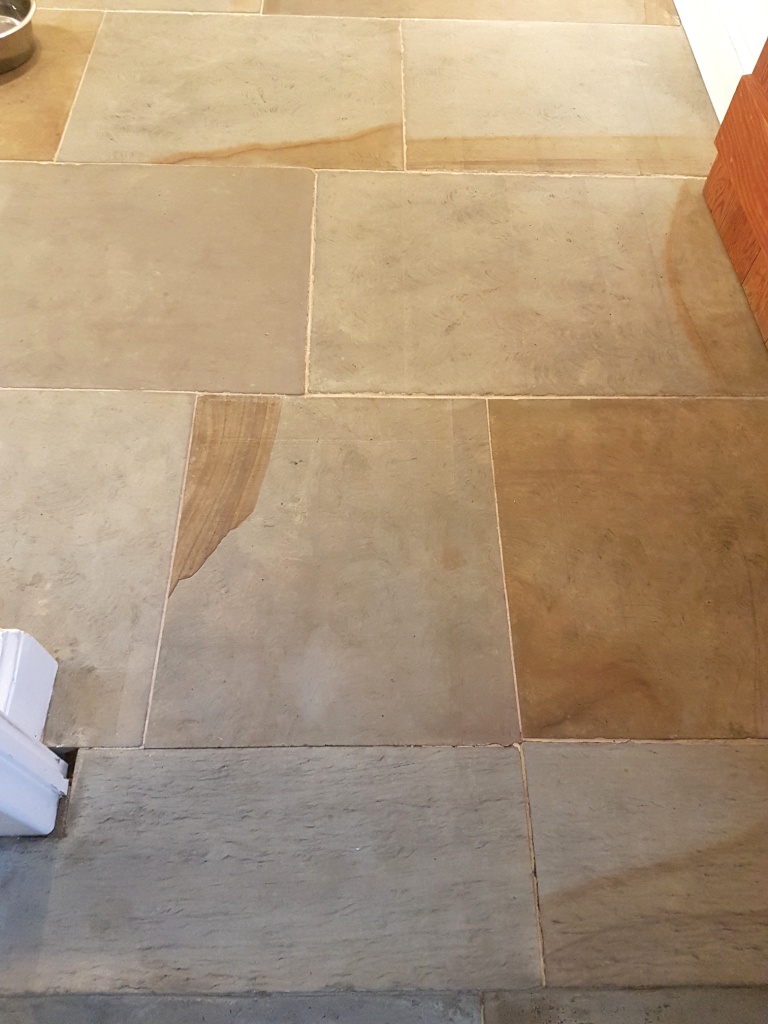
Dirty Lapicida Sandstone Floor After Cleaning Bedale
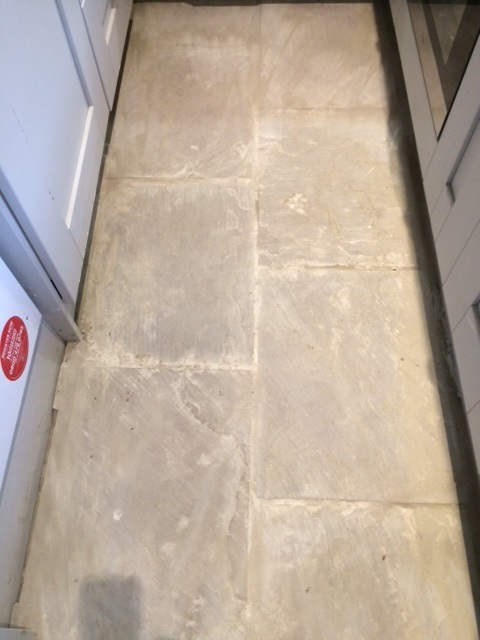
I’m sure you will agree the floor looks much improved, certainly the customer and myself were both very pleased with the transformation of the floor; my customer even left the following testimonial on the Tile Doctor feedback system.

Nigel Stoker was knowledgeable, efficient and very pleasant. My floors are looking amazing. Claire G, Bedale

Dirty Lapicida Sandstone Floor After Cleaning Bedale
 

Deep Cleaning a Lapicida Sandstone Flagstone Floor in North Yorkshire

Deep Cleaning Lapicida Sandstone Flagstones in Bedale Read More »

Bullnose Travertine Floor Before and After Cleaning and Sealing in Pateley Bridge

Yellow Stained Bullnose Travertine Tiles Rejuvenated in Pateley Bridge

The photos below show a beautiful Bullnose Travertine tiled kitchen floor at a property in Pateley Bridge which needed professional attention as a consequence of being protected by a cheap and ineffectual sealer.

The problem was that sealer that had been applied did not provide resistance to UV rays, and the exposure to the sunlight had turned the Travertine tiles an unnatural yellow colour. Over time the sealer had gradually worn away in the busiest areas, so it was less noticeable but of course without the protection of the sealer the stone then became exposed to ingrained dirt and stains.

Bullnose Travertine Before Cleaning Patley Bridge Bullnose Travertine Before Cleaning Patley Bridge

I took some pictures however they don’t really show the problems that well but needless to say, the property owner was very keen to have the situation rectified – which of course is where I came in. I travelled to Pateley Bridge, a small market town in Nidderdale in the Borough of Harrogate, North Yorkshire.

What is a ‘Bullnose’ tile, you say? Well, it simply refers to the trim of the tile. While traditional tiles will have a straight edge, a Bullnose tile will have a slightly rounded or curved edge.

Cleaning Yellow Stained Travertine Tiles

To begin the restoration, I deep cleaned the tiles mechanically using Tile Doctor diamond burnishing pads starting with a coarse grit. These pads served the purpose of grinding away the very top damaged layer of the stone, effectively removing the yellow staining, grease marks and any old sealer. You use a little water to help lubricate the process and this soon becomes soiled and needs to be rinsed away and removed after each pad is applied.

Next, I cleaned all of the stained grout lines by hand. I did this using Tile Doctor Pro-Clean, which is a reliable, alkaline-based cleaner for use on both natural stone tiles and grout. I mixed the Pro Clean into a solution of one part cleaner to three parts fresh water and worked it in by hand using a stiff brush along the grout lines. Once done the now dirty cleaning solution was rinsed off the floor and extracted leaving the grout fresh and clean.

Bullnose Travertine During Cleaning Patley Bridge
To finish the cleaning process, I polished the floor with a 3000 grit (very fine) burnishing pad to leave the tiles with a silky satin finish. This pad is applied mechanically with a little water in a technique we often call a spray burnish.

Sealing a Travertine Tiled Kitchen Floor

Once the floor was dry it needed protecting to ensure that dirt could no longer penetrate the pores of the stone. So to guarantee that this wonderful satin finish would last, I sealed the tiles with two coats of Tile Doctor Ultra-Seal.

Ultra-Seal is Tile Doctor’s premium impregnating sealer which is formulated to provide maximum stain protection, especially in food preparation and serving areas such as the kitchen.

Bullnose Travertine After Cleaning Patley Bridge Bullnose Travertine After Cleaning Patley Bridge

The photos above show the outcome of the restoration, I appreciate my photograph skills are not the best but hopefully you can notice how much healthier the stone looks now, compared to the yellow, sickly appearance of the stone before.

Professional Renovation of a Bullnose Travertine Tiled Floor in North Yorkshire

Yellow Stained Bullnose Travertine Tiles Rejuvenated in Pateley Bridge Read More »

Westmorland Green Slate Floor Before and After Cleaning in Ripley

Restoring Green Westmorland Slate and Blue Moleanos Limestone Tiles in Ripley

It’s not too common that you find two very different natural stone tiled floors in the same property. However, this is exactly what I discovered on a recent visit to a farmhouse property in Ripley, near Harrogate in North Yorkshire. The owner wanted to restore both their Westmorland Green Slate tiled entranceway and a Blue Moleanos Limestone tiled floor.

Westmorland Green Slate originates from the Lake District in Cumbria – where it has been quarried for many centuries – and is known to be a high quality and popular choice for flooring due to its subtle and pleasant green shades. By contrast, Moleanos Limestone originates from Portugal and is one of more commonly found types of Limestone used in buildings across the world.

But while the two floors were very different, the customer’s objective was the same for both – to restore the appearance of the tiles and return the shine to the stone. Here’s how I did it.

Cleaning and Sealing Westmorland Green Slate Tiles

The first floor I tackled was the Westmorland Green Slate, situated at the entrance to the property. Naturally, given that the tiles are situated in a high traffic area, they were very dirty and required a deep clean.

Westmorland Green Slate Floor Before Cleaning in Ripley
To do this, I applied a strong dilution of Tile Doctor Pro-Clean, which is our high alkaline, multi-purpose cleaner, stripper, and degreaser. The product was scrubbed into the tiles using a scrubbing pad fitted to a heavy-weight rotary machine to strip away any old sealer and remove the ingrained dirt. One I was satisfied with the condition of the floor it was rinsed with water and a wet vacuum used to remove the now soiled cleaning solution.

Once the floor had been left to dry completely, I was able to give the floor a fresh seal in the form of four coats of Tile Doctor Seal and Go. This sealer is specially formulated to provide both a stain resistant surface seal and a durable low-sheen finish.

Westmorland Green Slate Floor After Cleaning in Ripley

Cleaning and Sealing Blue Moleanos Limestone Tiles

Whilst waiting for the slate floor to dry I moved on to restore the Blue Moleanos Limestone tiles, which covered a floor area of 20 square metres, but were looking very sad, tired, and lifeless.

Blue Moleanos Limestone Floor Before Cleaning in Ripley
To clean polished Limestone tiles, we typically use a process known as burnishing, which involves the direct application of four different diamond encrusted burnishing pads to grind away old sealers, dirt and stains, before polishing the stone to restore lustre.

First, I used a Coarse 400 grit burnishing pad to strip the floor of the old sealer and remove all grease marks and stains. I had to go over the floor with the pad twice to get rid of some particularly stubborn grease spots.

Having done that, I moved on to focus on building back up the polished appearance of the Limestone by applying the Medium 800 grit, Fine 1500 grit, and Very Fine 3000 grit burnishing pads, with a light spray of water to act as a lubricant with each. This achieved a high-quality satin finish, which I ensured will be protected for the long-term by sealing the stone with Tile Doctor Colour Grow – an impregnating and colour enhancing sealant.

Blue Moleanos Limestone Floor After Polishing in Ripley
It took me three full days of work to clean, polish and seal both floors – and the hard work paid off, as the customer was absolutely delighted with their rejuvenated tiles!

Professional Tile Cleaning, Polishing and Sealing for Westmorland Green Slate Tiles and Blue Moleanos Limestone Tiles in Ripley, North Yorkshire

Restoring Green Westmorland Slate and Blue Moleanos Limestone Tiles in Ripley Read More »

Indian Fossil Stone floor After Cleaing in Skipton

Indian Fossil Stone Floor in Terrible Condition Restored in Skipton

This Indian Fossil Sandstone tiled floor in Skipton was in a terrible state. Indian Sandstone, sometimes known as Indian Sandstone Flags, are an alternative to Yorkshire Sandstone (or ‘Yorkstone’), which is known for being particular hard wearing and high quality.

Indian Fossil Stone floor Before Cleaning in Skipton
Nonetheless, the problems with the floor were not due to the quality of the stone, per say. Rather, the floor’s poor condition was caused by a lack of sealer, allowing the floor – and by extension the entire house – to become very dusty. In addition, the grout lines had been pointed with cement and sand instead of normal grout, which simply made the floor look messy and poorly cared for.

Indian Fossil Stone floor Before Cleaning in Skipton
I was called down to the property to set the situation right by providing a deep clean and fresh seal.

Cleaning an Indian Fossil Sandstone Floor

I started the job by dealing with the unsightly cement splashes around the grout lines, breaking them down manually using a good old fashioned hammer and chisel.

Nonetheless, my main concern around the grout lines was the grout haze caused by the excess cement. To neutralise the haze I carefully treated the grout lines with a phosphoric acid cleaner known as Tile Doctor Grout Clean Up, this product removes mineral deposits such as excess cement leaving the surface looking a lot tidier. The floor was then rinsed with water to remove the acid cleaner.

To round off the cleaning process, I mixed a solution of one part Tile Doctor Pro Clean to four parts clean water, before applying it to the tiles and scrubbing it in with a black pad fitted to a rotary machine. This helped to remove the ingrained dirt caused by a lack of sealer and clean the area ready to receive a fresh seal.

Sealing an Indian Fossil Sandstone Floor

I left the property to allow the floor to dry over night. Upon my return the next day, I checked for excess moisture and, once satisfied the floor was dry, I proceeded to seal the floor with four coats of Tile Doctor Seal & Go.

Indian Fossil Stone floor After Cleaning in Skipton
Seal & Go is a water-based topical sealer designed to build up stain resistant protection on the surface of the floor and to allow moisture vapour transmission. It is typically used to seal internal, unsealed porous surfaces, including Sandstone, Quarry and Victorian tiled floors.

Indian Fossil Stone floor After Cleaning in Skipton
Given the awful original condition of this floor, the results achieved over the space of two days were very good. Certainly my customer was very pleased with the transformation. The addition of a robust surface seal will go a long way to ensure the floor doesn’t fall back into such a bad state again.

Restoring the Appearance of an Indian Fossil Sandstone Flagstone Floor in North Yorkshire

Indian Fossil Stone Floor in Terrible Condition Restored in Skipton Read More »

Scroll to Top